Welcome to my blog

I hope you will find the recipe you are looking for your occasion here.

Now video instructions are available for select recipes and can be accessed at

Gardening and Cooking Made Easy

The latest 5 recipes are displayed on the
main page. For more recipes, you can browse the archive, click on the labels in the index to the left or use the Custom search below to look for a specific recipe.


Search for more results

Custom Search
Showing posts with label vadi. Show all posts

Thursday, March 21, 2019

Pudachi Vadi/ Sambar Vadi

Pudachi vadi was definitely something completely new for me.  This is a deep fried delicacy where the stuffing is primarily made of cilantro. The closest snack which is similar to it would be bakarvadi. I hadn’t heard of it till a couple of years ago. And the way I learnt about it was from a Marathi daily soap (who says watching television isn’t educational, eh!). 
So fast forward to  present day, I was having a conversation with friends and family and this came up. I was  told ‘it tastes great. I used to enjoy eating it.’  So, I thought, why not try making it at home. That is the only practical way for me to taste it. 
This is also known as sambar vadi in Nagpur and supposed to be a speciality from the region (not related in anyway to the lentil based sambar). This is because coriander/cilantro is called sambar in Nagpur. I recently found out that it is also available in Kolhapur.
Of course the challenge with making something you’ve never seen or eaten before is that you don’t know if what you create is the right thing.  But my taster attested that, it had turned out exactly what he had eaten growing up.
It is delicious, the family loved it and I think I’ll be making it again and again.


Ingredients
Stuffing 
2 bunches cilantro - finely chopped, use thin stalks too
2 tsp white poppy seeds/khuskhus
2 tsp sesame seeds/til
1/2 cup dry coconut flakes
4 green chillies
4 large garlic cloves
10-12 green onion leaves
2-3 garlic scapes/leaves if available
1/2 red onion finely chopped
Salt to taste
1 tsp goda masala
For the cover 
2/3 cup whole wheat flour
1/3 cup all purpose flour
1/2 tsp baking powder
2 cups besan
1 tsp haldi
1 tsp chili powder
Salt to taste
3 tbsp oil
A Paste made of 2 tsp goda masala, 1 tsp tamarind concentrate, 1 tsp sugar, salt to taste


Method
Mix all the ingredients for the cover. Then add little water at a time and knead it into a hard dough (like for a puri). Set aside.
In a pan dry roast khus khus, and sesame seeds. Then dry roast the coconut flakes. Let it cool and the grind to a coarse powder. Grind the chillies and garlic. I used a mortar and pestle to make grind it.
Heat oil in same pan and add the chopped. The Add the garlic chili paste to the onions. Cook well and add the cut onion greens and garlic scapes. Sauté for a few mins and then add the cilantro. Cook for a few minutes then add 1 tsp goda masala. Cook for a few mins to dry out. And let cool. Then add salt to taste and mix well. This stuffing should be fairly dry.

Take a small ball of dough, enough to roll into an oval puri about 3 inches long. Roll small oval puri about 2 mm thick. Not too thin and transparent but more like samosa cover. Then apply a layer of the paste made with goda masala and tamarind.
Then line up about 2-3 tsp of the filling in the center along the length of the oval. Then wrap the two shorter ends together to make a roll. Seal the edges well. Use some water along the edges if needed to make sure that they edges stick. Using your fingers and palm shape the roll into a triangular shape if you like. This is not required but provides a shape to your vadi.

Heat oil in a kadhai. Fry on medium heat like a samosa till very well browned and crispy. They will crisp up further as they cool. On a ceramic electric stove top, I started the process at 7 and then fried it at 5.
Cut into smaller pieces and serve or serve full rolls. These taste amazing even when warm and can be served immediately upon frying.
Can also store in airtight container for 2-3 days or refrigerate for longer storage. Warm up in oven to crisp up if stored for a longer time.


Tips
Wash all the greens and let them dry before cutting. This will minimize the moisture introduced into the stuffing. If the edges are not sealed well, the roll will unravel and the filling will spill into the oil.
You can lightly panfry them with a tsp of oil before frying, to ensure a tight seal, cooking the sealed edge. Make sure that you do not brown the rolls during this pre-cooking process.
If you feel the rolls are not crisp enough after cooling down, then bake them in hot oven heated to 400F for 10 mins. Place them on a cooling rack and then on a baking cookie sheet/tray before placing in the oven for good air circulation and to avoid darkening on one side of the roll because it is in contact with a baking sheet/tin.
If you don’t have goda masala, substitute with dhania-jeera powder (1:1 ratio).

Tuesday, January 24, 2012

7 Cup Fudge - Saat Vati Barfi/Vadi

I made this recently for a get together and it was a big hit. I had doubled the recipe, and prepared a large quantity and by the end of the evening, the plate was almost empty. I also got a lot of compliments and requests for this recipe. So, I must conclude that this is indeed a lip smacking sweet and is liked by others just as much as my family and I do.  The best part is that this recipe is possibly the easiest Indian sweet one can ever make. It is one where you really can't go wrong.This recipe can be easily scaled up and you can be assured that it will wow your guests. So, if you are a beginner cook or looking for something easy but impressive, then this is it.

The reason why this is called 7 cup vadi/barfi is that the amount of ingredients total up to 7 cups, so it is also an easy recipe to remember.


Ingredients
1 cup besan/chickpea flour
1 cup ghee/clarified butter
1 cup grated fresh coconut
1 cup milk
3 cups sugar
1/4 tsp cardamom powder (optional)


Method
Take a plate or tray in which you will pour out the barfi and set it and grease it well with ghee.

In a large deep pan, mix together all the ingredients. It really doesn't matter what order you put the ingredients in, however it is easier if you start off with ghee and milk and then add the dry ingredients and stir them in. Then place this pan on the stove and keep it on very low heat. Stir frequently. You don't want the ingredients at the base to burn.


The mixture will liqudefy when it gets hot as the sugar melts, however after sometime, it will start to thicken. At this stage, you will need to pay attention to check how thick it is getting. When the mixture thickens enough that when you stir it, the base of the pan can be easily viewed for a few seconds, then the mixture is ready to be poured into the greased plate. Alternately, you can take a  drop full of the mixture into a plate and as soon as it is cool enough to touch, try to roll it into a ball. If you are able to roll it, then the mixture is ready to be poured.


Use a bowl or measuring cup to spread the mixture out into the plate. Make sure to grease the base of the cup with ghee, so that the mixture doesn't stick. Use it to level the mixture and flatten it. Now, let the mixture cool. When it has cooled to a luke warm temperature, it will solidify a little. At this stage, you can easily cut it into squares. Once it has cooled down completely, you can easily separate out the vadis into individual pieces.
Make this as a sweet snack or for a special occasion.


Tips
Add the cardamom powder so that the aroma of the barfi is great. If you have the time, keep this mixture aside for about 30 mins. This will help in dissolving the sugar in the wet ingredients and the cooking time will reduce slightly. The color of the  mixture will darken as it cooks, but make sure to keep stirring it so that the ingredients at the base don't burn or stick to the pan. It maybe easier to use a non-stick pan.

If the mixture becomes too thick while cooking it, add a little more milk to thin it out and then cook it till the right consistency is reached. Also, if you remove the mixture from the heat a bit early and it doesn't set into solid individual pieces upon cooling, don't panic. Just put the mixture back into the pan and cook it for a few more minutes. It is a foolproof recipe and easy to correct if you do make a mistake.

Tuesday, January 10, 2012

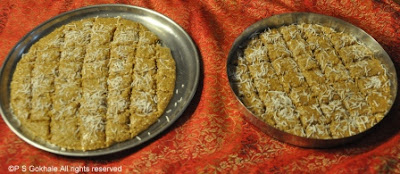
Til Gul Wadi/Vadi - Sesame Seed Fudge

The first week of January has passed by and we are inching towards 14th of January, when the first Indian festival of the year will be celebrated. This is "Sankrant" also known as Makar  Sankrant in India. It is a festival to celebrate the harvest season. This is one festival which almost always falls on the 14th of January (this year it was on the 15th) and is based on the movement of the Sun rather than the Moon. It is celebrated throughout India and is called by different names in different states. Some names that I am familiar with are Lohari (in Punjab), Uttarayan (in Gujarat), Makar Sankrant (in Maharashtra) and Pongal (in the southern states). In Gujarat, the entire day is spent on the terrace of the houses and in streets flying kites. It is one of the most colorful scenes I have ever seen. In Andhra Pradesh, it is celebrated over a period of three days.


In Maharashtra, it is celebrated by distributing sweets made from sesame seeds and jaggery. These are called "til gul vadi" and the tradition is to say "til gul ghya ani goad goad bola" which translates to "please take this sweet and speak sweetly". There are multiple variations in how this sweet is made, some are really hard in texture, some are brittle and some are soft. Each family has it's own recipe and tradition of making this sweet.

The ones I make have a soft texture and are easy to bite into and extremely simple to prepare. You can roll it into a ball and make a "laddoo" or you can flatten it and cut it into "vadi/barfi" akin fudge pieces. This is my Mom's recipe and my favorite version of this sweet. I hope you will give it a try and enjoy it.


Ingredients
1 cup sesame seeds
1 cup peanuts (shelled and without the peel)
1 cup finely cut jaggery, cup should be packed
1 tbsp ghee/clarified butter
2 tbsp of grated dessicated coconut, for garnish
some ghee to grease the plate in which the sweet will be set.


Method
Take a plate with an edge or a pan with a small edge and grease it with some ghee.
In a dry skillet, on low to medium heat, roast the sesame seeds till you get the aroma of the sesame seed.  Keep it aside and let it cool. In the same skillet roast the peanuts following the same method as for the sesame seeds. Be careful not to burn these ingredients. Once these cool down, coarsely grind them separately and then mix the two powders together.

In a pan, add the ghee and jaggery and keep it on a very low flame to cook. The jaggery will start melting. Be sure to keep it on very low heat.. Stir the jaggery so that it doesn't caramelize. Within a couple of minutes, the jaggery will start bubbling and foaming. At this stage, turn off the heat and add the powdered mixture of peanuts and sesame seeds and mix well together. Then pour this mixture (it will be quite thick) into the greased plate. Then using another bowl/measuring cup (grease the bottom), pat the this hot mixture and even it out into the plate. Make sure to level it properly. Then sprinkle the dessicated coconut all over the top and using the cup, pat it into the mixture. All this must be done while the mixture is hot.

Then, after the mixture cools a little, cut it into square pieces of about 1 inch sides. Let the mixture cool completely befor you take the individual pieces out of the plate.


Tips
You can roast the peanuts and the sesame seeds in the microwave. Initially you can do it for 1 minute intervals. Stir it after each minute and then you can reduce that to 30 second intervals. It takes about 2-3 minutes based on the power settings of your microwave. Let them cool completely and then grind.
If jaggery is kept on high heat, it will start caramelizing as soon as it melts, so be careful of the temperature. Also, it is necessary to turn off the heat as soon as the jaggery foams to get the soft consistency, the longer it is cooked, the harder the end product will be. If you feel that the jaggery syrup has become very thick, you can add some more ghee or alternately add a couple of tbsp of milk to the syrup to thin it out (if you add milk, this shortens the shelf life, so be sure to keep it refrigerated and eat it in a couple of days). If  after adding the sesame and peanut powder, the mixture becomes very dry and powdery, then sprinkle a teaspoon of warm milk and stir (while the mixture is hot). The mixture will immediately become moist (if it becomes too soft and moist, then re-heat it).  Then spoon the mixture into the greased plate.

If you forget to remove the pieces and then it gets difficult to take them out, heat the bottom of your plate or keep it in a warm oven for a couple of minutes and then it will be very easy to get the pieces out.