Welcome to my blog

I hope you will find the recipe you are looking for your occasion here.

Now video instructions are available for select recipes and can be accessed at

Gardening and Cooking Made Easy

The latest 5 recipes are displayed on the
main page. For more recipes, you can browse the archive, click on the labels in the index to the left or use the Custom search below to look for a specific recipe.


Search for more results

Custom Search
Showing posts with label one pot meals. Show all posts

Friday, July 20, 2018

Sev Khamani

This is usually made with chana dal batter and is delicious.  I had made a mixed dal batter earlier in the week and had been making different things from it- idli, dosa, pizza base. So, I decided to use it to make sev khamani and it turned out great. No one realized that they were eating the same batter that had been used to make dosa the previous night! And it is a protein rich, delicious item which can be served stand alone and will make a complete meal. Or you can serve it as an item on a chaat menu. This is also a gluten free dish.


Ingredients
1 cup each of idli rice, tur dal, urad dal, mung dal, chana dal - soak for a few hours and grind it to make a thick batter (idli consistency)
Ferment overnight.

For the khamani
3 cups of the fermented batter
1/4 tsp turmeric
Salt to taste
For seasoning
3 tbsp oil
1/4 tsp mustard
1/4 tsp jeera
1/8 tsp hing
6-7 large garlic cloves, finely minced
2 tsps sugar, adjust to taste
Juice of 1 lime, adjust to taste
Thin besan sev (one used for bhel)


Method
Grease a bowl with some oil and pour the batter in. Add the salt and turmeric and stir well. Then steam cook it for 20 mins, till it sets (like dhokla or idli). Remove the bowl, let it cool a bit and the break up the cooked batter with the help of a spatula. If it is warm it will be soft and clumpy and won't separate into small pieces but that's ok.
In a large saucepan, heat up the oil and and the mustard and jeera seeds. Once you hear them crackle, add the hing and the garlic. Sauté the garlic for a minute or two and then add the cooked batter pieces and mix well with the seasoning. Now cook this on a low medium heat till the mixture starts to dry up a little and starts separating into smaller pieces instead of being stuck together in large clumps. Since the batter is already cooked, this just provides the texture. Before turning off the heat, add the sugar and lime juice and mix well and turn off the heat. The taste should be sweet and sour and garlicky.
And as it cools down the batter will stiffen and provide the right shev khamani texture.
Now pour this into your serving platter and sprinkle the besan sev liberally on it. Garnish with cilantro. If available add pomegranate seeds as a garnish.


Tips
You can make a different combination of dals and try the recipe.

Thursday, July 12, 2012

Bisibele Bhath - A Rice Delicacy from Karnataka with a twist

Bisibele bhath is a speciality from Karnataka. It is a rice and dal preparation which is akin to "khichadi" another dal and rice preparation. My mom used to make this recipe when I was a child and I remember not really liking it because it had so many vegetables. She used to serve it with a lot of ghee (clarified butter) though, which used to make it finger licking delicious. Now that I am older and wiser, I understand the beauty of this dish. First, it is a one pot meal. Second, it has all the nutritional components, it has proteins from the lentils/dal, carbohydrates from rice and you can add many vegetables to it which take care of the vitamins and fiber aspect. And best of all, it is all cooked together with yummy spices in one single pressure cooker. It is a perfect dish for that very busy weekday and you can have the satisfaction of serving something healthy and good.


I make it in the fastest way possible and that is what this recipe is about. I use store bought spices. MTR brand's Bisibele Bhath masala is easily available in the Indian store and I generally have a packet of this at home. Next, I cut vegetables that I have on hand if I have time, or I open a pack of frozen mixed vegetables ( generally contains green beans, carrots, peas and corn) and use that. That makes it easy to cook and absolutely delicious too. The twist in this recipe is that I experimented with a new grain instead of rice this time. I replaced the rice entirely with quinoa and make the dish using the exact same method and I must say the result was amazing. If it had been a blind tasting, I couldn't have differentiated between the one made with rice and one made with quinoa. I am thrilled that I have been able to make this dish even healthier. The recipe and method stay exactly the same irrespective of whether you use rice or quinoa. So here goes.


Ingredients
1 tbsp ghee or oil
1/8 tsp mustard seeds
1/8 tsp cumin seeds
a pinch of asafoetida/hing
7-8 curry leaves
1-2 green or red chillies, to taste
1 onion, diced into small pieces
1 tomato, diced into small pieces
2 cups of frozen vegetables mix (washed) or you can cut fresh vegetables like potato, carrots, green bell pepper, green beans etc. into bite sized pieces
1 cup tur dal/pigeon peas
1 cup rice or quinoa
4-5  tsp bisibele bhath masala
1 tsp tamarind pulp (you can use store bought pulp or make fresh paste)
salt to taste
6 cups water


Method
Mix the dal and rice/quinoa and rinse the mixture 2-3 times with water and set aside.
In a pressure cooker, heat the oil and add the mustard and cumin seeds. Once they start to crackle, add the hing and curry leaves and chillies. Next add the onions and let them cook. Once they start to turn a little brown, add the tomatoes and let this cook till the tomatoes are cooked through. Then add the diced vegetables mix and stir. Let the vegetables fry for a minute and then add the dal and rice/quinoa mixture and mix all the ingredients well. Then add the bisibele bhath masala to this and again mix well so that all the vegetables and grains are coated with the masala. Then add the water, the tamarind paste and salt. Stir once and then close the lid on the pressure cooker and cook it based on how much time it takes to cook tur dal in your cooker. It takes about 3-4 whistles in my cooker. Serve this hot with ghee/clarified butter, accompanied with some raita and chips or papad.


Tips
Bisibele bhath when hot is runny and very soft. It thickens as it cools down.
Quinoa is rather small, so when you rinse it, it is difficult to drain the water using your fingers or a colander. So I use a tea strainer to catch the quinoa and drain the water.
To make tamarind paste from tamarind, soak a lime sized ball of tamarind in a little warm water (just enough to cover it). You can even microwave it for 20-30 seconds. Then squeeze out the pulp and use the tamarind. Cut the green chillies lengthwise, so they will be easy to spot and you can remove it later. I generally taste a little bit of the water to determine if I need to add more salt or spices when I make such rice dishes.

Wednesday, June 6, 2012

Minestrone Soup

This is a wonderful soup. My mom used to make it quite often, especially when Dad would travel. I understand beauty of this soup now that I am a Mom.  There are often times that I need to put a meal on the table which is wholesome but am too tired to make multiple dishes. By making just one dish, I am able to take care of all the nutritional facets, put something new on the table and since it is so delicious, it is a sure hit.

This soup has multiple vegetables, pasta and beans and is a complete meal by itself.  I make a large batch and enjoy it through the week. If you don't add the beans and pasta to it, then it is a very low fat (almost zero fat), high fiber, delicious snack or appetizer. Also, it is a forgiving recipe. Even if you don't have all the vegetables that the recipe calls for, as long as you have the basic carrots, onions, celery and tomatoes, you will be able to achieve the desired taste.


Ingredients
2 tsp extra virgin olive oil
1 carrot, sliced
1 small onion, diced
1 celery stalk, sliced thinly
2-3 garlic cloved, finely diced or crushed
5-6 tomatoes/ 1 can of whole tomatoes - diced
a wedge of cabbage, thinly sliced (about 1/8th or less head of cabbage)
5-6 green beans, diced
1 zuccini, slit it into two lengthwise and then slice it thinly into semi circles
water/ broth
1 cup spinach leaves
1/4-1/2 cup white or cannelini beans cooked (can also use red beans)
2 cups cooked pasta (use small pasta is possible like shell or macaroni shape. In the pictures here, I used penne as that was the only pasta I had on hand)
parmesan cheese, to garnish (optional)
1 tsp Italian seasoning (optional)
salt to taste
pepper to taste


Method
In a deep vessel (deep enough for the soup to boil in), heat the oil. Add garlic and stir for a minute or two. Once you get the aroma of the garlic, add the onions. Then add the Italian seasoning if you are using it. As they soften, add the celery and the carrots. Cook this mixture till the vegetables are slightly softened. Next add the green beans and cook for a few minutes. This is the time to add the tomatoes. If using canned ones, add the tomatoes as well as the juice they are in. (If adding fresh ones, then let the tomatoes cook through by boiling them in the water/broth.) Then add enough water or broth (about 3-5 cups) to make this into a water consistency.  The soup base is not very thick. Then add the zuccini and cook. This cooks very fast. Then add the cabbage slices.  Once these are semi cooked, add the spinach leaves.

Once all the vegetables are added, add the beans and pasta. Cook the pasta separately per directions on the packet. Add the cooked pasta to the soup. Bring the mixture to a boil. Add salt and pepper to taste. Garnish with grated parmesan cheese.

Serve hot as a meal, a starter or an afternoon snack.


Tips
If you don't have italian seasoning, try adding just oregano and basil if possible. This makes it more flavorful. You can skip the seasoning alltogether. If you are starting with dry beans, soak them for 6-8 hours or overnight. Then either boil them till softened or pressure cook them. It is a good idea to add some salt to the beans while being cooked so that it gets absorbed in the beans and makes them flavorful. If you are using canned tomatoes, use whole tomatoes and then dice them into cubes. Whole canned tomatoes are more flavorful than diced ones. You can also add the dry pasta to the soup and boil it in the soup directly. If you are doing that, add it as soon as the broth/water is added and then add the zuccini and spinach. If you are using canned tomatoes and beans, then taste the soup before adding more salt, as canned foods already have salt added.  You can skip or do any combination of the beans, cabbage, spinach and zuccini and still get a great tasting soup.

Wednesday, August 31, 2011

Baati - Baked Whole Wheat Dumplings

The first time I ate authentic dal baati was in Indore, about eleven years ago. I was visiting family and there were two occasions when I was able to savor this delicacy. The baatis were authentically cooked in an earthen stove. Then, they were dunked in ghee and served with hot delicious dal. I can never forget that experience. The taste of the baatis being roasted and baked in an authentic kiln can just not be replicated in a modern kitchen. After I got married, I was pleasantly surprised to find that my husband liked this dish and even knew how to make it. Eventually, we started making it quite often. While one can't get the rustic taste, only possible using an earthern stove, the ones baked in the oven are also equally delicious. This is supposed to be a delicacy, however, I make this so often, that I am not sure I can realy classify it as a delicacy in our house anymore! I must mention that once you make this, you will realise it is much easier than toiling for hours on an elaborate menu. However, your guests will be very impressed with this dish. It is so easy that you may get hooked and make this a regular feature on your menu as well.


Ingredients
2 cups whole wheat flour
1/4 cup besan/chickpea flour
1 cup yogurt
1/2 tsp salt
2 tbsp ghee
1/4 tsp baking soda
water to knead


Method
Mix together all the dry ingredients. Then create a well in the center of the flour mixture. Into this add the ghee and yogurt. Then mix this. If the yogurt is watery, then you may not need to add any additional water to knead it all together into a soft dough. It shouldn't be too loose, nor too dry and hard. Knead the dough well and let it rest for 15-30 mins. Cover the dough with a damp cloth so it doesn't dry out.


Preheat the oven to 350F. Then roll out the dough into small balls about 1-1.5 inches in diameter. Place these on a baking sheet with enough space between them to allow for expansion. Bake in the oven for about 20-40 mins, till well browned. The baati will expand and break open and develop cracks as it cooks. The end result shouldn't be hard. When warm, pour a little ghee so that it gets absorbed through the cracks in the baati. Serve with hot dal and additional ghee.


Tips
Instead of adding ghee to the flour, you can add the milk solids that are left behind when you make ghee at home. This is a wonderful use of these solids, especially if you have used salted butter. If the milk solids are salted, then reduce the amount of additional salt that you add to the flour. Traditionally the baatis are soaked in ghee before being crushed and then hot dal is ladled onto this and is eaten hot.
To simulate an eathern kiln, use a pizza stone. Preheat it and then place the baatis onto this to be baked. 

Friday, August 19, 2011

Mushroom Soup

When I was younger, I didn't like mushrooms. Then sometime during my teens, I tasted them on top of a pizza and started liking them. Then, I tried the mushroom soup that my Mom made and I loved it. I still remember the last time I ate the one made by Mom. It was nine years ago and I still associate it with warmth, love and comfort.  So, this is a recipe I turn to during the cold months or when I want something that will fill my tummy and soul with warmth. Mushrooms are high in proteins, so it is a very nutritious soup as well. I usually make a leaner version by skipping the cream, but addition of cream towards the end of the cooking process is a must for special occasions.


Ingredients
15-20 button mushrooms, sliced
1 tbsp butter or olive oil
1/2 onion, diced
2 garlic cloves, chopped
salt to taste
some cream or milk to finish off the soup, to taste
1-2 cups of water


Method
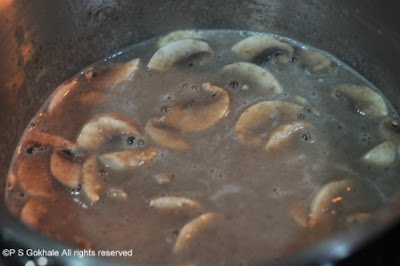
Heat butter or olive oil in a pan. Add the garlic and onion to it and sautee. Cook the onion till it is transluscent. Keep aside some mushroom slices and add the rest to the pan and cook till the mushrooms are softened. Then, puree this, adding water as needed. The soup should not be too watery. Then add the milk or cream to the pureed soup and heat. Add, the remaining mushroom slices. Add salt and stir. Turn off  the heat once it starts simmering and the mushroom pieces become tender. Serve hot. Pair it with a slice of bread for a complete and quick meal.


Tips
I have always heard everyone say that you should not wash mushrooms, but just wipe them off with a damp towel. However, I wash the mushrooms and immediately wipe them before cutting. I have not noticed any issues with doing that. If the stem of the mushroom feels too stocky, just use the cap.

Monday, June 20, 2011

Veg Au Gratin - Baked Vegetables in White Sauce

This is the tastiest veg au gratin ever. A wonderful medley of fresh, crisp vegetables in a rich white sauce, with a delicious layer of browned cheese. My favorite version of this dish is the one I used to eat at a restaurant in Pune. It has always tasted the same, ever since the first day I ate it, some 15 years ago. They serve the same size portion,  accompanied by a piece of garlic toast. It is absolutely the yummiest version of this dish. I was remembering and craving a taste of this dish for the longest time. So, I finally decided to experiment and try it out. It did turn out quite close to the original, so this will do for now.


Note: For variation, instead of adding a layer of cheese and baking it, add some hot sauce and eat the vegetables cooked in white sauce.
Ingredients
1 tbsp butter
1/4 cup all purpose flour/maida
2 cups milk (use whole milk, definitely not skimmed milk)
salt to taste
white pepper to taste (can use black pepper if white pepper is not available)
1/4 cup onions, diced into small pieces
1/4 cup peas
1/4 cup potato, diced into small pieces
1/4 cup carrots, diced into small pieces
1 cup shredded cheese
1 tbsp oil


Method
Cook the peas, potatoes and carrots partially. You can do this by cooking them in the  microwave for a couple of minutes. You can also cook them by either adding them to boiling water for a few minutes or steam cooking them for a few minutes. Heat oil in a pan and add the onions. Sautee the onions till they are transluscent. Then add all the vegetables and saute for a couple of minutes. Add salt to taste, turn off the heat and keep aside.


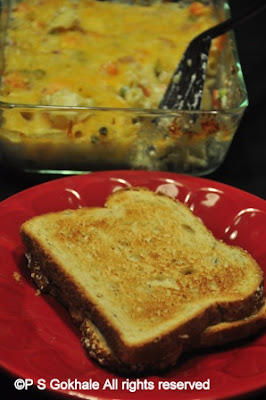
In another deep pan, add the butter and once it melts, add the flour. Cook the flour in the butter till it starts to look slightly pink. Generally at this stage, the raw flour smell disappears. Do not over cook the flour and do not let it turn brown. Then, turn the heat low and add the milk while stirring the mixture with a whisk. It is critical at this stage to keep mixing the milk and flour together so that no lumps are formed. Once the flour is dissolved in the milk, stir it often till it starts to thicken. Add salt and white pepper. As soon as it become thick and gets a sauce like consistency, turn off the heat and add half a cup of grated cheese. Mix thoroughly till the cheese is well incorporated. Add the sauteed vegetables and mix into the sauce. (At this stage all the components are cooked and you can eat the vegetables without baking it further, if you choose.)

Next, pour this mixture into an oven safe dish and layer the remaining cheese on top in an even layer. Bake this for 10-15 minutes at 350F or till the the chee.se has melted and starts to brown slightly.
Serve hot with some garlic bread.


Tips
All the vegetables should be cut to similar size about the size of the peas. If white pepper is available use it. It adds flavor to the white sauce and the specks of pepper cannot be seen in the sauce. If not possible, then add black pepper. If you are using frozen peas, rinse them with water and thaw them out. These will be soft enough and do not need to be cooked again prior to sauteeing. You may want to boil the potato first and then dice it.  You can also use the broil setting on your oven to melt and brown the cheese faster. Make sure you are using a pan that is broiler safe.

If you feel adventurous enough, try adding a few diced pieces of pineapples (canned) along with the rest of the vegetables. The original dish has a few  pineapples pieces in it. However, upon my family's preference,I didn't add it.

Wednesday, December 29, 2010

Greek Pizza

This is a very simple, and elegant dish. It's colorful, full of flavor and textures. It is also a whole meal, hearty and filling. The best part is that this takes less than half an hour to put together. I orginally ate a version of this at a friend's place. She was inspired by a pita pizza she had eaten at a restaurant and wanted to try it out. I have taken the concept and used the same base, but created a Greek salad to top the pizza.  This recipe makes about four to five pita pizzas. This can be used as an appetizer recipe too or finger food for a party. Just cut the pita into slices and serve.


Ingredients
4-5 pita rounds
1 cup hummus
4-5 greek olives, diced
2 cucumbers, diced
1 cup baby spinach leaves
1 tomato, diced
1 cup sweet bell pepper mix, diced (yellow/red/orange)
1 tbsp olive oil
1 tsp dried oregano
1/4 onion, sliced
salt to taste
1/8 tsp black pepper
1 lemon, juiced
2-3 tbsp feta cheese, crumbled


Method
Mix together the diced cucumber, bell pepper mix, onion and olives. In a bowl, mix the olive oil, oregano and lemon juice. Pour this over the vegetable mixture. Add the salt and pepper and mix all the ingredients together. Heat the pita bread on a flat pan so that they become a little crisp. Apply a layer of hummus  over the pita bread round. Then spread a layer of the vegetables. Add some spinach leaves over the pita and then sprinkle some feta cheese. Eat this as soon as you have added all the layers, else the base will become soggy.


Tips
You can use a flavored hummus to add more flavors to the recipe. Dice all the vegetables in similar sized cubes.

Sunday, December 12, 2010

Egg Curry

Egg Curry is a dish which always reminds me of Dad. He introduced me to eggs and how tasty the various preparations could be. It’s funny how I associate the dish with Dad though it was Mom who always made it. I made this quite frequently as a student and a few friends came to associate this dish with me. So whenever it was my turn to cook, this dish was often requested. I generally make a lot of gravy with it and serve it with some white rice. It tastes great with some hot chapati too. Add a side salad of onions, green chillies and it is a wonderful meal. This dish tends to taste better after a few hours or the next day when the eggs have had some time to absorb the spices.


Ingredients
2 tbsps oil
2 black cardamoms
2 bay leaves
2 cloves
1 red onion, diced
2 tomatoes, diced
red chilli powder to taste
1-2 tsp garam masala (add 2 tsp for spicier taste)
3 cloves of garlic, chopped
1/2 inch ginger, grated/crushed
3 or 4 hard boiled eggs, sliced into two along the length of the egg
1-2 cups water
salt to taste


Method
In a pan, heat the oil and add the cardamom, cloves and the bay leaves to the oil, fry till you can smell the aroma, but take care not to burn them. Add the onion, ginger and garlic. Fry this till the onion is well browned. Ideally, cook this on a medium heat setting and fry the onions till you see a little oil being released. Then add the tomatoes, and cook till the tomatoes are browned. Add garam masala, red chilli powder and cook for another minute. Then add the water. Add salt. Boil this till the gravy thickens to your liking. Gently, slide in the eggs to the gravy. Boil the gravy for a few minutes with the eggs, so that the eggs absorb the spices. Serve hot with white rice or chapati.


Tips
The eggs should be hard boiled, so that the yolk does not run into the gravy. When stirring the gravy take care to not damage the egg halves. If you want to adjust the seasoning, scoop out the egg pieces, stir the gravy and then add them back in. If the eggs are boiled in the gravy, they get well marinated and tasty.
To reheat, if possible do not use the microwave, as eggs tend to burst. You can scoop out the egg pieces, heat the gravy for a longer time till it is piping hot. Then, heat the eggs for about 30 seconds in the microwave and add them back to the gravy.

Wednesday, August 25, 2010

Pav Bhaaji

Pav bhaaji is a dish which is a potpourri of vegetables and is a complete meal. I have made this dish often and you can find the standard recipe on the back of the pav bhaaji masala box, however it is not easy to replicate the taste of the restaurant pav bhaaji. I must mention here that not all restaurants in India are equal where it comes to  the authentic pav bhaaji taste. One of my favorite places was a restaurant near my home, and my friends and I used to always start salivating when we passed by and smelt the wonderful aroma wafting from the restaurant. The bhaaji used to be continuously cooked on a large flat "tava" outdoors where people used to be seated. The tava was dark, looked like it was made of iron and seemed to be specialized for the pav bhaaji. Pav bhaaji means bread with vegetable. The bhaaji/vegetable consists of several different veggies. It has been very rare to come across really well made pav bhaaji here and while most people make a pretty decent version, I was really yearning to eat the one that tasted like the one back home.


It was two years ago that my sister-in-law made this bhaaji. She cooked it for a party and had made enough for about 30 guests. It was a great hit and even though she had made a large quantity, it was almost gone by the end of dinner. Her version was so close to the restaurant version that I just had to jot down the recipe. I have tried it and it turned out great. The key is to be  patient, and let everything cook properly. You will be pleasantly surprised when you follow this recipe.


Ingredients
2 tbsp oil
1-2 tbsp butter
½ medium cauliflower florets (about 1 cup of florets)
1 green bell pepper
1 large red onion or 2 medium red onions finely chopped
½ cup peas - thawed or if you are using fresh peas, cook them through by boiling in water
3-4 medium size potatoes - boiled and mashed
2-3 tomatoes finely diced
1 inch ginger
1 tbsp finely minced garlic or garlic paste
Red chilli powder to taste
3-5 tbsp pav bhaji masala
1 tsp jeera dhania powder (cumin-coriander powder)
Salt to taste
Finely chopped cilantro for garnish
Butter
Lemon wedges and finely chopped onion to serve with
Dinner rolls


Method
Heat the oil and to this add the onions. Once these are cooked till transparent, add the garlic and ginger. This mixture needs to be cooked till the raw smell of the mixture goes away. This can take a few mins, but this is the phase you need to be patient and let it all cook through. While this is cooking, boil the cauliflower florets in water, till it is tender. It shouldn't be too soft, just cooked through. Once the onion, garlic ginger are cooked through, add the bell pepper and cook for a couple of minutes, then add the tomatoes. Once the tomatoes are cooked through, add the cauliflower florets. Cook this mixture well for a few minutes. To this mixture add the chilli powder, jeera dhania powder, pav bhaaji masala and cook for a couple of minutes. The pav bhaaji masala quantity would need to be adjusted based on how spicy your masala is. Add the potatoes, mix thoroughly and cook for a couple of minutes. Then add the peas. Cook for a few minutes more. Add the salt and adjust the chilli to your taste. Finally add the butter and mix it through.

Serve this bhaaji with toasted dinner rolls. The easiest way to roast these is to slice them through into two pieces horizontally and apply a little butter and then toast on a pan or broil.  Add a little butter to the bhaaji when you serve it and garnish with cilantro, chopped onion. Add a wedge of lime.


Tips
You can add more butter while you are making the bhaaji, instead of adding it at the end. This enhances the taste.
This is a easy recipe to scale up and popular to make for a large gathering of people. To toast a large number of dinner rolls at a time, broil these on the high setting for a couple of minutes. Also, the dinner rolls cook through very quickly when broiling.