The latest 5 recipes are displayed on the main page. For more recipes, you can browse the archive, click on the labels in the index to the left or use the Custom search below to look for a specific recipe.
Let me start by saying that this is an amazing recipe. It is one of the tastiest Mexican foods that I have eaten in recent memory. It is spicy and has a burst of flavors and everyone in the family absolutely loved it. I am so glad to have found this recipe because it is perfect to use all the roselle hibiscus petals after making tea. And now I have a way to use the large harvest we have had this year. It does not matter if you are using fresh roselle sepals or dried ones in this recipe. The ones in the original recipe were dry whereas I used the fresh ones that I harvested today. The recipe was originally shared by a friend, Ayshica, in a wonderful gardening group called "Gardening in the Desert". She shared this recipe from a YouTube channel called "Views on the road" and highly recommended it. Ayshica is a great cook herself and I trust her food recommendations, so I thought that I had to give this recipe a try.
Now, this recipe requires certain Mexican chillies - Guajillo and Pasilla chillies. After making and eating the tacos I am of the firm belief, that these chillies are a key flavor ingredient for the birria tacos. These chillies lend an earthy taste which reminds me of the mole sauce. Also, when I searched for what birria was and other recipes for birria, I realized that the original version is meat based. The birria is a stew made with the meat and these chillies. However, this version is completely vegetarian and if you use non-dairy cheese, will be a 100% vegan. I did not use any broth or bouillon powder/cubes either and the result was still lip smacking delicious. The roselle sepals add a slight tart flavor. These also make the taco filling and provide that meatiness to the taco, that 3-4 tacos per person was a pretty good serving size for most of the family members. I think any vegetable that retains its texture after being boiled can be a used, like jackfruit or mushrooms.
The way I understand it, birria is a stew and then the meaty portion of the stew is used to fill the taco and then the taco is then grilled/cooked and eaten by dipping it into the consomme or liquid part of the stew. The stew that I made with the roselle sepals was quite soup like. Then I used the roselle sepals and carrots which were cooked in the sauce as the taco filling. And then we dipped the tacos in the soup and also drank sipped it along with the tacos. I also made the chilli oil which was mentioned in the original recipe and modified it based on what I had on hand. The combination of flavors was perfect for a cold weeknights dinner. And so so delicious!!
The highlight of the recipe was that I was able to use a lot of our homegrown produce. Roselle hibuscus was the star of the recipe, but it was great to be able to use homegrown carrots and cilantro as well. If you would like to know more details on growing, harvesting and preserving Roselle Hibiscus, do check out our videos on our YouTube channel, "Gardening and Cooking Made Easy".
How to grow Roselle Hibiscus
How to harvest and store Roselle Hibiscus
Ingredients
For the chilli oil
1/2 cup oil
3 guajillo chillies
2 spicy chillies, dry (I used Indian dry chillies)
1 bay leaf or 1 tsp broken bay leaf pieces
1/2 tsp black pepper
1/4 tsp clove powder
salt to taste
1/4 tsp sugar
For the birria
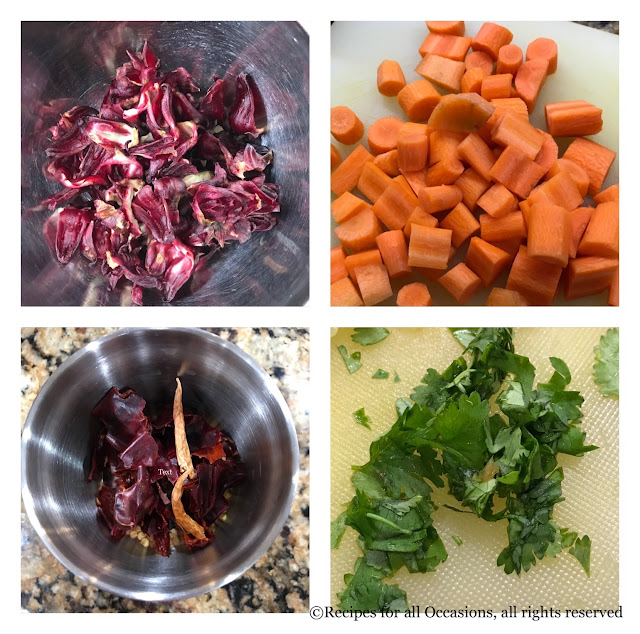
1.5 cups fresh roselle petals. If using dried ones, I would recommend using 1 cup
6-7 carrots, cut into small bite sized pieces, appropriate for filling in the taco
2 tbsp apple cider vinegar
1 medium red onion, cut into half
3 garlic pods, whole
1 pasilla chilli
4 guajillo chillies
10 cups of water
1 bayleaf
salt to taste
1/4 tsp sugar
For the tacos
corn tortillas
cooked roselle sepals and carrots from the birria/stew
finely cut cabbage
finely cut white or yellow onion
cilantro
chilli oil
shredded/grated cheese
Method
To make the chilli oil
Remove the stem of the chillies. In a coffee grinder or blender in which you can grind spice to a fine powder, grind the chillies and the bay leaf into a fine powder. If you want, you can also remove the seeds, however I did not as I wanted the oil to have the heat and spice from the chillies. Heat 1/2 cup of oil (I used olive oil) and once it is warm (do not heat to very high temperature to avoid spices burning), add the chilli and bay leaf powder. Stir, and then add the garlic powder, clove powder, black pepper powder, sugar and salt. Cook all the spices for a couple of mins, making sure to not overheat the oil. Turn off the heat and set aside.
To make the birria/stew
Boil 4 cups of water and pour over the roselle sepals (dried or fresh). Set aside for 15 mins. Strain and use the water to make tea or lemonade. Add 2 tbsp of apple cider vinegar to the sepals, toss them in it and set aside.
In a pressure cooker, Instant Pot or a regular deep sauce pan, addd the remaining 6 cups of water. Then to it add the onion, cut into two halves. Then remove the stem of the chillies and add those to the water along with the garlic cloves. If you don't like too much spice remove most of the seeds of the chillies. Add 1/4 cup of carrots. Then cook this mixture. If you are cooking it in the pressure cooker, cook for 1 whistle. In the instant pot, cook for 5 mins. Naturally release the pressure. If you are cooking it in the saucepan, cover and cook for 10-15 mins once it starts boiling, till the chillies are softened. Now, using a skimmer spoon, fish out the chillies, garlic and onion. Let them cool down a little and blend in the blender to a fine paste. This is your salsa or sauce that flavors the stew.
Add the paste back to the water. Then, add the rest of the carrots, the roselle sepals along with the vinegar and 1 bay leaf and cook for another 10 mins till the roselle and carrots are softened. If using a pressure cooker, cook till it reaches pressure and turn off heat. Instant Pot timing will be 2 mins. Let pressure cookers naturally release pressure.
Taste, add the salt and sugar and stir well. Then fish out the carrot pieces and roselle sepals and place into a bowl. Heat the liquid and boil it for a few mins.
To assemble the taco
Use a brush or spoon and smear the corn tortilla on both sides with the chilli oil. Then filling a tbsp of the roselle, carrot filling, cabbage, onions, cilantro and shredded cheese. On a hot pan, cook the taco on both sides till the cheese melts.
Serve with the consomme/soup part of the stew. Dip the tacos in the soup and eat.
Tips
The chillies are dry, so it is easy to just split the chillies into two and shake them to remove the seeds. Or remove the stem and shake the seeds out. I made corn tortillas with masa harina flour and the taste was amazing using fresh tortillas. If possible, I recommend it. If the taco is opening up (I do tend to overfill it), place a spoon on top of the taco as it cooks on one side. Then as you flip it over and cook on the other side, it should retain its folded taco shape (see photo above). If you are using other vegetables, then I recommend adding tomatoes along with the onions and garlic and puree those as well. Else, add lemon juice to the stew at the end of the cooking, before serving.
It has been years since I have been buying tortillas from the store. Initially, when I was a student, I used to buy whole wheat tortillas which used to be my substitute for chapatis/rotis. When I started making tacos and burritos at home, I started using the corn and flour tortillas. However, it always bothered me that these store bought tortillas had such a long shelf life and a really long list of ingredients. Half of these ingredients seemed to be chemicals that I couldn't even pronounce. If you have been following my blog, you will see that I try to make most of the food from scratch at home. This way I am able to control the content and quality of my food. So, several years ago, I decided I just couldn't buy these tortillas anymore and had to try making them at home. How hard can it be?!
I bought some masa flour, and set off to work. The main hurdle was that I didn't have a tortilla press when I first did this experiment, but I managed to make it work with other equipment (details in the method and tips below), and the result was incredible. They were very easy to make, quick to cook, smelt heavenly (none of that chemical smell of the store ones) and absolutely delicious! I will never need to buy corn tortillas again. For all of those who have toyed with this question, but thought it was too difficult to make, go ahead and take the plunge. It is easier than making bread or chapatis and so worth the effort! Your taste buds and your stomach will thank you.
Ingredients
1 cup instant corn masa flour (masa harina - white corn or yellow corn)
1/8 tsp salt or a pinch of salt
2/3 cup and a few tbsp water
1 thick plastic ziploc bag/parchment paper cut into 2 squares or 2 thick, square plastic sheets (about 8X8 inches) or parchment paper
1 tortilla press OR a heavy pan with a wide flat bottom
Method
Mix the salt in with the flour and then add water. Add a little at a time till a soft yet firm dough is formed. You don't want the dough to be too dry that it crumbles and neither do you want it to be too loose and soft. Divide the dough into 8 equal pieces and cover with a damp cloth or paper towel, so that it doesn't dry up.
Heat your pan on high heat and then keep the temperature at medium-high. Now, take a piece of dough, roll it into a ball, about 1.5 to 2 inches in diameter. If you are using a tortilla press, then line it with 2 sheets of the plastic sheet. Place the ball between the two sheets and then press it till the tortilla is about 5-6 inches in diameter. Now, if you don't have a tortilla press, then place the plastic sheets one on top of the other, on your kitchen countertop or a rolling surface and then place the ball of dough in between the sheets and then flatten it slightly with your palm. Then, take a pan or any heavy vessel which has a large base (larger than the diameter of the tortilla) and then place this pan onto the dough. Make sure to have it in a flat level (parallel to the rolling surface) and then press onto the dough to flatten it. Do this till the dough has been flattened and the tortilla is 5-6 inches in diameter. If needed, you can use a rolling pin to increase the tortilla size. Don't use a rolling pin for too long though, as it makes the tortilla stick to the plastic sheet.
Now, open up the tortilla press/remove the pan and then peel the plastic sheet off the tortilla. Then, flip the tortilla into the palm of one hand and then using your other hand peel off the other plastic sheet and then place it onto the hot pan.
Cook on one side for a couple of minutes, till the edges start to dry out and then flip it over and cook on the other side for 1.5-2 minutes. Then flip it back and cook it completely on the side that had been placed on the pan first. The tortilla will start to puff up as it gets cooked.
Tips You may need less or more water depending on how humid your surrounding is. To dampen the cloth/paper towel, wet it and then squeeze out all the water so that the towel doesn't have any water dripping from it. If the towel is too wet, it will affect the consistency of the dough. I use a cast iron pan to cook these. Masa harina is not the same as the corn flour used to make makke di roti. Masa harina is processed differently, and hence the tastes will vary. However, you can substitue with corn flour if masa harina is not available. Yellow corn masa flour will yield yellow tortilla and the white ones are with the white corn masa flour. Both are delicous.
I have so many photos now, that I am having a hard time trying to decide which recipe to post next. And, as I backup and archive these photos, some recipes are slipping away from memory. So, I am going to try and jot down notes when I cook, so that when I finally post the recipe, I am able to remember all the details.
I am sure that you are wondering what a Mexican pizza is. Is the base made from tortillas or do I top it with salsa? Well, this is an inspiration from a pizza that I have eaten at a restaurant called "California Pizza Kitchen". It is a delicious and flavorful pizza. The pizza has a traditional base and has a thinner crust than the usual one inch crust pizzas. It it topped with blackbeans, tomatoes and onions and green lettuce. And finally the topping of tortilla chips lends the crunchy texture. So every time you bite down into a slice, you hear a nice satisfying crunch. Well, one day I decided to reverse engineer this dish and see if I could create a similar taste. The challenge was to find the right spices to create that similar and oh so tasty flavor. The end result was very close to the original. My family enjoyed it and I got great feedback from the fact that we polished off the entire pizza in one sitting. So, make this the next time your family can't decide on whether to eat Italian or Mexican. This is one tasty alternative which will satisfy everyone.
Ingredients
1 prebaked pizza base OR pizza dough for 1 pizza
2 cups soaked and cooked black beans, alternately you can use one can of black beans
4 tomatoes, diced (or use canned tomatoes)
green chillies or jalapeno, to taste
1/8th tsp, cumin powder/jeera powder
salt to taste
1/2 onion, diced
1/4 green bell pepper, diced
1/4 yellow bell pepper, diced
1/4 red bell pepper, diced
3-4 green leaf lettuce leaves, sliced into thick ribbons
2-3 green onion stalks and leaves, diced
1 cup shredded mozzarella cheese (can use any other cheese blend)
1/4 tsp sugar, optional
10 tortilla chips, crushed into bite size pieces or you can use tortilla strips
2 tbsp sour cream, adjust to taste
Method
If you are using pizza dough, then roll out the dough to the desired thickness and blank bake (see tips) the pizza till the base is cooked through for about 10-15 minutes at 450 F. This prevents the pizza from getting soggy. While your pizza dough is getting baked, mix together the tomatoes, chillies and add salt. If the tomatoes are sour, add a little sugar. Cook this mixture down, till a thick sauce is created. You will not need a lot of sauce, just enough to cover the pizza base.
Then, heat the cooked black beans, add the cumin powder to this and some salt.
Now, you are ready to assemble the pizza.
Take your prebaked pizza base. Then spread a layer of the tomato sauce. Next spread a generous layer of the black beans. Then, sprinkle the diced onions and bell peppers as the next layer. Finally, add the layer of cheese. Then, bake the pizza at 350F for 10 minutes or till the cheese has melted completely.
Take it out of the oven. Then, cover it with lettuce, green onion leaves and tortilla chips. Finally, drizzle a layer of sour cream on the pizza.
Serve hot with some salsa on the side.
Tips
You can find an easy to make pizza dough recipe here. You can also find pizza dough at grocery stores these days or even request a pizza restaurant to sell you some. Blank baking, means baking the pizza base without any toppings. This is to cook the pizza base, so that the pizza doesn't get soggy in the center. You can also blank bake the pizza base a couple of days earlier and then use this base when you are ready to add the toppings. Prick the dough before you bake it, else it will puff up. Else, you can place a foil on top of the rolled dough and cover it with some baking weights or beans and then blank bake the base.
If you are using canned beans, make sure to rinse them out before using it. Also, add a little water (a tablespoon or so) to the beans as you cook them with the cumin powder and salt.
If you are starting with dry black beans, then soak them overnight. Next day, pressure cook these till completely cooked and slightly softened. You can add some salt to the beans when you cook them.
This is one of those easy recipes that you can pull together with ready made, store bought ingredients or make most of them a day previously and put them together when you are ready to eat. Another great feature of this recipe is that it is very flexible. You can change many of the ingredients based on what you have in the pantry and your fridge. The main components are tortillas, rice, beans and you can add different vegetable and salsas and make it as decadent or as healthy you want. You will notice that a lot of ingredients in this recipe are optional or ones that can be substituted for something else.
Ingredients (for 1 burrito)
1 large tortilla - whole wheat/ flour/ corn
2 tbsps cooked rice
2 tbsps cooked beans - red or black beans (can use canned or read tips)
1 tbsp fresh salsa
ready made salsas- to taste (optional)
hot sauce - to taste
avacado (can be used instead of guacamole- optional)
shredded cheese - mexican blend/mozarella/cheddar
sour cream (optional)
guacamole (optional)
pinch of cumin powder
bell pepper, sliced- green, red/orange/ yellow (optional)
onion, sliced (optional)
1 tsp oil
cilantro
salt, to taste
Method
In a pan heat the tsp of oil and once hot, add the sliced onion and cook till softened and light brown. Then add the sliced bell pepper and cook till the bell pepper is cooked through. Alternately you can also cook this on the grill for a smoky flavor.
Add a little oil (optional) in a pan and then add the cooked beans to the pan with a little water (about 2 tbsp). Then add the cumin powder to it and a little salt to flavor these beans. Set them aside. It is now time to assemble the burrito.
Warm up the tortilla. In the center, add the cooked rice. Top it with beans and then add the cooked onions and bell pepper mixture. Next add the salsas that you want. These can be fresh or store bought. Then add guacamole if you have some ready or avocado. It gives a nice decandent taste to the burrito and you can easily skip the sour cream. Then add a dollop of sour cream and sprinkle cheese on it. If you like your burrito hot, then add some hot sauce into the burrito itself. Sprinkle a little cilantro. Then fold the burrito to create a neat packet. A complete meal created in a matter of minutes.
Tips
You can use canned beans, which are pre-cooked. If you want to start from scratch, then soak the dry beans overnight and then cook the beans with water in a covered pan, by boiling it till the beans are softened. Or you can cook the soacked beans in a pressure cooker. It takes about 5-10 whistles in my cooker depending on how well the beans have been soaked and is much quicker than waiting for it to cook in the pan.
The grilled pepper and onions mixture is called Fajita and you can even grill these. The grilled smoky flavor really flavors the burrito. This addition is optional.
Guacamole or just plain avacado adds a buttery rich taste and is a great substitution to the sour cream. The plus point is that avocado has healthy fat, rich in omega 3. You can also whip up some yogurt and use it instead of sour cream.
When you cook rice, add a little salt to flavor the rice and then you can mix in chooped cilantro into the warm rice which will impart a nice herby flavor to the rice. You can also squeeze some lime on it for additional flavor.
You can also use chapatis instead of tortillas.
It has been really hot for the last couple of weeks and I was not upto slaving over a hot stove last weekend. So I asked my husband what he would like to eat and ended up vetoeing all the suggestions he made like fried rice, dal fry and aloo paratha. He finally said "why don't you make a burrito?" So we went to the grocery store to get the required ingredients like tortillas and hot sauce. I hadn't ever tried a mexican dish at home before, so I was really looking forward to it. We reached the tortilla aisle and realised that all the burrito size tortillas came in really big packs and we would never be able to use all of those. While I was wondering what to do, my husband was exploring the aisle and found a small pack of about 10 taco size corn tortillas. That decided it - tacos it was! I must say it was light and refreshing and made a wonderful Sunday lunch.
Ingredients
8-10 corn tortillas - taco size
1 can black beans - rinsed (alternately, you can soak 1 cup of beans, pressure cook it and add a little salt to it)
1 cup shredded iceberg lettuce
sour cream
shredded cheese mix
For the salsa
2 tomatoes diced
1 red onion diced
1 avacado diced
2 tbsp cilantro finely chopped
1 chilli finely diced
1 lemon
For the grilled vegetables
1 corn cob or 1 cup frozen corn- thawed
1 yellow onion sliced
1/2 green bell pepper sliced
1/2 orange bell pepper sliced
1/2 red bell pepper sliced
1/2 yellow bell pepper sliced
1 tsp cumin
1 tbsp oil
salt to taste
pepper to taste
Method
For the salsa
Mix together the diced tomatoes, red onion, avacado. Add the juice of the lemon, salt and pepper and mix well. Lemon juice should be added after the avacado to retain the green color or it will turn brown. Mix in the chilli, per taste.
For the vegetables
Heat oil in a pan. To this add the sliced onion. Stir fry this for 3-4 mins till the onion is transparent. Then add the bell peppers and the corn. If using frozen corn, add the corn after the bell pepper has been stir fried for 2-3 mins. Add the cumin and salt to this.
To assemble the taco
Cook the tacos on a pan, a couple of mins on each side. To this, add the beans, followed by salsa and the grilled vegetables. Add a dollop of sour cream and cheese. Top with the shredded lettuce.
Tips
Serve with hot sauce.
The simplest way to peel the avacado, is to cut it around the length into two pieces, remove the inner seed and then use the spoon to scoop out the avacado.
This is a great meal to-go. Just pack it as shown below and you have your next day's tasty lunch ready. It is easy to assemble just before you eat. I have added some jalapenos to the salsa and grilled vegetable mixture here, since my husband likes it a little spicy!
I am submitting this recipe to Susan's MLLA which is hosted here by Siri this month.




.JPG)
.JPG)
.JPG)
.JPG)
.JPG)
.JPG)
.JPG)
.JPG)
.JPG)


