Welcome to my blog

I hope you will find the recipe you are looking for your occasion here.

Now video instructions are available for select recipes and can be accessed at

Gardening and Cooking Made Easy

The latest 5 recipes are displayed on the
main page. For more recipes, you can browse the archive, click on the labels in the index to the left or use the Custom search below to look for a specific recipe.


Search for more results

Custom Search
Showing posts with label diwali. Show all posts

Friday, November 13, 2020

Rava vadi - faux kaju katli

I made this recipe based on my memory of our neighbor in Pune, from decades ago. She had come over to our house during Diwali. She had brought sweets to share and was most excited for us to try out this sweet and guess what it was made of. All of us guessed that it was kaju katli and her grin just grew bigger. Finally she revealed to us that she had made this using rava and there were no nuts. These were very similar to these pink square vadis that used to be available at the kirana stores (local grocer) in a small transparent plastic cover. 

I had a very faint memory of the recipe and decided to try it based on my cooking experience. The end result was delicious. It looks like kaju katli and the texture is similar, so you can even serve this as a faux kaju katli for those who have nut allergies.


Ingredients
1 cup fine rava
1 cup milk
1/4  to 1/2 cup ghee
1 cup sugar (can increase by 1/4 cup, adjust to taste)


Method
Mix the rava and milk and let it soak for 5-6 hours at the minimum or overnight. Then add the sugar and ghee to the mixture. Put this mixture into it in a broad saucepan and cook this mixture on low heat, stirring frequently. Cook till it comes together as a dough. Once it starts getting dough like, take 1/4 tsp onto a plate, let it cool till you can touch it and try to roll it into a ball. If it is not sticky and you can roll it easily, then the mixture is ready. 

While it is warm, knead this dough well so that it comes together. Then roll it out into a 1/4 inch thickness and then cut into diamonds. To ensure it doesn't stick, apply ghee to the rolling pin as well as the surface you are rolling it onto. Or you can sandwich it between two parchment paper sheets and roll it out. Let it dry and it is ready to eat. It can take a day to dry it out so that it is firm. Store in the fridge.


Tips
If there are any lumps, press on them and as it thickens, they will dissolve. If you increase the heat, the color of the mixture will change as it will brown. It will still be delicious, so you can do that as well. It just won't look like kaju katli. 

Wednesday, June 14, 2017

Mango Kalakand - Pressure Cooker Version

This is a delicacy and usually requires several hours when made traditionally. You start with whole milk, separate it into whey and paneer, then add the paneer to whole milk and reduce this down till thickened and then add the sugar, stir it for a little longer till thick enough to set and then set it on a greased plate. There are several short cut recipes that I have seen by baking ricotta cheese or making it in the microwave, but I have always found that these fall short of the authentic taste, especially for me. I have a sensitive palate and am able to taste the ricotta cheese in these recipes which annoys me terribly. So, I end up spending long hours during Diwali time (the only time I make elaborate sweets) making this.

Since I have been on a pressure cooking experimentation spree, I broke down the basic components of the traditional recipe and decided substitute milk with milk powder and see if this would set in the cooker when cooked under pressure, similar to a caramel flan. Thus far, I have experimented with cake and waffle batter and they have cooked well under pressure in less than 20 minutes. So again with a motivation to simplify the recipe with respect to the length of time and effort, I set forth with my experiment. In addition, I decided to flavor it with mango as I hadn't made mango kalakand before. And the result was terrific! Absolutely delicious, soft and well set kalakand. I can now whip this up easily for any dinner party now and so can you.


Ingredients
1 cup freshly made crumbly paneer
1/2 cup milk powder
1/2 cup sugar
3 tbsp mango pulp, canned
1 tsp ghee plus more to grease the container
1 cup water for the cooker


Method
Take the crumbly paneer in a bowl and mash it a little to make it slightly smoother. We still need a little granular structure to give kalakand the right texture. Then add the milk powder and sugar. Mix these well and then add the mango pulp. Add 1 tsp ghee and mix well. This mixture should be quite thick. If the pulp is very watery, then add some more milk powder to thicken it.

Grease a cooker safe container with ghee. Pour this mixture into the container. Cover this container with foil or a lid. This is to prevent water from condensation falling into the kalakand.


Pressure Cooker
Pour a cup of water into the cooker and place the covered container into the cooker. Cook this on medium low heat (4 setting on my stove) for 15 minutes (you can steam it or pressure cook it, it does not matter). Take it off the heat. Let the pressure fall and then open the lid.

Instant Pot
Cook it in manual mode for 15 minutes with vent closed. Let the pressure fall and then open the lid.


Now carefully remove the covered container making sure to not disturb the lid of the container. Then wipe it down nicely and once assured that there is no water, open the lid. Check that it is well set by inserting a toothpick or a paring knife into the kalakand and if it comes out clean, it is done.

Then let this cool down completely, cut this into squares. Refrigerate for a few hours. Then separate out the squares and serve them.


Tips
Paneer was made from whole milk and I had non-fat milk powder on hand.
If using fresh mango pulp, thicken it a little by cooking it a couple of minutes and add sugar if needed.  If this makes the mixture runny, add milk powder. The mixture must be like a thick cake or idli batter to set well.
To make normal kalakand, instead of mango pulp, add 1-2 tbsp of yogurt to bring the ingredients together in thick batter/paste form. Add cardamom powder for flavoring.
If you use a mango pulp that is too watery or if you haven't drained all the water from the paneer and it is too soft after refrigeration and you cannot make pieces out of it, pour the mixture into an open pan and heat it up for a couple of minutes till thickened and put it back in the greased plate to set it.

Tuesday, November 10, 2015

Gulkand Barfi - Rose Fudge

Gulkand are rose petals preserved in sugar. It is made by preserving rose petals with sugar and kept in a glass bottle in the sun till the sugar melts. This preserved mixture is extremely fragrant and delicious and a delicacy. It is meant to give a cooling effect during the summer months.

This sweet recipe came about in an interesting way. My husband had brought Gulkand Barfi from India a few years ago and when we were discussing the menu for Diwali treats this year, he suggested I make it. I had only eaten this sweet that one time. And it had been quite a while since then and I couldn't remember what it was made of.  He told me that it definitely had gulkand and coconut and I would need to figure out the rest.

Well, I started off with sugar and coconut and then added the other ingredients based on the description of the sweet. The end result was extremely delicious and finger licking. I just cannot stop eating it.

Ingredients
3 cups shredded fresh coconut
2.5 cups sugar
1/2 cup gulkand
1 can evaporated milk (12 oz can)
1 packet milk powder (90 gm pack)
2 tsp of milk
2-3 drops red/pink food color (optional)
1-2 tsps of ghee to grease the plate
1-2 drops of rose essence


Method
Take a plate or tray in which you will pour out the barfi and set it and grease it well with ghee.

Mix together the sugar and coconut and heat this. Once the sugar has melted, add the evaporated milk and the milk powder and cook this on low heat, stirring often.  Keep stirring and cook it down till you can see the base of the pan. Add a couple of teaspoons of warm milk to the gulkand and stir it in. Stir it well so that the gulkand liquefies a little so that it can easily be stirred and incorporated into the mixture that is being cooked.

When the mixture thickens enough that when you stir it, the base of the pan can be easily viewed for a few seconds, then the mixture is ready to be poured into the greased plate. At this point add the gulkand and then increase the heat and stirring continuously again cook it down to the consistency where it is ready to be poured onto a greased plate. Turn off the heat, add  the color and essence is using and mix in it thoroughly. Pour the mixture onto the greased plate and using a bowl or measuring cup spread the mixture out into the plate. Make sure to grease the base of the cup with ghee, so that the mixture doesn't stick. Use it to level the mixture and flatten it. Now, let the mixture cool.  When it has cooled to a luke warm temperature, it will solidify a little. At this stage, you can cut it into squares.


Tips
If you want to speed up the cooking process, you can increase the heat but be sure to stand at the stove and keep stirring so that it doesn't brown or stick to the pan.  An alternate method to check if the mixture is at the right consistency is to take a  drop full of the mixture into a plate and as soon as it is cool enough to touch, try to roll it into a ball. If you are able to roll it, then the mixture is ready to be poured. The gulkand is added at the last step and cooked for a minimal time so that is maintains its fragrance. If you take this off the heat a little early and the barfi ends up being soft after cooling completely, you can reheat the mixture. However, you will end up losing the fragrance from the gulkand. So definitely add the essence before you put it into the greased pan. The taste will be the same.

Thursday, November 5, 2015

Rose Cashewnut Fig Almond Barfi - Rose Kaju Anjeer Badam barfi

This year I have challenged myself to make some complex sweets which I had usually bought in the past. I have realized that the taste of homemade sweets is so good and I have so much control over the quality of the ingredients that we enjoy it more than the store bought version. This is another decadent sweet. The outer covering is made using cashews and sugar and the process is similar to that of Kaju Katli, which is a Cashew sweet and once you cut into it, you see the inside filling of figs and almonds. This is also a labor and time intensive recipe and you need to keep a close eye on the ingredients but oh so delicious!

Hope you like the recipe and give it a try. If you do, leave me a comment.


Ingredients
1 cup raw cashewnuts
red food coloring
rose essence or rose water
12-14 dried figs
1 tsp ghee
1/4 cup of mava/khoa
1/8 cup of sliced almonds
powdered sugar (measurement in the recipe for cashew covering)

3-4 tbsp powdered sugar for fig mixture (it depends on how sweet the fig paste turns out to be)


Method
Soak the cashews with enough water to cover them completely. Soak the cashews for at least 4-5 hours, overnight would be best. Then drain the water and remove any peels that may have been on the nuts and then rinse them out. Process the cashews to make a fine paste. Add just a little water when you make the paste, just enough to let your grinder function properly. Then, measure an equal quantity of powdered sugar. Mix the cashew paste and sugar and start heating it in a open pan.

Keep stirring the mixture and let it cook. Keep the temperature at a very low level while cooking to avoid any browning. Make sure to keep stirring the two mixtures so that they don't stick to the base of the pan and brown. As the mixture starts thickening, it will get more difficult to stir it around as it gets heavy and sticky. However, it is crucial that at this stage you stir it and do not let it stick to the base and brown. At this stage, test the consistency of the mixture. Take a small drop (it will be hot so be careful) and roll it between your fingers. If you can mould it into a ball (it will be like molten wax) and it retains its shape, then you can take it off the heat. Make sure that the ball is not at all sticky. If it sticks to your fingers even a little, cook it a little longer.

Soak the dry figs for about 15-30 mins and then heat them on the stove top for a few mins till they soften. Then process this through the grinder and make a paste. In a pan, heat the ghee and add the mava. Heat it till it softens and you get the smell of roasting it. Then add the fig paste, sugar and stir well. Cook this mixture till it starts to thicken and then add the sliced almonds. Cook this till it cooks down and becomes pliable like a dough. Remove a small quantity and let it cool down till you can touch it and then try rolling it. If it is not sticky and can be easily rolled into a ball then the mixture is at the right consistency.


Let the mixtures cool to a temperature where you can handle it. Add a couple of drops of red food coloring to the cashew mixture and a couple of drops of rose essence. Knead this into the cashew dough till it is evenly mixed and you have a nice pink color and the dough is a smooth ball.

Then take a fistfull of fig mixture and roll it into a ball. Make a bigger ball of the cashew mixture and then using your fingers make a depression in it and then roll this cashew ball around the fig ball. Cover the fig ball completely with the cashew and then roll this to get a smooth finish. Then flatten it into a thick disk. Slice this into sectors by cutting the disc into eighths along the diameter of the disc. You can make about 4-12 slices based on how big you make the disc.

Garnish with silver foil if available. You can do this before cutting the disc.

You can store it in an airtight container for a couple of weeks. It lasts in the refrigerator for upto a month.

Tips
If you add a lot of water when you grind the paste, then the sugar proportion will be off. Also, since you need to cook it down to a dough consistency, it will take much longer to cook it. The nut paste must be very fine and there shouldn't be any grainy texture. If you are in doubt, use 1 cup of powdered sugar for 1 cup of nuts and if it is granulated, use 3/4 cup of sugar. Granulated sugar will take much longer to melt, and if you process it in the grinder, you can turn it into powdered sugar and use that.

Use a large pan so that the evaporation rate is faster and that will make the cooking process faster. Use a non stick pan so that the mixture will not stick while cooking. The color should not change. Also, as the sugar melts, the mixture will start getting sticky and as the the cooking process comes closer to completion, it will get more difficult to stir it around. If you are cooking a large quantity, then it is advisable to take turns with someone else to stir it. Grease your hands with some ghee/clarified butter before you knead the cashew mixture and also when handling the fig mixture to keep it from sticking to your hands.


Wednesday, November 4, 2015

Cashew Pistachio Rolls - Kaju Pista Barfi

This is a decadent sweet. Made from just two ingredients, nuts and sugar, it highlights the rich taste of the cashews and pistachios. I had always bought it till now, however since I had made Kaju Katli in the past, which is a Cashew sweet, I thought I would try my hand at this decadent dessert. Now, to be honest, it did take quite a lot of time and a lot of elbow grease but the end result was so good, that I don't think I can go back to eating the store bought version anymore. I also bought some edible silver leaf (warak in Hindi) and was able to give a very professional look to the sweet. Even my parents thought that it was store bought when I shared the photo with them.

With the festive season starting soon, give this sweet a try and let me know how it turns out.


Ingredients
1 cup raw cashewnuts
1 cup raw, unsalted pistachios
powdered sugar

Method
Soak the cashews and pistachios in separate containers with enough water to cover them completely. Soak these for atleast 4-5 hours, overnight would be best. Then drain the water and remove any peels that may have been on the nuts and then rinse them out. Process the cashews to make a fine paste. Add just a little water when you make the paste, just enough to let your grinder function properly. Then, measure an equal quantity of powdered sugar. Carry out the same process with the pistachios and grind to make a fine paste.  Measure the cashew paste and pistachio paste separately. Then, measure an equal quantity of powdered sugar for each nut. If you get one cup of cashew paste then add 1 cup of powdered sugar to it. Do the same for the pistachio paste. In this example we will end up using a total of 2 cups of powdered sugar.  Mix the cashew paste and sugar and start heating it in a open pan. Then mix the pistachio paste and sugar and start heating it in a separate pan.

Keep stirring these mixtures and let them cook. Keep the temperature at a very low level while cooking to avoid any browning. Make sure to keep stirring the two mixtures so that they don't stick to the base of the pan and brown. As the mixture starts thickening, it will get more difficult to stir it around as it gets heavy and sticky. However, it is crucial that at this stage you stir it and do not let it stick to the base and brown. At this stage, test the consistency of the mixture. Take a small drop (it will be hot so be careful) and roll it between your fingers. If you can mould it into a ball (it will be like molten wax) and it retains its shape, then you can take it off the heat. Make sure that the ball is not at all sticky. If it sticks to your fingers even a little, cook it a little longer.


Let the mixture cool to a temperature where you can handle it. At this stage, knead the two mixtures separately into two balls like you would knead dough till they are smooth. If you want, then you can deepen the green color of the pistachio by adding a couple of drops of green food coloring.

Then roll out the pistachio dough into long cylindrical rolls about 2 cms in diameter. Then roll out the cashew dough into a sheet which is about  half a centimeter in thickness. Then, place the pistachio roll on top of this cashew sheet and roll the cashew sheet around it, such that you get a circular cylinder covering the entire pistachio roll. Cut off the excess dough.  Then, using a serrated knife cut these long cylindrical rolls into small rolls. I cut some in two inch long pieces and some much small.

Garnish with silver foil if available.

You can store it in an airtight container for a couple of weeks. It lasts in the refrigerator for upto a month.


Tips
If you add a lot of water when you grind the paste, then the sugar proportion will be off. Also, since you need to cook it down to a dough consistency, it will take much longer to cook it. The nut paste must be very fine and there shouldn't be any grainy texture. If you are in doubt, use 1 cup of powdered sugar for 1 cup of nuts and if it is granulated, use 3/4 cup of sugar. Granulated sugar will take much longer to melt, and if you process it in the grinder, you can turn it into powdered sugar and use that.

Use a large pan so that the evaporation rate is faster and that will make the cooking process faster. Use a non stick pan so that the mixture will not stick while cooking. The color should not change. Also, as the sugar melts, the mixture will start getting sticky and as the the cooking process comes closer to completion, it will get more difficult to stir it around. If you are cooking a large quantity, then it is advisable to take turns with someone else to stir it. Grease your hands with some ghee/clarified butter before you knead the cashew mixture to keep it from sticking to your hands.

Instead of a roll, you can also roll both out into sheets and then place on top of each other and cut into diamonds or squares as a variation.

Tuesday, September 15, 2015

Coconut Beetroot Barfi (Coconut Beetroot Fudge)

My Mom and I were discussing various recipes that are made during the festive season and one of my favorites is coconut burfi or naral barfi. I told her I was planning to make that sometime soon and she suggested that I try adding some beetroot to make it colorful. I loved the idea and I decided to try it with golden beetroots. The end result was beautiful. The barfi turned out to absolutely golden and it tastes great. And I feel less guilty eating it because I know I am also eating a vegetable. This is a beautiful, delicious and healthier variation to the coconut barfi.

The recipe for the coconut barfi can be found here.


Ingredients
2 cups fresh coconut - grated/scraped (if using frozen, thaw it)
2 cups sugar
1/2 cup whole milk
1 cup beetroot - cooked and grated (see details in method)
1/8 tsp cardamom powder


Method

Cook the beetroot and then grate it. I usually do it in a pressure cooker

Heat the beetroot, coconut and sugar in a pan. Stir it and then add the milk. The sugar will melt and turn into syrup. As the mixture starts to thicken, add the cardamom powder. Stir frequently so that the mixture doesn't burn. Heat this mixture, till it is thick enough, so that when you move a spoon through it, you can see the base of the pan and till the mixture comes together. In the meanwhile, grease a tin or dish with some ghee or butter. Then pour the mixture in a greased pan. Use a spatula to spread this or you can use the base of a small bowl. Grease the base of the bowl with some ghee, so that the coconut mixture doesn't stick to the base. Once it has cooled down a little and is warm to touch, cut it into small squares.  Once it has completely cooled down, you can separate the squares. Store it in the fridge.


Tips
You can scrape/grate a coconut and freeze this in an airtight bag/box for about 6-8 weeks. After you scrape the coconut, heat it for a minute in the microwave or on the stove till you can smell the coconut aroma. Then cool it and freeze it. This helps preserve the coconut for a longer period.
When you cook the beetroot in the pressure cooker, just wash it and place it in the cooker. Remove the top and the root end and peel it after it is cooked.
If you use red beetroot (which I plan to use the next time), you will get a beautiful pink color.

Tuesday, October 29, 2013

Champakali - A Diwali Delicacy

The "Plumeria" flower is called Champa/Chafa in Marathi. "Champakali" refers to the bud of this flower. As you may have guessed, the snack is supposed to be in the shape similar to the bud of the plumeria flower. It is a delicate snack and tricky to shape and fry, but looks very pretty and tastes similar to chirote or shankarpali covered with syrup. I have fond memories of making these with my Mom, for Diwali, as a child. The process of shaping a round dough disc into the bud of a flower was a lot of fun and it was a delight to see them being fried by Mom. This time around, I decided to make these with my daughter and I was transported back to those good old days from childhood. Both of us had a lot of fun making the Diwali snacks together and I hope that these memories stay with her forever.


Ingredients
1 cups all purpose flour/maida
2 tbsps oil
1/8 tsp salt
water, to knead the dough
1 cup sugar
1/4 cup water
oil to deep fry the champakali


Method
Mix together the flour, salt and oil. Adding a little water at a time and mix the ingredients together to make the dough. Knead the dough till it is supple but firm and stiff.

In a deep pan, mix the sugar and water and heat it till you get a thick syrup. The syrup should be at the 2 thread consistency. This means that if you take a drop of syrup between the tips of your forefinger and thumb and stretch it out, you will see two strands of syrup. Test the syrup once you start to see it thicken. The syrup should be warm when you add the fried champakali to it. So make it just before you start the process of frying the champakali

Take a small piece of dough and roll it into a ball about an inch in diameter. Flatten it into a disc and roll it out into a small circle about 2 inches in diameter. The disc should be thin, about 2-3 mm in thickness. Now, make parallel cuts in this disc. These cuts should not be from edge to edge, but should end about 3/4 to 1 cm before you reach the edge. Now, holding this disc with both hands between your forefinger and thumb, and twist the disc such that the parallel cuts remain parallel and the disc gets shaped into a "flower bud". Make sure to pinch the two ends of the disc together, so that it will not unravel when frying. See the photos which illustrate this. You can make all of these before you start frying.


Make sure that the oil is hot. Then, add the molded champakali and deep fry it till it is nice and a deep golden brown. Remove it onto a paper towel to remove the excess oil. Dip each champakali in the warm syrup, to coat it entirely with syrup and set it onto a plate. Shake off excess syrup, so that you will get a thin layer. As the syrup cools, it will form an outer layer on the champakali.

Store these in an airtight container after completely cooled. Refrigeration is not needed. It will last for 2-3 weeks.


Tips
If you are rolling the dough and it ends up sticking onto the rolling surface and you need to use oil or flour to stop it from sticking, then the dough is not stiff enough. Add a little more all purpose flour and mix well. Knead till the dough is supple. The dough tends to relax and may soften when you let rest, so you may have to add a little flour and knead it again before rolling it out.
You can add a couple of drops of food color to the syrup. This will make the champakali colorful. I dipped a batch in plain syrup which got a white coating and the rest of the batch was dipped into the syrup, after adding a couple of drops of pink food color to it. These turned pink upon cooling down.

Sunday, October 27, 2013

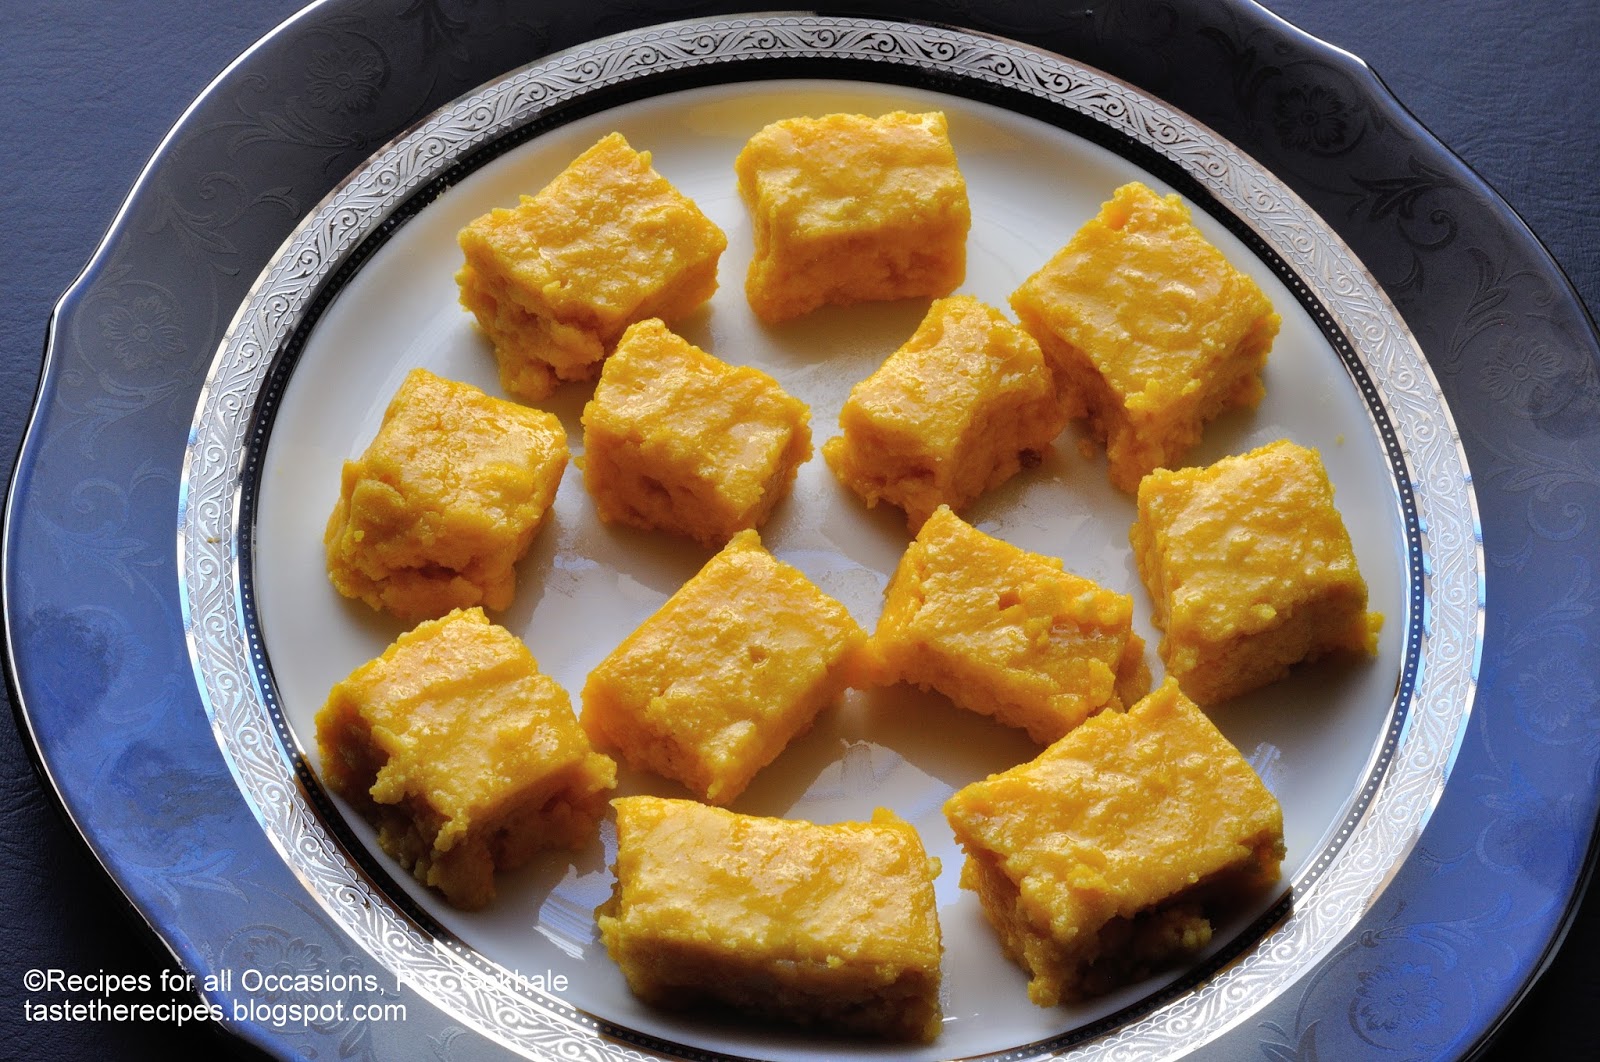
Mango Barfi/ Mango Vadi

A very popular sweet in Maharashtra, it is a combination of two rich ingredients viz. mango pulp and mava. This was one of the first sweets that I had tried making at home once I figured out how to make mava. The result was so tasty, and my family loved it. The next year, I taught another friend how to make it and we made it together for her Diwali party. However, I didn't cook it to the right consistency and it turned out a little soft. It set into a semi-soft barfi in the fridge and I got several compliments on it. In fact, this softer version was compared to the one made by a famous Mithai house in Pune. Hence, this is a very forgiving recipe. Whether you cook it to the right consistency or make it a bit softer, the taste doesn't get affected, and is delicious.


Ingredients
2 cups mango pulp
1.5 cup mava/khoya/khava
2 cups sugar
1/2 cup powdered sugar (not icing sugar)


Method
Mix the sugar and mango pulp in a microwave safe bowl, and cook it in the microwave for 10 minutes, till the mixture thickens and changes color and darkens. Cook it in 2 minute increments and stir.
In a separate bowl, heat the mava in the microwave for 1 minute and then add this sugar and mango pulp mixture to the mava. Mix this well.

Grease a pan with some clarified butter and keep aside. 

Now, transfer this mixture to a thick bottomed pan and reduce the mixture till it starts to thicken. Make sure you are doing this on low-medium heat, so that the mixture doesn't burn. Keep stirring often. Let the  mixture thicken, till it is so thick, that when you stir it, you can see the bottom of the pan and the mixture doesn't flow back to cover the base of the pan easily. You can also try and take a small drop of the mixture onto a plate, let it cool slightly, and try to roll it into a ball. If you can roll it into a soft ball without it being very sticky, then the mixture is at the right thickness.


Take this mixture off the heat and let it cool down a bit till it is easy to touch without burning your fingers, but still warm. Then add the powdered sugar to it and mix well.

Pour this into the greased pan and using the base of a measuring cup or a steel cup, flatten it out into the pan. The thickness of this should be about 1/2 -3/4 inch. Let the mixture cool down a little more till luke warm and then cut it into squares about 1X1 inch in size.


As you can see from the pictures, I prefer making the softer version. It is great, irrespective of the consistency. 


Tips 
You can use any canned pulp. If you use fresh mango pulp, remember that it may be more watery than the canned one and you may need to use more pulp, else the taste of mango may not be very strong. Also, canned pulp already has some sugar added to it. If you use fresh pulp, you may need to increase the amount of sugar being used, based on how sweet the mango is.
If the mixture is too thick and you are unable to flatten it, add a little milk and cook it till it softens. If it is too soft, that you are unable to cut it without it sticking to the knife, then cook the mixture for a few more minutes. You can also let it set in the fridge over a couple of days. This easily lasts in the fridge for about 10 days to 2 weeks.
Don't use icing sugar, because it is a mixture of powdered sugar and cornstarch.