Welcome to my blog

I hope you will find the recipe you are looking for your occasion here.

Now video instructions are available for select recipes and can be accessed at

Gardening and Cooking Made Easy

The latest 5 recipes are displayed on the
main page. For more recipes, you can browse the archive, click on the labels in the index to the left or use the Custom search below to look for a specific recipe.


Search for more results

Custom Search
Showing posts with label healthy. Show all posts

Friday, March 23, 2018

Samosa Wraps

This recipe came about when I was trying to decide what to cook for dinner one weekday and all I could think of was eating samosas. Deep fried samosas; cooking them on a busy weekday evening in less than an hour's time seemed impossible. And I would have still had to cook something more to make it a balanced complete meal. Instead I decided to add lentil flour to whole wheat flour and make  rotis which would be a nutritious wrap cover. To make sure that it was well balanced with vegetables and a complete meal, I used cabbage and carrot for the stuffing which were the vegetables I was planning to use up that week. And then I roasted these on a flat pan/tava with about a teaspoon of oil per wrap. What could have been a regular roti sabji meal was now transformed into a delicious and exotic fare which the kids enjoyed thoroughly. It turned out so well, that I get requests to make it often.


Ingredients
1/2 cup urad  dal flour
1/2 cup chick pea flour/besan
1/2 cup green mung dal flour
2 cups whole wheat flour
1 tsp salt 
1 tbsp oil
water (1to 2 cups) to knead a dough that is soft to roll out the chapatis
1 napa cabbage head, shredded or finely sliced
1 carrot, grated
1 onion, sliced
2 garlic cloves, finely chopped
2 tsp tava fry masala
1/2 tsp garam masala
Salt to taste
Chili powder, optional, to taste 
1 tbsp oil
Oil to pan fry the samosas 


Method
Combine all the flours in a bowl and mix them. Mix the tbsp of oil and salt in and then add a little water at a time to knead the dough. It should not be too stiff. Cover and let it rest for 20 mins, if you have the time. If it is sticky, add a little more wheat flour.
Now, take a fistful of dough, and roll it out into a thin round roti/chapati/poli. And then roast each chapati till it is partially cooked, a couple of minutes on each side. Since it is going to be cooked again, make sure to not cook them through completely. Stack these up and keep aside. 

In a flat and large saucepan, heat up the remaining tbsp of oil and add garlic and onion to it when hot. Stir fry them till the onion is transparent and then add the carrot and napa cabbage. Let it cook for a couple of minutes. Then add the tava fry masala, garam masala and salt (and chili powder if using). Mix well and let it cook till the cabbage is cooked through. The water should evaporate as it cooks. If there is any water left after cooking, drain it.

Heat up a flat saucepan or tava on which you can pan fry the samosas. Now cut each partially cooked chapati into a semi circle. Roll it up into a cone and then add the napa cabbage and carrot stuffing into the cone. Since the chapati is partially cooked, you will not be able to seal the cone opening. Spread a couple of tsps of oil onto the pan surface. Now place the stuffed chapati cone onto the pan with the open side face down, so that the open side gets cooked first. Now let this cook on medium heat till the chapati is cooked well and starts to crisp up. Then flip it over and cook the other side till crisp. You can cook a few samosa cones at a time. Be careful when flipping it over to make sure that the stuffing doesn't fall out and add oil as needed while pan frying them.  Serve warm with ketchup.

This can be a main meal for a weekday dinner as it is a wholesome, healthy and tasty meal.


Tips
Since the dough has a lot of lentil flour, the resultant dough maybe a little sticky. You can use some wheat flour or oil to reduce the stickiness.
Napa cabbage has a lot more water content than regular cabbage and hence a large open pan will provide enough surface area for the quick evaporation of the water that is released from the cabbage. If you stuff uncooked chapatis you will be able to seal it properly, however since the cabbage will retain some water, the result may end up being soggy and uncooked. Hence the chapati is partially cooked to reduce the moisture content. 
Place the cooked ones on a wire rack if possible as you cook the entire batch. This will help keep the samosa crisp till it is served. You can use the same recipe with a variety of vegetables. If you cannot find tava fry masala, add 1/4 tsp of fennel powder or 1/2 tsp of fennel seeds and 1/4 tsp of aamchur instead and increase the quantity of the garam masala to 1 tsp.

Tuesday, June 7, 2011

Rainbow Chard Stir Fry

I made this in spring which now seems a long time ago, with the temperatures soaring. I had the radio switched on one morning while driving and I heard the most wonderful description of fresh green vegetables cropping up in spring. It signified the end of winter and beginning of spring. They ended the radio segment with a mouth watering commentary on a simple recipe made using greens like chard, collard greens and spinach. That five minute description of freshly harvested greens inspired me to visit the local farmer's market that very weekend. I foudn the most gorgeoud rainbow chard. The reason why it's called rainbow chard, is that the stems of the leaves are very colorful - a bright red and yellow with green leaves (the colors are so bright and pretty that I couldn't resist putting up all the different photos I took of the vegetable).

Now, this was the first time I was to prepare rainbow chard and my mother's words came back to me on the basic principles of preparing green vegetables. "Use red chillies and garlic and any green vegetable will taste wonderful". I was glad that I heeded her advice as the recipe turned out great. I now have another addition to my green vegetable list!


Ingredients
1 tbsp oil
2-3 cloves garlic, finely minced
1 bunch of rainbow chard - about 3-4 leaves. Chop the green leafy part in chiffonade style, into thin ribbons. Cut the stems into small pieces and keep them aside
2-3 dried red chillies (adjust amount to taste)
salt to taste
1 lemon for garnish


Method
Heat the oil and add the garlic. Once the garlic starts to turn a light golden, add the red chillies and the stems.  Stir well and let the stems cook for a few minutes till they look a little tender. You can cover the pan, so that the stems will cook faster. Next add the green leaf ribbons into the pan and stir. Let this cook till the leaves wilt. If the chard is tender, the leaves will cook pretty quickly. You can cover the pan if needed. Next, add salt and stir. Turn off the heat and squeeze a little lemon on top of the cooked vegetable. Serve as a side or eat with hot rotis.


Tips
Let the stems cook through paritally and become soft before adding the greens. The stems are fibrous and will take a longer time than the greens. If you add them both together, you will end up overcooking the green leafy party. The easiest method to detect if the stems and leaves are cooked to the desired level, is to taste it. If it is difficult to chew or too fibrous let it cook for a few more minutes. This preparation tastes good with a little bit of crunch rather than cooking it till mushy.

Thursday, March 24, 2011

Healthy Oatmeal Cookies - An Oxymoron? - Maybe not!

The last thing I think of while devouring... umm eating cookies, is "healthy eating". Cookies translate to something sweet and decadent. At this point, you are probably wondering - what's up with this title then! Please read on. I enjoy cookies as much as the next person, but I also feel guilty after eating them (what's the saying? once on the lips, forever.... ).  It so happens that I run down to the cafe a couple of times a week, to get an afternoon snack, but faced with limited options, I end up getting chips or cookies. This just adds to my guilt. So, finally I decided it would be a better idea if I made cookies with healthy ingredients, cut back on the sugar and fat. Homemade is the best right? So, I used oatmeal, whole wheat flour, wheat bran and apple sauce. The end result was healthy and akin to granola bars. The texture is more on the "cracker" side because I baked them till they were well browned and no longer soft. (Of course you can stop when they are cooked through if you like soft cookies.) Now, there is no guilt, I can indulge and  it is a great to go breakfast. Tasty, filling and sweet minus the decadence. The best part is that my family loved it too.


Ingredients
1 cup whole wheat pastry flour
2 tbsp wheat bran
2 cups rolled oats (not the quick 1 min cook ones)
1 tsp baking powder
1/2 tsp baking soda
1/2 tsp salt
2 tbsp butter, melted and cooled
1 large egg
1/2 cup unsweetened applesauce
1/2 cup brown sugar, packed
1/2 cup sugar
1 tsp vanilla extract
1/2 cup raisins


Method
Grease a cookie sheet/ baking sheet and heat the oven to 350F. Sieve together the whole wheat pastry flour, baking powder, baking soda, and salt. Add the wheat bran and mix with a whisk. In another bowl, whisk together the egg and vanilla extract. To it add the melted butter, apple sauce, both sugars and mix well. To this add the wheat flour mixture and stir till ingredients are mixed. Then fold in the rolled oats. Using an icecream scoop or two spoons, scoop a little mixture into small dollops onto the sheet. Make sure you leave a couple inches between the dollops, as the cookies will expand while baking. Bake the cookies for about 20-30 minutes or more till they are brown. I baked them till they were well browned and dry. If you prefer soft cookies, stop baking when they are light brown and cooked through.


Tips
You can substitute the white sugar with brown sugar as well. The cookies will be a little less sweet. Brown sugar is white sugar mixed with molasses. I am not sure how much healthier it is compared to white sugar, but the resultant dishes are definitely  less sweet.

Tuesday, January 4, 2011

Sauteed Kale

I generally don't make New Year's resolutions, because I know that I am probably going to forget it or break it in a week. However, this year I would like to definitely free up more time to relax, sit back and not do anything. Just relish the moment, read a book or do something creative. It seems that these moments are getting rarer and life gets busier. One of the things I can do, is cut back on the time spent in the kitchen, specially during the week. So my quest will be to make healthy and tasty dishes in minimal time. I hope to accomplish this by finding shortcuts, making more use of all the kitchen appliances (that just sit on the counter) and by cooking meals which may not consist of many dishes, but is well balanced. Here's to New Year's resolutions!! Now that it's on my blog, I am definitely motivated to follow through!!!

On this note, I am going to pen down one of the simplest methods of cooking Kale. It is quick and took me less than 10 minutes to get everthing in the pan. Green vegetables are always full of vitamins and minerals and are healthy for you. And this preparation is absolutely lip smacking. It makes a great side dish or you can serve it as part of your main course with chapatis.


Ingredients
1 tbsp oil
1 bunch of kale leaves, about 4-5 leaves, chopped and washed
1 tomato, diced
1/2 onion, diced
1 tbsp ginger-garlic paste
salt to taste
1/2 lemon
2-4 tbsp water


Method
Heat the oil in a pan. Add the onion, and ginger-garlic paste. Fry this till the onion is transluscent. Then add the tomato and cook for a few minutes. Next add the kale leaves. If needed, add a couple of tablespoons of water. This will help wilt the kale quickly. It will also deglaze the pan to remove any onion and tomato that sticks to the bottom of the pan. Cook the kale for about 5-10 minutes, till the kale has wilted a little and cooked through. Add salt and squeeze lemon juice over the vegetable. Stir well.


Tips
The stems of kale leaves are generally very fibrous, so its best to cut the leaf around the stem and discard those. You can use store bought ginger-garlic paste. If you decide to use fresh ginger and garlic, use roughly equal amounts. Do not cover the kale while it is cooking. This will help retain the green color. It will turn brown when covered, but will cook sooner. Adding water to the pan also help to deglaze the pan and remove any onion or tomato bits that stick to the bottom of the pan.

Wednesday, November 3, 2010

Dal Makhani - Spicy Lentil

Dal Makhani is one of my favorite dals. I remember watching the cook at a "dhaba" in Delhi prepare this. It was a long time ago, but I still remember watching in surprise as he added an entire packet of 100 gram butter to just our order of dal, and it tasted fabulour. I remember the rich taste and it tasted heavenly with hot tandoori roti and some onions. Now, my version is definitely not as rich as the authentic one, but I promise you it's just as tasty. This is a recipe that I make on days when I need to prepare a quick but wholesome meal. I use whole lentils/ masoor dal for my quick, low calorie version instead of whole urad. Since masoor is a lentil variety which doesn't need to be pre-soaked, and cooks in about 15 minutes in the the pressure cooker, it doesn't need advance preparation. Serve it with some rice or naan or bread and it makes a complete meal.


Ingredients
2 tbsps oil or ghee
2 black cardamoms
1 green cardamom
1 bay leaf
1 red onion, diced
2 tomatoes, diced
red chilli powder to taste
1-2 tsp garam masala (add 2 tsp for spicier taste)
3 cloves of garlic, chopped
1/2 inch ginger, grated/crushed
1 cup lentils/whole masoor dal
2 cups water
salt to taste
additional water as needed


Method
Add the water and one garlic clove to the dal cook in the pressure cooker. In another pan, heat the oil and add the two types of cardamom and the bay leaf to the oil, fry till you can smell the aroma, but take care not to burn them. Add the onion, ginger and garlic. Fry this till the onion is well browned. Then add the tomatoes, and cook till the tomatoes are browned. Add garam masala, red chilli powder and cook for another minute. Then add the cooked dal to the pan, stir. Add water if the dal is too thick. Add salt. Serve hot with naan or white rice.


Tips
If you want a richer version, cook it in ghee and add butter towards the end of the cooking process.

Monday, September 20, 2010

Palak Paneer

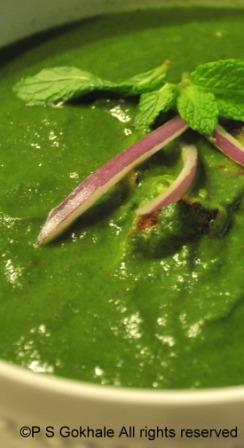
I met a couple of friends last night who mentioned that they really enjoy reading the recipes and try them out occasionally. I must say that it definitely motivated me to update the blog more frequently. So keep posting and emailing your feedback and comments. Also, requests for recipes are most welcome. Today's recipe is one that you can find at most Indian buffets in the US. The problem is that most of the times it is one of the worst vegetarian dishes on the menu. I am talking of none other than the famous palak paneer. I think it is one of the most well known Indian dishes here and have even seen it in the frozen section of grocery stores. But none of the versions I have eaten here in the past several years have come close to being tasty or appetizing.
This is my mom's version of palak paneer. I had prepared it a couple of times when friends came over for dinner and I was asked for the recipe on all occasions. Well, I finally got a chance to take the requisite pictures for the blog and here it is. Palak paneer does not need to be bland and flavorless anymore!!


Here is a detailed video on how to make palak paneer. This is a great curry to include other leafy greens as well (except mustard, since the leaves are spicy). 


Ingredients
1 bunch spinach/palak - chopped coarsely
3-4 cloves of garlic - finely chopped or grated
1/2 inch ginger - finely grated or ground into a paste
1 tomato - diced
1 red onion  - diced
1/8 tsp - cinnamon
2 tsp garam masala
4-5 mint leaves
green chillies to taste, diced
salt to taste
paneer - cubed
1 tsp ghee
1 tbsp oil


Method
Heat oil and to it add the onions, ginger and garlic. Fry till the onion transluscent, then add the chillies and tomatoes. Cook for a few minutes till the tomato is cooked and then add the spinach to it. Cook for a few minutes till the spinach is wilted. Add the spices - garam masala, cinnamon and if you want add the mint at this stage. Add the salt, stir and cook for a couple of minutes and then take it off the heat. Puree it in a mixer/blender. Add a 1-2 tbsp water if needed to grind it.
In a pan, heat the ghee, sprinkle a pinch of salt and add the cubed paneer to it. Roast it on a least two sides of the cube. Add this to the pureed spinach mixture and heat for a few minutes. Serve hot with chapati, naan or jeera rice.


Tips
The little amount of mint and cinnamon enhance the palak taste. If you want to make it more decadent, you can add a tbsp of cream to finish it off after you heat the puree with the paneer.

Saturday, July 31, 2010

Whole Wheat Waffles

What a wonderful Saturday it has been so far!! I was allowed to sleep in today and woke up to the wonderful aroma of waffles, apples and cinnamon. It was such a great way to start the day. My husband had prepared breakfast along with some really good tea. It was a nice treat. The morning was cloudy and gray and with such a delicious breakfast, I was transported to a far away place and felt  I was on a holiday.


At one point in time, I thought making waffles was almost next to impossible and had to rely on the readymade frozen variety. But ever since I got the waffle maker, I can never go back to the cardboard like frozen version. Nothing tastes better than the homemade version. Add to this a compote of fresh berries and thats one of the best breakfast menus I can think of. The waffle recipe is so easy and quick that I even make it on those rushed weekday mornings.


Ingredients
1 cup whole wheat pastry flour
1 tsp oil
1/8 tsp baking soda
1 tsp vanilla essence
1 egg
1/8 tsp salt
3/4 cup milk (whole or skimmed) or water


Method
Beat the egg well. To this add the vanilla essence and mix well. In another bowl, mix together the flour, salt and baking soda. To this add the oil and egg mixture. Then slowly pour in the milk and mix together to form the batter. The batter should be thick but easily pourable. Adjust the quantity of milk to adjust the batter consistency.


Tips
Ideally you would want to separate the egg yolk and white and beat the egg white till you have a nice foam. Start out with the egg yolk and vanilla essence and then add the other ingredients. Then fold in the egg white once the batter has been created. Do not overmix the batter. You should mix it just enough so that all the ingredients get incorporated.

Sunday, July 25, 2010

Grilled Artichoke

This is a beautiful vegetable. It resembles a flower and belongs to the sunflower family. I used to pass this vegetable by, every time I visited the grocery store. But the only way I had used it was via its canned form-the canned artichoke hearts. I finally saw this on the menu of a restaurant that is famous for its cheesecakes and decided to try it. Ever since that day, I have picked it up in the grocery section instead of passing it by. It's an extremely healthy vegetable, high in Vitamin C. Though many methods list a tedious way to cook it, the following method is a no fuss way to cook it, so that it can be enjoyed often.


Ingredients
1 Artichoke
2 tbsp white vinegar
salt to taste
1 tbsp olive oil or vegetable oil
1 large pot of water (enough to submerge the artichoke completely)
Dressing of your choice to serve with the artichoke


Method
Take the pot of water and add the vinegar to it. Start to heat this mixture. To prepare the artichoke, cut off about 1 inch of the top of the artichoke. Remove the stem and peel it. Add the artichoke and stem to the water prior to boiling. Artichoke will tend to float but we want it to be completely submerged in water, so that it cooks properly. To achieve this, cover the artichoke with a small strainer or sieve and place a small weight (heavy plate/small vessel, etc.) on the strainer. Let the water come to boil and let it boil for about 20-30 minutes. To check if it is completely cooked, insert a knife into the base where the stem was attached. If it goes in without any resistance, then it is completely cooked. Remove the artichoke and the stem.

Artichoke, being from the sunflower family, has a center thistle surrounded by the green leaves. This resembles small needles and is not edible. It must be removed. To do this, cut the artichoke into two halves lengthwise (not along circumference). You will see the thistle at the base just above the artichoke heart. Use a spoon to scoop this out. Make sure that you remove all the needles. Now, use a brush and cover the artichoke and stem with a layer of oil and sprinkle salt. Grill the halves or you can broil it. Remove it when it has a nice grilled/charred look.


How to Eat this
Serve the grilled artichoke with your favorite dressing. Italian and ranch go well with artichoke. Peel off each leaf, dip in the dressing, and scrape off the pulp from the leaf using your bottom teeth. The bigger outer leaves are very fibrous and may not have a lot of pulp. As you work your way towards the center, the leaves become more tender and the amount of pulp increases. The bulk of the artichoke is the heart and the stem, which are citrusy and delicious.


Tips
The artichoke will start oxidizing and will turn brown as soon as you cut it. It's necessary to get it into the acidic water as soon as possible. The color of the artichoke will tend to change a little after it is boiled. It will turn brownish green. You can eat the artichoke after boiling as well without grilling.

Thursday, July 22, 2010

Veggie and Beans Taco

It has been really hot for the last couple of weeks and I was not upto slaving over a hot stove last weekend. So I asked my husband what he would like to eat and ended up vetoeing all the suggestions he made like fried rice, dal fry and aloo paratha. He finally said "why don't you make a burrito?" So we went to the grocery store to get the required ingredients like tortillas and hot sauce. I hadn't ever tried a mexican dish at home before, so I was really looking forward to it. We reached the tortilla aisle and realised that all the burrito size tortillas came in really big packs and we would never be able to use all of those. While I was wondering what to do, my husband was exploring the aisle and found a small pack of about 10 taco size corn tortillas. That decided it - tacos it was! I must say it was light and refreshing and made a wonderful Sunday lunch.


Ingredients
8-10 corn tortillas - taco size
1 can black beans - rinsed (alternately, you can soak 1 cup of beans, pressure cook it and add a little salt to it)
1 cup shredded iceberg lettuce
sour cream
shredded cheese mix

For the salsa
2 tomatoes diced
1 red onion diced
1 avacado diced
2 tbsp cilantro finely chopped
1 chilli finely diced
1 lemon

For the grilled vegetables
1 corn cob or 1 cup frozen corn- thawed
1 yellow onion sliced
1/2 green bell pepper sliced
1/2 orange bell pepper sliced
1/2 red bell pepper sliced
1/2 yellow bell pepper sliced
1 tsp cumin
1 tbsp oil
salt to taste
pepper to taste


Method

For the salsa
Mix together the diced tomatoes, red onion, avacado. Add the juice of the lemon, salt and pepper and mix well. Lemon juice should be added after the avacado to retain the green color or it will turn brown. Mix in the chilli, per taste.


For the vegetables
Heat oil in a pan. To this add the sliced onion. Stir fry this for 3-4 mins till the onion is transparent. Then add the bell peppers and the corn. If using frozen corn, add the corn after the bell pepper has been stir fried for 2-3 mins. Add the cumin and salt to this.


To assemble the taco
Cook the tacos on a pan, a couple of mins on each side. To this, add the beans, followed by salsa and the grilled vegetables. Add a dollop of sour cream and cheese. Top with the shredded lettuce.


Tips
Serve with hot sauce.
The simplest way to peel the avacado, is to cut it around the length into two pieces, remove the inner seed and then use the spoon to scoop out the avacado.


This is a great meal to-go. Just pack it as shown below and you have your next day's tasty lunch ready. It is easy to assemble just before you eat. I have added some jalapenos to the salsa and grilled vegetable mixture here, since my husband likes it a little spicy!


I am submitting this recipe to Susan's MLLA which is hosted here by Siri this month.