Welcome to my blog

I hope you will find the recipe you are looking for your occasion here.

Now video instructions are available for select recipes and can be accessed at

Gardening and Cooking Made Easy

The latest 5 recipes are displayed on the
main page. For more recipes, you can browse the archive, click on the labels in the index to the left or use the Custom search below to look for a specific recipe.


Search for more results

Custom Search
Showing posts with label beans. Show all posts

Sunday, August 21, 2016

Mixed Vegetable Kurma - Coconut Based Curry

This is a delicious, vegetable rich curry with a coconut base which forms the gravy. I ate this for the first time in a South Indian style restaurant with Uttapam (thick rice pancakes). I absolutely loved it. I  then started making it at home whenever I would have grated coconut on hand. I believe this has its origins in Karnataka. It is very different from the mixed vegetable kurma which is found in North Indian style restaurants where the gravy base is onions and tomatoes.

This pairs very well with phulkas, uttapams and is worth being on a feast menu when served with puris. If is also a great gravy accompaniment with simple pulao. I love this preparation and hope you enjoy it too.


Ingredients
1 onion, finely chopped
2 carrots, cut into small cubes
15 green beans, finely diced
1 potato, cut into small cubes
¼ cauliflower, cut into small florets
½ cup peas
2 tbsp oil
¼ tsp cumin seeds/jeera
2 bay leaves/tej patta
salt to taste
water to form the gravy

For the gravy masala paste
1/2 onion, chopped
1 cup fresh coconut
4-5 garlic cloves
1 inch ginger
1-2 green chillies (to taste)
¼ cup cilantro/coriander leaves loosely filled (approximately leaves yielding from 10-15 stems)
½ tsp turmeric
½ tsp tamarind paste (soak tamarind in warm water and once it is softened, remove seeds and any fibers and extract the pulp from the tamarind)
1 tsp garam masala (optional)
water to grind the ingredients together to form a thick paste


Method
Blend all the ingredients listed under the fresh coconut masala paste into a fine thick paste. Cut all the vegetables into approximately similar sized pieces. To reduce the overall cooking time, you can steam cook these or cook these in the microwave till partially cooked. Do not overcook them. It is not necessary to semi-cook the vegetables. It will just take a little longer for the kurma to cook if raw vegetables are added. If using frozen peas, just thaw them. Do not cook them with other vegetables as thawed peas cook really quickly.

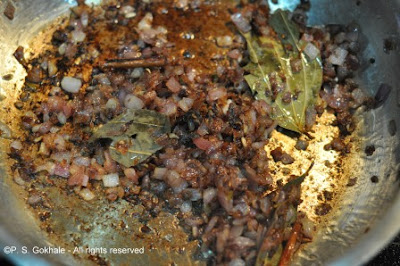
Heat a pan. Add oil and then cumin seeds and bay leaves. Once the cumin seeds crackle, add the coconut paste and cook it till the raw smell of onion and garlic goes away and it starts to brown slightly. Next add the cut vegetables – the carrots, beans, peas, potato and cauliflower. Stir to coat these in the coconut masala and let these cook for a few minutes. Then add about ½-1 cup of water to create a gravy, based on your preference. Add salt to taste. Let the vegetables boil till completely cooked.

Serve hot with chapati, puri or uttapam.


Tips
Do not use cold or frozen coconut directly when making the masala paste. Thaw it and warm it a little. If it is very cold, the oil will separate out during the grinding process. Also, use warm water to grind the masala. You can also add 10-12 cashews (not roasted, raw) to the paste to give it a richer taste.

Tuesday, December 11, 2012

Mexican Pizza

I have so many photos now, that I am having a hard time trying to decide which recipe to post next. And, as I backup and archive these photos, some recipes are slipping away from memory. So, I am going to try and jot down notes when I cook, so that when I finally post the recipe, I am able to remember all the details.

I am sure that you are wondering what a Mexican pizza is. Is the base made from tortillas or do I top it with salsa? Well, this is an inspiration from a pizza that I have eaten at a restaurant called "California Pizza Kitchen". It is a delicious and flavorful pizza. The pizza has a traditional base and has a thinner crust than the usual one inch crust pizzas. It it topped with blackbeans, tomatoes and onions and green lettuce. And finally the topping of tortilla chips lends the crunchy texture. So every time you bite down into a slice, you hear a nice satisfying crunch. Well, one day I decided to reverse engineer this dish and see if I could create a similar taste. The challenge was to find the right spices to create that similar and oh so tasty flavor. The end result was very close to the original. My family enjoyed it and I got great feedback from the fact that we polished off the entire pizza in one sitting. So, make this the next time your family can't decide on whether to eat Italian or Mexican. This is one tasty alternative which will satisfy everyone.


Ingredients
1 prebaked pizza base OR
pizza dough for 1 pizza
2 cups soaked and cooked black beans, alternately you can use one can of black beans
4 tomatoes, diced (or use canned tomatoes)
green chillies or jalapeno, to taste
1/8th tsp, cumin powder/jeera powder
salt to taste
1/2 onion, diced
1/4 green bell pepper, diced
1/4 yellow bell pepper, diced
1/4 red bell pepper, diced
3-4 green leaf lettuce leaves, sliced into thick ribbons
2-3 green onion stalks and leaves, diced
1 cup shredded mozzarella cheese (can use any other cheese blend)
1/4 tsp sugar, optional
10 tortilla chips, crushed into bite size pieces or you can use tortilla strips
2 tbsp sour cream, adjust to taste


Method
If you are using pizza dough, then roll out the dough to the desired thickness and blank bake (see tips) the pizza till the base is cooked through for about 10-15 minutes at 450 F. This prevents the pizza from getting soggy. While your pizza dough is getting baked, mix together the tomatoes, chillies and add salt. If the tomatoes are sour, add a little sugar. Cook this mixture down, till a thick sauce is created. You will not need a lot of sauce, just enough to cover the pizza base.
Then, heat the cooked black beans, add the cumin powder to this and some salt.
Now, you are ready to assemble the pizza.


Take your prebaked pizza base. Then spread a layer of the tomato sauce. Next spread a generous layer of the black beans. Then, sprinkle the diced onions and bell peppers as the next layer. Finally, add the layer of cheese.  Then, bake the pizza at 350F for 10 minutes or till the cheese has melted completely.


Take it out of the oven. Then, cover it with lettuce, green onion leaves and tortilla chips. Finally, drizzle a layer of sour cream on the pizza.

Serve hot with some salsa on the side.


Tips
You can find an easy to make pizza dough recipe here. You can also find pizza dough at grocery stores these days or even request a pizza restaurant to sell you some. Blank baking, means baking the pizza base without any toppings. This is to cook the pizza base, so that the pizza doesn't get soggy in the center. You can also blank bake the pizza base a couple of days earlier and then use this base when you are ready to add the toppings. Prick the dough before you bake it, else it will puff up. Else, you can place a foil on top of the rolled dough and cover it with some baking weights or beans and then blank bake the base.
If you are using canned beans, make sure to rinse them out before using it. Also, add a little water (a tablespoon or so) to the beans as you cook them with the cumin powder and salt.
If you are starting with dry black beans, then soak them overnight. Next day, pressure cook these till completely cooked and slightly softened. You can add some salt to the beans when you cook them. 

Sunday, May 27, 2012

Veggie/Garden Burger - Another Flexible Recipe

This is a great recipe to get your kids to eat their vegetables. The veggie patty in this recipe includes lots of vegetables as well as soy granules. It is delicious and very nutritious at the same time. Patties are great recipes to use leftovers too. I like to experiment with ingredients in the fridge as well as different vegetables to come up new and innovative ways to make the burger patties at home. Any extra patties can be frozen for a couple of months. They are very handy on days when you are rushed to make a quick meal.

If you don't wish to use these patties in burgers or sandwhiches, you can also make mini-sized medallions as sides to your meal or even as an appetizer which can be relished with some ketchup or green chutney.


Ingredients
2 medium potatoes, boiled and mashed
1 cup of soy nugget granules
5-6 green beans, chopped
1 carrot, cut into fine pieces
1/2 cup broccoli florets
½  cup peas
Green chillies, to taste
1inch ginger
Salt to taste
2 bread slices
1/4 cup rava or bread crumbs
oil to shallow fry the patties

burger bun
onion, sliced
lettuce
tomato, sliced
pepper
salt
ketchup
mustard
cheese slice


Method
Boil the soy granules  in 4 cups of water for 10 minutes. Drain and upon cooling, squeeze water out of the cooked granules. Wash the green beans, carrot, broccoli, peas.  Place these vegetables in a vessel and pressure cook for 1 whistle. Alternately, you can also steam cook the vegetables till soft or cook in the microwave for a couple of minutes till softened.

Make a paste of green chillies and ginger.

Mix together the potatoes, soy granules, pressure cooked vegetables and peas.  Mash all the ingredients together. To this add the chilli and ginger paste and salt. Add bread slices if the resultant mixture becomes watery, else you can skip the bread.  Spread out rava or bread crubms in a flat dish. Roll out the mixture into a small ball and flatten it. Then roll it in the rava or bread crumbs. Shallow fry in a flat pan.


To assemble the burger, apply ketchup and mustard on one half of the bun. Next lay a cheese slice, a lettuce leaf, a couple of onoin rings, a slice of tomato and then the patty. Serve with chips or a fresh salad.


Tips
If you are using frozen peas, wash them and then cook them for a minute or two in the microwave. These are pretty soft already and if you cook them in a pressure cooker, they will turn mushy.
If it is just a little soft, you can add a little cornflour. Also, if you want to avoid wheat and not use bread, substitute cornflour instead of bread.
I have also used some lefover beans or lentils and rice in lieu of soy granules. You can also use a variety of vegetables in the patty.

Tuesday, May 22, 2012

Vegetarian Burrito- An Incredibly Flexible Recipe

This is one of those easy recipes that you can pull together with ready made, store bought ingredients or make most of them a day previously and put them together when you are ready to eat. Another great feature of this recipe is that it is very flexible. You can change many of the ingredients based on what you have in the pantry and your fridge. The main components are tortillas, rice, beans and you can add different vegetable and salsas and make it as decadent or as healthy you want. You will notice that a lot of ingredients in this recipe are optional or ones that can be substituted for something else.


 Ingredients (for 1 burrito)
1 large tortilla - whole wheat/ flour/ corn
2 tbsps cooked rice
2 tbsps cooked beans - red or black beans (can use canned or read tips)
1 tbsp fresh salsa
ready made salsas- to taste (optional)
hot sauce - to taste
avacado (can be used instead of guacamole- optional)
shredded cheese - mexican blend/mozarella/cheddar
sour cream (optional)
guacamole (optional)
pinch of cumin powder
bell pepper, sliced- green, red/orange/ yellow (optional)
onion, sliced (optional)
1 tsp oil
cilantro
salt, to taste


Method
In a pan heat the tsp of oil and once hot, add the sliced onion and cook till softened and light brown. Then add the sliced bell pepper and cook till the bell pepper is cooked through. Alternately you can also cook this on the grill for a smoky flavor.

Add a little oil (optional) in a pan and then add the cooked beans to the pan with a little water (about 2 tbsp). Then add the cumin powder to it and a little salt to flavor these beans. Set them aside. It is now time to assemble the burrito.

Warm up the tortilla. In the center, add the cooked rice. Top it with beans and then add the cooked onions and bell pepper mixture. Next add the salsas that you want. These can be fresh or store bought. Then add guacamole if you have some ready or avocado. It gives a nice decandent taste to the burrito and you can easily skip the sour cream. Then add a dollop of sour cream and sprinkle cheese on it. If you like your burrito hot, then add some hot sauce into the burrito itself. Sprinkle a little cilantro. Then fold the burrito to create a neat packet. A complete meal created in a matter of minutes.


Tips
You can use canned beans, which are pre-cooked. If you want to start from scratch, then soak the dry beans overnight and then cook the beans with water in a covered pan, by boiling it till the beans are softened. Or you can cook the soacked beans in a pressure cooker. It takes about 5-10 whistles in my cooker depending on how well the beans have been soaked and is much quicker than waiting for it to cook in the pan.
The grilled pepper and onions mixture is called Fajita and you can even grill these.  The grilled smoky flavor really flavors the burrito. This addition is optional.
Guacamole or just plain avacado adds a buttery rich taste and is a great substitution to the sour cream. The plus point is that avocado has healthy fat, rich in omega 3. You can also whip up some yogurt and use it instead of sour cream.
When you cook rice, add a little salt to flavor the rice and then you can mix in chooped cilantro into the warm rice which will impart a nice herby flavor to the rice. You can also squeeze some lime on it for additional flavor.
You can also use chapatis instead of tortillas.

Thursday, February 16, 2012

Chole (Cholay/Chana) - Delicious Curried Garbanzo Beans

Chole/ Cholay or Masala Chana is a very tasty dish where chickpeas (also known as garbanzo beans) plays the main role. It is very popular in Indian restaurants and if you can't find it under the curries section, you will definitely find it paired with the puffed, deep fried bread called "Batura/Bature". It is an easy to scale up dish too and generally finds a permanent spot in buffets, in almost all Indian restaurants (especially restaurants outside India).  Hence, it is a fantastic dish to make for a large crowd at home. When I was in college, curried garbanzo was a staple and made at least once a week. However, that was a far cry from what chole should be. It is definitely not something to be cooked in a hurry by throwing various spices in it. And I would highly recommend not using canned beans (unless it is an emergency), especially if you want the end product to be impressive. The following recipe is one that you will be proud to serve to your guests, who will be left smacking their fingers and asking for more (or even the recipe).


Ingredients
1 cup raw/dry garbanzo beans/chickpeas/chana/chole
water to soak the chickpeas completely
1 tea bag
3 tbsp oil
1 black cardamom/badi elaichi
3 bayleaves
1 inch cinnamon piece
10 black peppercorns
4-5 garlic cloves, finely chopped
1 inch ginger, finely chopped
1 cup red onion/ 1 large onion
2 tsp corriander-cumin/dhania jeera powder
1 tsp amchur powder/ dry raw mango powder
1 tomato, diced
2 tsp garam masala
red chilli powder to taste
salt to taste
1/2 cup water (for the gravy - if needed)


Method
In a deep bowl, soak garbanzo beans. Make sure that you are covering the beans with sufficient water and have at least an inch of water above the top layer of the beans. Soak for at least 6 hours (best if done overnight). The beans will absorb the water and swell and the volume will double. Then take these in a deep pan and add a tea bag to it and cover with water and cook. You need to boil the chickpeas till they are softened. There should still be some bite or firmness to the chickpea and it should not get mushy. You can alternately use the pressure cooker (which is a faster method). Once cooked, take the tea bag out and keep this aside.


In another large and deep pan, heat oil. To this add the black cardamom, bay leaves, cinnamon and pepper corns. Let them roast in the oil for a minute till fragrant and then add the ginger and garlic and
fry for another minute. Then add the onions. Now, cook the onions till well browned. It is very important to brown the onions, to get the authentic taste. This should be done on medium heat so that the onions don't burn.


Once the onions are well browned, add the dhania-jeera powder and amchur powder and stir well and fry for a minute. Then add the red chilli powder and then the cooked chickpeas. Retain the water in which the chickpeas have been cooked. Do not add water at this stage. Mix the chickpeas well so that they get coated by the spices. Then add the tomato and about a half a cup of the retained water in which the chickpeas were cooked. Let this cook till the tomato gets cooked and softens. At this stage, add the garam masala.  If the gravy has become very thick, then add a little water and let the gravy boil for a few minutes. Add salt to taste. Serve hot with white rice or bature or naan.


Tips
You need to plan ahead when making chole as the beans need to be soaked at least for 6-8 hours before they can be cooked. The fastest method to cook chickpeas is to cook them in the pressure cooker. It takes about 8 whistles in my cooker to cook the chickpeas or I cook them in the beans mode in my Instant Pot.
I have read many recipes in which a pinch of baking soda is added to the water when it is being soaked. From what I have read, this helps the chickpeas cook faster. However, it is not necessary to do so.
Add a little salt while cooking the beans, and it will get absorbed into the chickpeas making them tasty.
If you noticed, this recipe doesn't call for any chole masala. This is an easy to make recipe which uses whole spices and only garam masala. If you want the chole to be yellow in color, then do not add the tea bag while cooking the chickpeas.
If you do use canned chickpeas, do not use the tea bag. The canned chickpeas are already pre cooked and rather soft, and if you cook them for an additional time with the teabag, they will disintegrate.
If you do happen to burn the onions a little, it will impart a slightly bitter flavor to the gravy. If you detect this, add a tsp of sugar to the gravy and mix well. This will nullify the bitterness.

Tuesday, March 1, 2011

Black Eyed Beans

Black Eyed beans are no-soak beans. They do not need overnight soaking or very long cooking time. This is a simple recipe and delicious too. It takes about  five minutes to put all the ingredients together. If you pressure cook it or use canned beans, the entire recipe takes about 15 minutes including preparation and cooking. It will definitely be a recipe that you will come to rely on. It makes life easier on busy evenings when you are running late. It's faster than ordering a pizza.  It taste great with tortilla or with white rice.


Note: If you are using canned beans do not pressure cook, as these are pre-cooked. Also, the net cooking time will be shorter.


Ingredients
1 cup uncooked black eyed beans or 1 can black eyed beans (these would be pre-cooked)
1 tbsp oil
1/8 tsp mustard seeds
1/8 tsp cumin/jeera seeds
3 tbsp shredded unsweetened dry coconut
3 cloves of garlic, finely chopped
red chilli powder to taste
salt to taste
1/2 tsp sugar
2 cups water (use 1 cup water if using canned beans)


Method
Heat the oil. To this add the mustard and cumin seeds. Once they being to crackle, add the garlic, coconut and stir. Add the uncooked black eyed beans (if using the cooked canned beans, drain and rinse them out) and stir. Add chilli powder, salt and sugar. Add the water and cook till the beans are completely cooked.  If cooking directly in the pressure cooker, cook it till the the appropriate pressure is reached (that is 2 whistles in my cooker) and then turn off the heat.  Once the pressure is released, open the lid and mix well. You can add a little more water and boil it all together, if you want the gravy to be thinner. Serve hot with rice or chapati.

If using the Instant Pot, I use the beans mode and natural pressure release. These are however quick cooking and about 12 minutes in manual mode, high pressure with natural pressure release will also work.

Note: If you cook it in a regular vessel, it will take about 30 mins or more for the beans to cook and become tender.

Tips
This is a recipe which is perfect to cook direcly in the pressure cooker. You can also use canned black eyed peas which are already cooked. If using this, do not cook it in the pressure cooker.