The latest 5 recipes are displayed on the main page. For more recipes, you can browse the archive, click on the labels in the index to the left or use the Custom search below to look for a specific recipe.
Let me start by saying that this is an amazing recipe. It is one of the tastiest Mexican foods that I have eaten in recent memory. It is spicy and has a burst of flavors and everyone in the family absolutely loved it. I am so glad to have found this recipe because it is perfect to use all the roselle hibiscus petals after making tea. And now I have a way to use the large harvest we have had this year. It does not matter if you are using fresh roselle sepals or dried ones in this recipe. The ones in the original recipe were dry whereas I used the fresh ones that I harvested today. The recipe was originally shared by a friend, Ayshica, in a wonderful gardening group called "Gardening in the Desert". She shared this recipe from a YouTube channel called "Views on the road" and highly recommended it. Ayshica is a great cook herself and I trust her food recommendations, so I thought that I had to give this recipe a try.
Now, this recipe requires certain Mexican chillies - Guajillo and Pasilla chillies. After making and eating the tacos I am of the firm belief, that these chillies are a key flavor ingredient for the birria tacos. These chillies lend an earthy taste which reminds me of the mole sauce. Also, when I searched for what birria was and other recipes for birria, I realized that the original version is meat based. The birria is a stew made with the meat and these chillies. However, this version is completely vegetarian and if you use non-dairy cheese, will be a 100% vegan. I did not use any broth or bouillon powder/cubes either and the result was still lip smacking delicious. The roselle sepals add a slight tart flavor. These also make the taco filling and provide that meatiness to the taco, that 3-4 tacos per person was a pretty good serving size for most of the family members. I think any vegetable that retains its texture after being boiled can be a used, like jackfruit or mushrooms.
The way I understand it, birria is a stew and then the meaty portion of the stew is used to fill the taco and then the taco is then grilled/cooked and eaten by dipping it into the consomme or liquid part of the stew. The stew that I made with the roselle sepals was quite soup like. Then I used the roselle sepals and carrots which were cooked in the sauce as the taco filling. And then we dipped the tacos in the soup and also drank sipped it along with the tacos. I also made the chilli oil which was mentioned in the original recipe and modified it based on what I had on hand. The combination of flavors was perfect for a cold weeknights dinner. And so so delicious!!
The highlight of the recipe was that I was able to use a lot of our homegrown produce. Roselle hibuscus was the star of the recipe, but it was great to be able to use homegrown carrots and cilantro as well. If you would like to know more details on growing, harvesting and preserving Roselle Hibiscus, do check out our videos on our YouTube channel, "Gardening and Cooking Made Easy".
How to grow Roselle Hibiscus
How to harvest and store Roselle Hibiscus
Ingredients
For the chilli oil
1/2 cup oil
3 guajillo chillies
2 spicy chillies, dry (I used Indian dry chillies)
1 bay leaf or 1 tsp broken bay leaf pieces
1/2 tsp black pepper
1/4 tsp clove powder
salt to taste
1/4 tsp sugar
For the birria
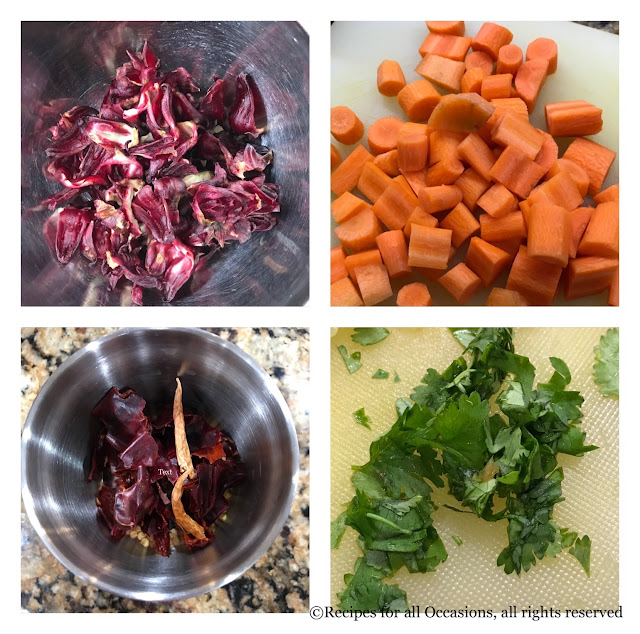
1.5 cups fresh roselle petals. If using dried ones, I would recommend using 1 cup
6-7 carrots, cut into small bite sized pieces, appropriate for filling in the taco
2 tbsp apple cider vinegar
1 medium red onion, cut into half
3 garlic pods, whole
1 pasilla chilli
4 guajillo chillies
10 cups of water
1 bayleaf
salt to taste
1/4 tsp sugar
For the tacos
corn tortillas
cooked roselle sepals and carrots from the birria/stew
finely cut cabbage
finely cut white or yellow onion
cilantro
chilli oil
shredded/grated cheese
Method
To make the chilli oil
Remove the stem of the chillies. In a coffee grinder or blender in which you can grind spice to a fine powder, grind the chillies and the bay leaf into a fine powder. If you want, you can also remove the seeds, however I did not as I wanted the oil to have the heat and spice from the chillies. Heat 1/2 cup of oil (I used olive oil) and once it is warm (do not heat to very high temperature to avoid spices burning), add the chilli and bay leaf powder. Stir, and then add the garlic powder, clove powder, black pepper powder, sugar and salt. Cook all the spices for a couple of mins, making sure to not overheat the oil. Turn off the heat and set aside.
To make the birria/stew
Boil 4 cups of water and pour over the roselle sepals (dried or fresh). Set aside for 15 mins. Strain and use the water to make tea or lemonade. Add 2 tbsp of apple cider vinegar to the sepals, toss them in it and set aside.
In a pressure cooker, Instant Pot or a regular deep sauce pan, addd the remaining 6 cups of water. Then to it add the onion, cut into two halves. Then remove the stem of the chillies and add those to the water along with the garlic cloves. If you don't like too much spice remove most of the seeds of the chillies. Add 1/4 cup of carrots. Then cook this mixture. If you are cooking it in the pressure cooker, cook for 1 whistle. In the instant pot, cook for 5 mins. Naturally release the pressure. If you are cooking it in the saucepan, cover and cook for 10-15 mins once it starts boiling, till the chillies are softened. Now, using a skimmer spoon, fish out the chillies, garlic and onion. Let them cool down a little and blend in the blender to a fine paste. This is your salsa or sauce that flavors the stew.
Add the paste back to the water. Then, add the rest of the carrots, the roselle sepals along with the vinegar and 1 bay leaf and cook for another 10 mins till the roselle and carrots are softened. If using a pressure cooker, cook till it reaches pressure and turn off heat. Instant Pot timing will be 2 mins. Let pressure cookers naturally release pressure.
Taste, add the salt and sugar and stir well. Then fish out the carrot pieces and roselle sepals and place into a bowl. Heat the liquid and boil it for a few mins.
To assemble the taco
Use a brush or spoon and smear the corn tortilla on both sides with the chilli oil. Then filling a tbsp of the roselle, carrot filling, cabbage, onions, cilantro and shredded cheese. On a hot pan, cook the taco on both sides till the cheese melts.
Serve with the consomme/soup part of the stew. Dip the tacos in the soup and eat.
Tips
The chillies are dry, so it is easy to just split the chillies into two and shake them to remove the seeds. Or remove the stem and shake the seeds out. I made corn tortillas with masa harina flour and the taste was amazing using fresh tortillas. If possible, I recommend it. If the taco is opening up (I do tend to overfill it), place a spoon on top of the taco as it cooks on one side. Then as you flip it over and cook on the other side, it should retain its folded taco shape (see photo above). If you are using other vegetables, then I recommend adding tomatoes along with the onions and garlic and puree those as well. Else, add lemon juice to the stew at the end of the cooking, before serving.
It has been years since I have been buying tortillas from the store. Initially, when I was a student, I used to buy whole wheat tortillas which used to be my substitute for chapatis/rotis. When I started making tacos and burritos at home, I started using the corn and flour tortillas. However, it always bothered me that these store bought tortillas had such a long shelf life and a really long list of ingredients. Half of these ingredients seemed to be chemicals that I couldn't even pronounce. If you have been following my blog, you will see that I try to make most of the food from scratch at home. This way I am able to control the content and quality of my food. So, several years ago, I decided I just couldn't buy these tortillas anymore and had to try making them at home. How hard can it be?!
I bought some masa flour, and set off to work. The main hurdle was that I didn't have a tortilla press when I first did this experiment, but I managed to make it work with other equipment (details in the method and tips below), and the result was incredible. They were very easy to make, quick to cook, smelt heavenly (none of that chemical smell of the store ones) and absolutely delicious! I will never need to buy corn tortillas again. For all of those who have toyed with this question, but thought it was too difficult to make, go ahead and take the plunge. It is easier than making bread or chapatis and so worth the effort! Your taste buds and your stomach will thank you.
Ingredients
1 cup instant corn masa flour (masa harina - white corn or yellow corn)
1/8 tsp salt or a pinch of salt
2/3 cup and a few tbsp water
1 thick plastic ziploc bag/parchment paper cut into 2 squares or 2 thick, square plastic sheets (about 8X8 inches) or parchment paper
1 tortilla press OR a heavy pan with a wide flat bottom
Method
Mix the salt in with the flour and then add water. Add a little at a time till a soft yet firm dough is formed. You don't want the dough to be too dry that it crumbles and neither do you want it to be too loose and soft. Divide the dough into 8 equal pieces and cover with a damp cloth or paper towel, so that it doesn't dry up.
Heat your pan on high heat and then keep the temperature at medium-high. Now, take a piece of dough, roll it into a ball, about 1.5 to 2 inches in diameter. If you are using a tortilla press, then line it with 2 sheets of the plastic sheet. Place the ball between the two sheets and then press it till the tortilla is about 5-6 inches in diameter. Now, if you don't have a tortilla press, then place the plastic sheets one on top of the other, on your kitchen countertop or a rolling surface and then place the ball of dough in between the sheets and then flatten it slightly with your palm. Then, take a pan or any heavy vessel which has a large base (larger than the diameter of the tortilla) and then place this pan onto the dough. Make sure to have it in a flat level (parallel to the rolling surface) and then press onto the dough to flatten it. Do this till the dough has been flattened and the tortilla is 5-6 inches in diameter. If needed, you can use a rolling pin to increase the tortilla size. Don't use a rolling pin for too long though, as it makes the tortilla stick to the plastic sheet.
Now, open up the tortilla press/remove the pan and then peel the plastic sheet off the tortilla. Then, flip the tortilla into the palm of one hand and then using your other hand peel off the other plastic sheet and then place it onto the hot pan.
Cook on one side for a couple of minutes, till the edges start to dry out and then flip it over and cook on the other side for 1.5-2 minutes. Then flip it back and cook it completely on the side that had been placed on the pan first. The tortilla will start to puff up as it gets cooked.
Tips You may need less or more water depending on how humid your surrounding is. To dampen the cloth/paper towel, wet it and then squeeze out all the water so that the towel doesn't have any water dripping from it. If the towel is too wet, it will affect the consistency of the dough. I use a cast iron pan to cook these. Masa harina is not the same as the corn flour used to make makke di roti. Masa harina is processed differently, and hence the tastes will vary. However, you can substitue with corn flour if masa harina is not available. Yellow corn masa flour will yield yellow tortilla and the white ones are with the white corn masa flour. Both are delicous.
Rava cake (semolina cake) is one of my most frequently baked cakes at home. It tastes absolutely decadent. This cake is so delicious that it does not need any icing on it. So it is always eaten plain or infused with other flavors. Given how delicious it is, I feel any frosting or icing would detract from its tastiness. In fact every time I have suggested that I try icing the cake, I have heard loud protests of how the icing would make it less tasty.
However, visually this ends up being a plain bake and the recipe gets relegated to being a cake for a regular bake and not for a special occasion. When the family requests that it be baked for special celebrations like birthdays and anniversaries, I have struggled with glamorizing this cake. How do I take a regular cake which can even be eaten at breakfast into a fancy bake for this great occasion.
This cake tastes so good by itself, that in this case an icing would actually reduce the enjoyment of eating the cake. So that was not an option. So I tried adding fondant flowers and decorations to up the glamor, but I wasn't satisfied. Then, I decided to experiment with baking a decoration right into the cake itself.
So, I took the same basic recipe shared many years ago on my blog (see original recipe) and added steps to glamorize the cake. See the method which details the steps on how to embed the design into the cake. You can use the same method described below with other cakes too, which are made with all purpose flour too.
This is an easy method that turns a simple cake into one with a tremendous wow factor!
Ingredients 1.5 cups fine rava/semolina 1 cup milk 1 cup sugar 1 cup yogurt 1/2 cup clarified butter/ghee 1/8 tsp cardamom powder 1/2 tsp baking soda few strands of saffron (optional - don’t use if embedding a design) a pinch of salt ghee for greasing the baking tin
Method
Cut a parchment paper the same size a the bottom of your baking tin. Draw the design you wish to embed into the cake onto a parchment paper. Then grease the baking tin and place the parchment paper onto the base, such that the pencil/pen mark will be stuck to the greased side and the traced outline can be seen from the top view.
Note: the design will get reversed once the parchment paper is flipped into the tin base. When the final cake is taken out, the design will be the same as Keep that in mind when creating an asymmetric pattern. When the cake is flipped out of the
Beat the yogurt and sugar together till the sugar is dissolved. To this add the milk, salt, ghee, rava and mix this together. Keep this mixture aside overnight or at least for 5-6 hours. It tastes better when the yogurt which gets set during the hours turns a little sour.
Preheat the oven to 350F. Grease a baking tin with ghee. Add the baking soda just before you bake. Mix the baking soda well into the batter. Then take about 1/2 to 1 cup of batter in another bowl.
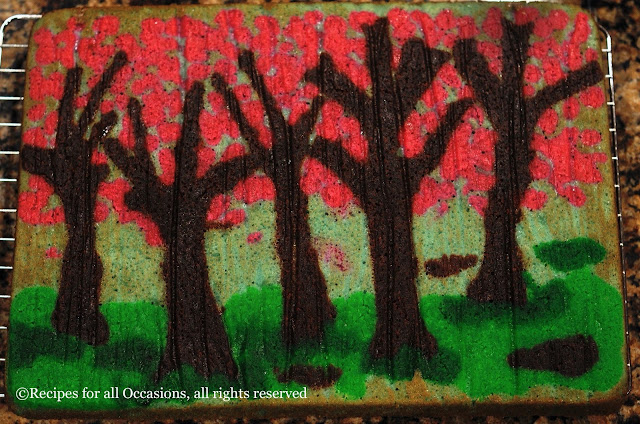
Depending on the design you plan to make, divide it further and using food coloring, color the batter. Then using piping bags, pipe the desired pattern onto the traced design on the parchment base, and fill it in. Then put the tin in the freezer for 15 mins so that the batter sets.
Then remove the pan from the freezer, check that the batter has set and will not flow easily. Then pour the rest of the batter into the tin covering the piped pattern evenly.
Then bake this for 20-30 mins at 350F. Use a knife or skewer and pierce the center of the cake with it. If it comes out clean then the cake is ready.
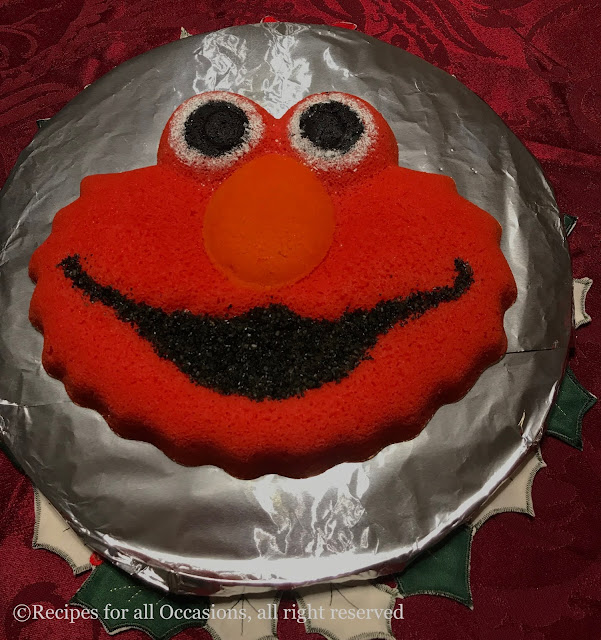
I have also piped out lettering and baked it on a separate baking sheet to decorate cakes.
Tips
If you are adding colors to the batter, use gel based colors if available as they are stronger and will color the batter with less amount of added coloring. Keep in mind that a design can get reversed when baking, so be careful when embedding lettering.