Welcome to my blog

I hope you will find the recipe you are looking for your occasion here.

Now video instructions are available for select recipes and can be accessed at

Gardening and Cooking Made Easy

The latest 5 recipes are displayed on the
main page. For more recipes, you can browse the archive, click on the labels in the index to the left or use the Custom search below to look for a specific recipe.


Search for more results

Custom Search
Showing posts with label vegetables. Show all posts

Friday, March 23, 2018

Samosa Wraps

This recipe came about when I was trying to decide what to cook for dinner one weekday and all I could think of was eating samosas. Deep fried samosas; cooking them on a busy weekday evening in less than an hour's time seemed impossible. And I would have still had to cook something more to make it a balanced complete meal. Instead I decided to add lentil flour to whole wheat flour and make  rotis which would be a nutritious wrap cover. To make sure that it was well balanced with vegetables and a complete meal, I used cabbage and carrot for the stuffing which were the vegetables I was planning to use up that week. And then I roasted these on a flat pan/tava with about a teaspoon of oil per wrap. What could have been a regular roti sabji meal was now transformed into a delicious and exotic fare which the kids enjoyed thoroughly. It turned out so well, that I get requests to make it often.


Ingredients
1/2 cup urad  dal flour
1/2 cup chick pea flour/besan
1/2 cup green mung dal flour
2 cups whole wheat flour
1 tsp salt 
1 tbsp oil
water (1to 2 cups) to knead a dough that is soft to roll out the chapatis
1 napa cabbage head, shredded or finely sliced
1 carrot, grated
1 onion, sliced
2 garlic cloves, finely chopped
2 tsp tava fry masala
1/2 tsp garam masala
Salt to taste
Chili powder, optional, to taste 
1 tbsp oil
Oil to pan fry the samosas 


Method
Combine all the flours in a bowl and mix them. Mix the tbsp of oil and salt in and then add a little water at a time to knead the dough. It should not be too stiff. Cover and let it rest for 20 mins, if you have the time. If it is sticky, add a little more wheat flour.
Now, take a fistful of dough, and roll it out into a thin round roti/chapati/poli. And then roast each chapati till it is partially cooked, a couple of minutes on each side. Since it is going to be cooked again, make sure to not cook them through completely. Stack these up and keep aside. 

In a flat and large saucepan, heat up the remaining tbsp of oil and add garlic and onion to it when hot. Stir fry them till the onion is transparent and then add the carrot and napa cabbage. Let it cook for a couple of minutes. Then add the tava fry masala, garam masala and salt (and chili powder if using). Mix well and let it cook till the cabbage is cooked through. The water should evaporate as it cooks. If there is any water left after cooking, drain it.

Heat up a flat saucepan or tava on which you can pan fry the samosas. Now cut each partially cooked chapati into a semi circle. Roll it up into a cone and then add the napa cabbage and carrot stuffing into the cone. Since the chapati is partially cooked, you will not be able to seal the cone opening. Spread a couple of tsps of oil onto the pan surface. Now place the stuffed chapati cone onto the pan with the open side face down, so that the open side gets cooked first. Now let this cook on medium heat till the chapati is cooked well and starts to crisp up. Then flip it over and cook the other side till crisp. You can cook a few samosa cones at a time. Be careful when flipping it over to make sure that the stuffing doesn't fall out and add oil as needed while pan frying them.  Serve warm with ketchup.

This can be a main meal for a weekday dinner as it is a wholesome, healthy and tasty meal.


Tips
Since the dough has a lot of lentil flour, the resultant dough maybe a little sticky. You can use some wheat flour or oil to reduce the stickiness.
Napa cabbage has a lot more water content than regular cabbage and hence a large open pan will provide enough surface area for the quick evaporation of the water that is released from the cabbage. If you stuff uncooked chapatis you will be able to seal it properly, however since the cabbage will retain some water, the result may end up being soggy and uncooked. Hence the chapati is partially cooked to reduce the moisture content. 
Place the cooked ones on a wire rack if possible as you cook the entire batch. This will help keep the samosa crisp till it is served. You can use the same recipe with a variety of vegetables. If you cannot find tava fry masala, add 1/4 tsp of fennel powder or 1/2 tsp of fennel seeds and 1/4 tsp of aamchur instead and increase the quantity of the garam masala to 1 tsp.

Wednesday, March 21, 2018

Vegetable Croquettes

This is a delicious recipe which is full of nutritious and delicious vegetables, has chickpea flour and bread crumbs and can make for a complete meal on a busy weekday. These are cooked in an appe pan also known as an abelskiver pan to keep them nutritious without impacting taste or texture. You can also deep fry them.


Ingredients
1/2 small cauliflower
3 potatoes, peeled
2 carrots, peeled
1/2 inch ginger, grated
2 garlic cloves, finely chopped
1/2 onion, finely chopped
15 green beans
1 green chili (can increase to make it spicy)
2 tsp garam masala
1/4 tsp haldi
1 tsp cumin powder
1/2 tsp dhania powder
Salt to taste
2 cups panko bread crumbs/ regular bread crumbs 
1/2 cup besan flour
Rava/semolina and bread crumbs to coat the croquettes
Oil


Method
Chop all the vegetables (except onion, ginger and garlic) and put them in a pressure cooker vessel. Pressure cook for 2-3 whistles till the vegetables are mushy and completely cooked. Drain any water released from the vegetables and mash the vegetables. Then add the seasonings - salt, chili, ginger, garlic, onion, garam masala. Mix it wee. Then add the bread crumbs and besan. Taste and adjust salt and if you want to make it spicy you can add chili powder or more green chilies. Mix all of these ingredients well. The resultant mixture shouldn't be sticky but should come together like a dough. Spread bread crumbs or rava on a plate. I made some flat patties that were coated in breadcrumbs and rolled the ball shaped croquettes in rava. Rava can withstand the heat from the cast iron appe pan better than the breadcrumbs and the outer crust doesn't burn or char while the inner part of the croquette ball is cooked. 

Heat the appe pan and add a little oil to each appe mold. Place the croquette balls in the appe and roast them evenly by turning them throughout the process on medium heat. Add a few drops of oil as necessary when rotating the balls. 

Cut croquette to show how a completely cooked croquette looks from the inside


You can also flatten them into patties and roast them on a pan. To cook the flat patties, I added a couple of teaspoons of oil to a pan and roasted them well on both sides, till the bread crumb coated crust was golden brown. 

You can also deep fry these croquettes on medium heat.


Tips
You can steam cook or boil the vegetables till cooked to a soft texture where they can be mashed.

Tuesday, October 23, 2012

Paneer Khurchan - Spiced Cottage Cheese

Paneer khurchan is a relatively new find for me. I have been eating various curries and dishes (spicy and sweet) made from paneer for years, ever since I can remember. However, I hadn't heard of this dish till about a couple of years ago. My husband was reminiscing about his good old college days and he mentioned that occasionally whenever his friend and he went out to dinner, this was a dish they always used to order. Then he asked me, if it was something that I could make. Of course, never having eaten sit, I thought I would give it a shot based on his description. I am not sure if the final result is exactly what he ate, but it turned out really good. It has become one of my go to recipes when I invite guests. It is easy to make and very tasty.


Ingredients
1 green bell pepper (medium), sliced into strips
1 red/yellow/orange (or a mix of colors) bell pepper, sliced into strips
1 tomato, sliced into strips
a 3X3X1 inch slab of paneer (if using ready made). If you make it at home then paneer resulting from about 1-1.5 litre of milk. Approximately 1.5 to 2 cups.
3 cloves of garlic, ground
1 medium red onion, sliced into strips
1 tbsp oil
1/8 tsp cumin seeds
1/4 cup tomato puree (or puree 2 tomatoes)
1/2 - 1 tsp red chilli powder, to taste
salt to taste


Method
Heat the oil in a flat pan. Then add the cumin seeds. Once they start to crackle, add the onions and garlic. Fry it for a minute and then add the bell pepper slices. Stir fry for another minute and then add the tomato strips. Once the vegetables are partially cooked (about 2-3 minutes), add the tomato puree, chilli powder and the paneer. If using ready made paneer, cut it into small pieces and add it. If the paneer is freshly made, just add it without shaping and cutting it. Add salt.
Cook on low to medium heat. The paneer will start sticking to the base of the pan. Scrape it off and keep stirring it. Eventually the paneer will start melting and get scrambled. Cook till the paneer and vegetables are cooked through completely. You will get a nice buttery  fragrance as the paneer browns slightly. Do not let it burn. Make sure to brown the paneer a little. Do not stop the cooking process as soon as the paneer has melted and gotten scrambled. The browning adds a lot of flavor to the dish. Serve hot with roti or naan.


Tips
If you are using fresh paneer, you need not squeeze out all the whey water from the paneer. You can just drain it and then add the paneer to the vegetables. The water will evaporate as the paneer cooks down. Make sure to turn down the heat once the paneer reaches the scrambled stage as it can burn easily as it starts to brown and get stuck to the base of the pan. The recipe to make paneer at home can be found here.
You can grind up the leftovers and use it as stuffing for parathas the next day. 

Sunday, September 16, 2012

Shahi Paneer - Cottage Cheese in a Delicious, Rich, Sauce

Shahi paneer is a very delicious curry/gravy preparation. The curry is a rich sauce, made with cashewnuts. "Shahi" means royal and it is truly a dish fit to be served to a king. It is a very popular dish and generally found at most Indian restaurant. The gravy is milder than a brown/red curry preparation and has a slight sweetness due to the use of cashwenuts. It has a light orange color and the authentic preparation is generally colored using saffron, though most of the versions that you find in restaurants are colored a deep orange with food color.

It is a dish that will always be a hit with your guests. Serve it hot with naan or tandoori roti.


Ingredients
2 cups cubed paneer
2 tbps oil
1 tsp ghee or butter
5 black peppercorns
1 2 inch cinnamon stick
3 cloves
2 bay leaves
1 large red onion, cubed (else use 2 medium red onions)
1/4 cup raw cashwenuts
1/2 cup water
3 garlic cloves
1 inch ginger
2 green chillies, to taste
1/4 cup yogurt
1/4 cup cream
1 pinch saffron
1/2 tsp garam masala
salt to taste
3 green cardamoms


Method
Boil the onion in some water till it is cooked and pink, then drain the water. Alternately, you can microwave it for about 2 mins, till the onion is softened. Then puree it in a food processor or mixer. Then make a paste of the cashewnuts. Add about 1/2 cup of water to grind the cashews.
Whisk the yogurt so that it is smooth.
In a non-stick pan, add the ghee then shallow fry the cubed paneer pieces till the paneer pieces are lightly browned. Grind the cardamom seeds to a fine powder.

In a deep pan, heat the oil and to this add the cinnamon, bay leaves, cloves, and peppercorns. Cook for a couple of minutes till the spices are fragrant and  then add the chillies and the onion puree. Cook for a few minutes. Meanwhile make paste of ginger and garlic and add it to the pan and cook the mixture for a few minutes. The raw smell should disappear, but the don't over cook the gravy. The color of the gravy should remain pinkish white. Cook on low heat, so that you don't burn the gravy or down brown it.   Next add the whisked yogurt to the cooked onion gravy and cook for a couple of minutes till it gets incorporated into the gravy. Next add the cream and a pinch of saffron to the gravy. Cook it all together for a minute and then add the garam masala and cook for another minute. Then, add the cooked paneer pieces and cook it all together for a minute or so.

Sprinkle the cardamom powder over the curry before serving.


Tips
Soak the cashews for a few hours. Then it will be easier to grind them into a fine paste. It is important that your gravy doesn't smell like raw onion or garlic, else it will not taste good. If you don't have a non stick pan to cook the paneer, then add a little more ghee to the pan so that the paneer pieces don't stick to the pan and disintegrate. You can skip this step entirely, if you prefer to have your paneer in its original softer form. You can use readymade paneer or make paneer at home. The recipe can be found here.

Thursday, July 12, 2012

Bisibele Bhath - A Rice Delicacy from Karnataka with a twist

Bisibele bhath is a speciality from Karnataka. It is a rice and dal preparation which is akin to "khichadi" another dal and rice preparation. My mom used to make this recipe when I was a child and I remember not really liking it because it had so many vegetables. She used to serve it with a lot of ghee (clarified butter) though, which used to make it finger licking delicious. Now that I am older and wiser, I understand the beauty of this dish. First, it is a one pot meal. Second, it has all the nutritional components, it has proteins from the lentils/dal, carbohydrates from rice and you can add many vegetables to it which take care of the vitamins and fiber aspect. And best of all, it is all cooked together with yummy spices in one single pressure cooker. It is a perfect dish for that very busy weekday and you can have the satisfaction of serving something healthy and good.


I make it in the fastest way possible and that is what this recipe is about. I use store bought spices. MTR brand's Bisibele Bhath masala is easily available in the Indian store and I generally have a packet of this at home. Next, I cut vegetables that I have on hand if I have time, or I open a pack of frozen mixed vegetables ( generally contains green beans, carrots, peas and corn) and use that. That makes it easy to cook and absolutely delicious too. The twist in this recipe is that I experimented with a new grain instead of rice this time. I replaced the rice entirely with quinoa and make the dish using the exact same method and I must say the result was amazing. If it had been a blind tasting, I couldn't have differentiated between the one made with rice and one made with quinoa. I am thrilled that I have been able to make this dish even healthier. The recipe and method stay exactly the same irrespective of whether you use rice or quinoa. So here goes.


Ingredients
1 tbsp ghee or oil
1/8 tsp mustard seeds
1/8 tsp cumin seeds
a pinch of asafoetida/hing
7-8 curry leaves
1-2 green or red chillies, to taste
1 onion, diced into small pieces
1 tomato, diced into small pieces
2 cups of frozen vegetables mix (washed) or you can cut fresh vegetables like potato, carrots, green bell pepper, green beans etc. into bite sized pieces
1 cup tur dal/pigeon peas
1 cup rice or quinoa
4-5  tsp bisibele bhath masala
1 tsp tamarind pulp (you can use store bought pulp or make fresh paste)
salt to taste
6 cups water


Method
Mix the dal and rice/quinoa and rinse the mixture 2-3 times with water and set aside.
In a pressure cooker, heat the oil and add the mustard and cumin seeds. Once they start to crackle, add the hing and curry leaves and chillies. Next add the onions and let them cook. Once they start to turn a little brown, add the tomatoes and let this cook till the tomatoes are cooked through. Then add the diced vegetables mix and stir. Let the vegetables fry for a minute and then add the dal and rice/quinoa mixture and mix all the ingredients well. Then add the bisibele bhath masala to this and again mix well so that all the vegetables and grains are coated with the masala. Then add the water, the tamarind paste and salt. Stir once and then close the lid on the pressure cooker and cook it based on how much time it takes to cook tur dal in your cooker. It takes about 3-4 whistles in my cooker. Serve this hot with ghee/clarified butter, accompanied with some raita and chips or papad.


Tips
Bisibele bhath when hot is runny and very soft. It thickens as it cools down.
Quinoa is rather small, so when you rinse it, it is difficult to drain the water using your fingers or a colander. So I use a tea strainer to catch the quinoa and drain the water.
To make tamarind paste from tamarind, soak a lime sized ball of tamarind in a little warm water (just enough to cover it). You can even microwave it for 20-30 seconds. Then squeeze out the pulp and use the tamarind. Cut the green chillies lengthwise, so they will be easy to spot and you can remove it later. I generally taste a little bit of the water to determine if I need to add more salt or spices when I make such rice dishes.

Monday, July 9, 2012

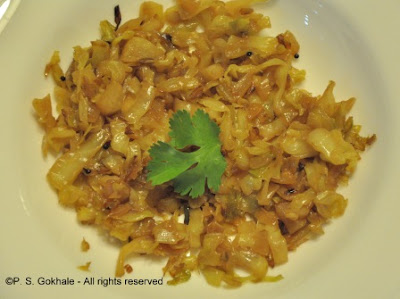
Cabbage Stir Fry

This is one of the most basic recipes.  This is a recipe that you can use with almost any vegetable to give it an Indian touch. It has minimal ingredients and spices and is a healthy and delicious recipe.  The tempered seasoning gives it the wonderful taste. You can shred the cabbage or dice it into smaller pieces and then use it.  Whenever I make this recipe, it always reminds me of a friend who used to sit patiently for a long time and cut the cabbage into really tiny pieces. I never had the patience to do that and used to generally shred the cabbage into longer strips. This time around, when I started cutting the cabbage, I remembered her and decided to cut it into smaller pieces.  I will probably revert back to longer strips the next time around just to save some time, but any kind of variety is always good.


Ingredients
1 tbsp oil
1/8 tsp mustard seeds
1/8 tsp cumin seeds
a ping of asafoetida/hing
1/8 tsp turmeric powder
1-2 green chillies, slit lengthwise, to taste
1 onion, sliced or diced (cut to match the cabbage)
1/2 cabbage, shredded into strips or diced
salt to taste
1/2 tsp sugar (optional)


Method
In a large pan, large enough to hold all the cabbage, heat the oil. To this add the mustard and cumin seeds. Once they start to crackle, add the hing and green chillies. Then add the onions and cook till the onions are soft and transluscent, add the turmeric and mix well. Then add the cabbage and mix well to coat the cabbage with the seasoning and then cover the pan with a lid and let the cabbage cook on low heat. Stir it occasionally and let it cook covered till it is has softened and looks completely cooked. Then remove the cover and add the salt and mix. At this stage, you can also add the sugar, if you want. Cook for a minute or two more. Serve hot with chapati/roti or as a side.


Tips
Sometimes you forget to stir the cabbage and it sticks to the base of the pan and it may turn a light brown shade. As long as it has not burnt and totally become black, if you mix the cabbage well and then continue to let it cook completely, the cabbage will get a nice smoky, caramelized taste.
I try to add the turmeric after adding one ingredient to the oil (like onion), so that it doesn't burn. However, if I do add turmeric directly to the oil, I add the vegetable that I am cooking immediately, to prevent the turmeric from burning. It takes just a few seconds for it to burn completely in the hot oil, so be careful.
Also, do not add water to this recipe. Even if you are tempted to add water to the cabbage thinking how can I cook it covered for so long, without water, what if it burns, resist the temptation. Cabbage contains a lot of water and if you add more, it will spoil the taste and texture of the cabbage. Just make sure to cook it on low heat, and keep an eye on it and stir often so that it doesn't burn.

Saturday, June 23, 2012

Stir Fried Sphagetti Squash/ Sphagetti Squash Upma

This is a recipe that I made up trying to think of different ways to use sphagetti squash. Now, this squash is called sphagetti squash because when it is cooked, the squash can be separated into sphagetti type strands. It is a great substitute for sphagetti and tastes great with marinara sauce (see recipe).   I had a lot of cooked sphagetti squash left over and was wondering what other recipes could I use it in. I was inspired by "vermicelli upma" which is vermicelli noodles with Indian seasoning and decided to try something similar with the sphagetti squash. The result was awesome. I also tried serving it as a vegetable side with rotis and it tasted great.


Ingredients
1 sphagetti squash, cooked and separated into strands
1 onion, diced (optional)
1 tbsp oil
1/8 tsp mustard seeds
1/8 tsp cumin seeds
1 tsp urad dal
5-6 curry leaves
a pinch of asafoetida/hing
1/4 tsp turmeric
2 tbsp peanuts (optional)
salt to taste


Method
Heat the oil and add the mustard and cumin seeds. As the mustard seed crackles, add the hing, urad dal and let the urad dal turn a light brown. Then add the curry leaves. Next add the peanuts and stir fry for a minute. Then add the onions if you are using them. Cook the onions till transparent and lightly browned. Then add the turmeric, mix and then add the sphagetti squash. Mix thoroughly so that the squash is covered with the seasoning and salt. Though the squash is cooked, let it cook with the seasoning so that it gets a nice flavor. You can even let a little of the squash touching the base of the pan brown. It gives it a nice caramelized flavor. Serve hot. You can serve it as a side with chapati/roti. It also tastes great on its own as a main dish and can be eaten as a snack as well.


Tips
The baked method of cooking the sphagetti squash makes for nice dry squash, however it is a lenghty method. An alternate way is to pressure cook it.  Add a little water to your pressure cooker (enough so that the cooker will function properly), then put the halved, cleaned squash skin side down so that the skin is in the water and the rest of it is above it.  Then pressure cook it. In this method, the squash may get a bit watery, however it is fast and if you are going to cook it further in an open pan (like in the recipe above), then the squash will dry out as it cooks.
You can skip the onions and just add the squash directly into the seasoning. This preparation also tastes great.

Friday, June 22, 2012

Gavar Ani Bhoplya Chi Bhaaji - Cluster Beans with Banana Squash/Pumpkin

I am amazed at the large variety of squashes and pumpkins that exist. I was only aware of one kind of a pumpkin while growing up. When anyone said that they had made a pumpkin curry, it really meant that they had cooked "laal bhopla" (in Marathi) or "kaddu" (in Hindi). And squash really boiled down to "bottle gourd".  Moreover, I was not fond of pumkins so I stayed as far away as possible. It was the similar case with cluster beans which are known as "gavar" (in Marathi) or "guvar" (in Hindi). Of course times have changed, my palette has expanded and I find that any vegetable can be made to taste good. I enjoy the challege and experimenting with new varieties.

A couple of weeks ago I found a slice of "banana squash" in the local market, which upon closer inspection turned out to be the familiar "laal bhopla". I got nostaligic, remembering how I used to fuss when I had to eat it and decided to give it a second chance. I was debating how to use it when I remembered a preparation that I had eaten at an aunt's house when I was a kid. It had my two least liked vegetables "pumpkin" and "cluster beans", but the taste had been amazing and I had relished it. Luckily I had a packet of frozen cluster beans in my freezer, so I decided to recreate that recipe. It came out very close to the taste I remember and I enjoyed it. I also tried out another variation of cooking just the squash by itself, but that is another post.


Ingredients
1 tbsp oil
1/8 tsp mustard seeds
1/8 tsp cumin/jeera seeds
1/2 tsp fenugreek/methi seeds
a ping of asafoetida/hing
1/4 tsp turmeric
2-4 dry red chillies (to taste)
salt to taste
2 cups diced banana squash/laal bhopla/kaddu
1.5 cups cluster beans, cut into 1/2 to 1 inch pieces (if using frozen, they are already precut)
1 tsp goda masala (optional)
1 tbsp groundnut/peanut powder
1/2 tsp sugar


Method
Heat oil and add mustard and cumin seeds. Once they crackle, add the methi seeds and hing and red chillies. Next add the turmeric and immediately add the cluster beans. Do not let the turmeric cook in the oil for too long as it burns almost very fast. Stir and then add the diced banana squash pieces. Stir well, lower the heat and cover the pan. Let the vegetables cook till soft, stirring occasionally. Once the vegetables are cooked through, add the goda masala, salt, peanut powder and mix well. Add sugar and stir. Serve hot with chapati or roti.


Tips
If needed, you add a couple of spoons of water if the vegetables are browning too fast without getting cooked through. This is more likely to happen if you are using a steel pan versus a non-stick one. If you have a lot of banana squash, you can freeze the diced pieces in a freezer safe bag/box. If you don't have goda masala, use dhania-jeera (corriander-cumin) powder instead.

Sunday, May 27, 2012

Veggie/Garden Burger - Another Flexible Recipe

This is a great recipe to get your kids to eat their vegetables. The veggie patty in this recipe includes lots of vegetables as well as soy granules. It is delicious and very nutritious at the same time. Patties are great recipes to use leftovers too. I like to experiment with ingredients in the fridge as well as different vegetables to come up new and innovative ways to make the burger patties at home. Any extra patties can be frozen for a couple of months. They are very handy on days when you are rushed to make a quick meal.

If you don't wish to use these patties in burgers or sandwhiches, you can also make mini-sized medallions as sides to your meal or even as an appetizer which can be relished with some ketchup or green chutney.


Ingredients
2 medium potatoes, boiled and mashed
1 cup of soy nugget granules
5-6 green beans, chopped
1 carrot, cut into fine pieces
1/2 cup broccoli florets
½  cup peas
Green chillies, to taste
1inch ginger
Salt to taste
2 bread slices
1/4 cup rava or bread crumbs
oil to shallow fry the patties

burger bun
onion, sliced
lettuce
tomato, sliced
pepper
salt
ketchup
mustard
cheese slice


Method
Boil the soy granules  in 4 cups of water for 10 minutes. Drain and upon cooling, squeeze water out of the cooked granules. Wash the green beans, carrot, broccoli, peas.  Place these vegetables in a vessel and pressure cook for 1 whistle. Alternately, you can also steam cook the vegetables till soft or cook in the microwave for a couple of minutes till softened.

Make a paste of green chillies and ginger.

Mix together the potatoes, soy granules, pressure cooked vegetables and peas.  Mash all the ingredients together. To this add the chilli and ginger paste and salt. Add bread slices if the resultant mixture becomes watery, else you can skip the bread.  Spread out rava or bread crubms in a flat dish. Roll out the mixture into a small ball and flatten it. Then roll it in the rava or bread crumbs. Shallow fry in a flat pan.


To assemble the burger, apply ketchup and mustard on one half of the bun. Next lay a cheese slice, a lettuce leaf, a couple of onoin rings, a slice of tomato and then the patty. Serve with chips or a fresh salad.


Tips
If you are using frozen peas, wash them and then cook them for a minute or two in the microwave. These are pretty soft already and if you cook them in a pressure cooker, they will turn mushy.
If it is just a little soft, you can add a little cornflour. Also, if you want to avoid wheat and not use bread, substitute cornflour instead of bread.
I have also used some lefover beans or lentils and rice in lieu of soy granules. You can also use a variety of vegetables in the patty.

Thursday, February 16, 2012

Chole (Cholay/Chana) - Delicious Curried Garbanzo Beans

Chole/ Cholay or Masala Chana is a very tasty dish where chickpeas (also known as garbanzo beans) plays the main role. It is very popular in Indian restaurants and if you can't find it under the curries section, you will definitely find it paired with the puffed, deep fried bread called "Batura/Bature". It is an easy to scale up dish too and generally finds a permanent spot in buffets, in almost all Indian restaurants (especially restaurants outside India).  Hence, it is a fantastic dish to make for a large crowd at home. When I was in college, curried garbanzo was a staple and made at least once a week. However, that was a far cry from what chole should be. It is definitely not something to be cooked in a hurry by throwing various spices in it. And I would highly recommend not using canned beans (unless it is an emergency), especially if you want the end product to be impressive. The following recipe is one that you will be proud to serve to your guests, who will be left smacking their fingers and asking for more (or even the recipe).


Ingredients
1 cup raw/dry garbanzo beans/chickpeas/chana/chole
water to soak the chickpeas completely
1 tea bag
3 tbsp oil
1 black cardamom/badi elaichi
3 bayleaves
1 inch cinnamon piece
10 black peppercorns
4-5 garlic cloves, finely chopped
1 inch ginger, finely chopped
1 cup red onion/ 1 large onion
2 tsp corriander-cumin/dhania jeera powder
1 tsp amchur powder/ dry raw mango powder
1 tomato, diced
2 tsp garam masala
red chilli powder to taste
salt to taste
1/2 cup water (for the gravy - if needed)


Method
In a deep bowl, soak garbanzo beans. Make sure that you are covering the beans with sufficient water and have at least an inch of water above the top layer of the beans. Soak for at least 6 hours (best if done overnight). The beans will absorb the water and swell and the volume will double. Then take these in a deep pan and add a tea bag to it and cover with water and cook. You need to boil the chickpeas till they are softened. There should still be some bite or firmness to the chickpea and it should not get mushy. You can alternately use the pressure cooker (which is a faster method). Once cooked, take the tea bag out and keep this aside.


In another large and deep pan, heat oil. To this add the black cardamom, bay leaves, cinnamon and pepper corns. Let them roast in the oil for a minute till fragrant and then add the ginger and garlic and
fry for another minute. Then add the onions. Now, cook the onions till well browned. It is very important to brown the onions, to get the authentic taste. This should be done on medium heat so that the onions don't burn.


Once the onions are well browned, add the dhania-jeera powder and amchur powder and stir well and fry for a minute. Then add the red chilli powder and then the cooked chickpeas. Retain the water in which the chickpeas have been cooked. Do not add water at this stage. Mix the chickpeas well so that they get coated by the spices. Then add the tomato and about a half a cup of the retained water in which the chickpeas were cooked. Let this cook till the tomato gets cooked and softens. At this stage, add the garam masala.  If the gravy has become very thick, then add a little water and let the gravy boil for a few minutes. Add salt to taste. Serve hot with white rice or bature or naan.


Tips
You need to plan ahead when making chole as the beans need to be soaked at least for 6-8 hours before they can be cooked. The fastest method to cook chickpeas is to cook them in the pressure cooker. It takes about 8 whistles in my cooker to cook the chickpeas or I cook them in the beans mode in my Instant Pot.
I have read many recipes in which a pinch of baking soda is added to the water when it is being soaked. From what I have read, this helps the chickpeas cook faster. However, it is not necessary to do so.
Add a little salt while cooking the beans, and it will get absorbed into the chickpeas making them tasty.
If you noticed, this recipe doesn't call for any chole masala. This is an easy to make recipe which uses whole spices and only garam masala. If you want the chole to be yellow in color, then do not add the tea bag while cooking the chickpeas.
If you do use canned chickpeas, do not use the tea bag. The canned chickpeas are already pre cooked and rather soft, and if you cook them for an additional time with the teabag, they will disintegrate.
If you do happen to burn the onions a little, it will impart a slightly bitter flavor to the gravy. If you detect this, add a tsp of sugar to the gravy and mix well. This will nullify the bitterness.

Friday, August 19, 2011

Mushroom Soup

When I was younger, I didn't like mushrooms. Then sometime during my teens, I tasted them on top of a pizza and started liking them. Then, I tried the mushroom soup that my Mom made and I loved it. I still remember the last time I ate the one made by Mom. It was nine years ago and I still associate it with warmth, love and comfort.  So, this is a recipe I turn to during the cold months or when I want something that will fill my tummy and soul with warmth. Mushrooms are high in proteins, so it is a very nutritious soup as well. I usually make a leaner version by skipping the cream, but addition of cream towards the end of the cooking process is a must for special occasions.


Ingredients
15-20 button mushrooms, sliced
1 tbsp butter or olive oil
1/2 onion, diced
2 garlic cloves, chopped
salt to taste
some cream or milk to finish off the soup, to taste
1-2 cups of water


Method
Heat butter or olive oil in a pan. Add the garlic and onion to it and sautee. Cook the onion till it is transluscent. Keep aside some mushroom slices and add the rest to the pan and cook till the mushrooms are softened. Then, puree this, adding water as needed. The soup should not be too watery. Then add the milk or cream to the pureed soup and heat. Add, the remaining mushroom slices. Add salt and stir. Turn off  the heat once it starts simmering and the mushroom pieces become tender. Serve hot. Pair it with a slice of bread for a complete and quick meal.


Tips
I have always heard everyone say that you should not wash mushrooms, but just wipe them off with a damp towel. However, I wash the mushrooms and immediately wipe them before cutting. I have not noticed any issues with doing that. If the stem of the mushroom feels too stocky, just use the cap.