Welcome to our sixth episode of the Culinary Tour of the World. This post takes us to the Carribean islands of Antigua and Barbuda (Antigua is pronounced as "Antigah"). Antigua and Barbuda are islands in the West Indies. As I was researching the cuisine, I learnt that there are many dishes which are similar across the various Caribbean islands like fungie. There are many seafood and other meat dishes which have a variety of vegetables too and and fresh tropical fruits are aplenty! A couple of dishes that I observed were spoken of when speciality from Antigua was discussed in some Caribbean food groups, one was home made ginger beer and the other was ducana. I bought the ingredients to make ginger beer, which was essentially a lot of grated ginger, sugar and water to create a ginger drink (non-fermented), but then realized that this is a commonly brewed drink on other islands too. So, finally I decided to make ducana which is a speciality made with coconut and sweet potato and usually served along with saltfish and vegetables.
Welcome to my blog
I hope you will find the recipe you are looking for your occasion here.
Now video instructions are available for select recipes and can be accessed at
Gardening and Cooking Made Easy
The latest 5 recipes are displayed on the main page. For more recipes, you can browse the archive, click on the labels in the index to the left or use the Custom search below to look for a specific recipe.
Now video instructions are available for select recipes and can be accessed at
Gardening and Cooking Made Easy
The latest 5 recipes are displayed on the main page. For more recipes, you can browse the archive, click on the labels in the index to the left or use the Custom search below to look for a specific recipe.
Search for more results
Custom Search
Showing posts with label coconut. Show all posts
Friday, March 12, 2021
Culinary Tour of the World: Episode 6: Antigua and Barbuda - Ducana
Link to the video recipe
Ingredients
1/2 cup coconut, grated (fresh or frozen and thawed)
1/2 cup sweet potato, grated (Japanese sweet potato or one which has cream colored flesh)
1/3 cup sugar
2 tbsp water
1/2 to 2/3 cup all purpose flour
1/4 tsp nutmeg powder
1/4 tsp ginger powder
1/2 tsp vanilla essence
banana leaves and foil to wrap the ducanas
water to boil the ducanas
Method
In a bowl, mix together the coconut, sweet potato and sugar. Mix well and then add the water, then add the spices and vanilla essence. Then mix in the all purpose flour. Add only a little to begin with and mix it to see how thick the mixture gets. It should be like a thick cake batter. I needed to use only about 1/2 cup of flour. If you live in a humid climate, or if there is a greater moisture content in your ingredients, you may need to use more flour.
Place a banana leaf (about 8"X4") on top of a foil which has similar dimensions. Add some batter (1/4th of the total) to the center and shape it into a rectangle (see video). Then fold the leaf over the batter, to create a rectangular packet. Then fold the foil to create a rectangular packet.
Boil water in a saucepan or large pan. To this add the foil packets and cook for about 45 mins to an hour. Remove the packets from water and drain well. Serve warm. It is not usually topped with butter or ghee, but adding a dollop really enhances the dish.
Tips
Double the ingredients to make 8 ducanas. This recipe will yield 4 ducanas which are about 2 inches by 4 inches in size. You can use desiccated coconut too, if you cannot find fresh coconut. However, soak it in a little milk before using it. The amount of flour you use will depend on the moisture content of the rest of the ingredients. You need enough to create a thick batter. Too much may yield to a stiff dumpling.
Labels:
antigua and barbuda,
coconut,
dessert,
ducana,
side,
sweet,
sweet potato
Saturday, June 10, 2017
Garlic Coconut Chutney
This is a chutney that is an absolute must with Batata Vada or Vada Pav to get the authentic taste of the dish. It is a perfect side to any Indian meal and has a slight pungent taste from the garlic. This is made mainly with two ingredients, viz. garlic and coconut but with a couple of added spices, this packs a ton of flavor.
Whenever I eat batata vada with this chutney, it takes me to childhood memories. We used to take trips during summer vacations, and many of those used to be between Pune and Mumbai. We used to take the train and the highlight of the train journey for me was the delicacies we would be able to eat on the way. My parents did not encourage eating street food and used to prefer home made food. Since, this was one of the rare times we got to eat these foods, I used to look forward to it eagerly. The train used to stop at Karjat station for just a few minutes. This was famous for the batata vadas that one could buy at the station and the taste was just amazing. During that brief halt, my dad used to get off the train and buy vada pav, which used to be served with a generous amount of this chutney mixed with bits of the fried vada batter. These few moments filled with excitement and thrill as the train stop was literally just a few minutes and many a times it used to start moving without my dad in sight. Every time my heart would be pounding with worry that he had been left behind. And I still remember the sense of relief when I used to see him walking with the packed of the vadas in his hand. At that age, I didn't like the vada pav combination and used to enjoy the vadas with this chutney.
It has been decades since I made that journey, but that taste lingers on and whenever I make batata vadas, whether there is pav or not, this chutney always accompanies it, helping me rejoice in my nostalgia.
Ingredients
1/4 cup garlic cloves
3/4-1 cup dessicated coconut, shredded/grated
salt to taste
red chilli powder to taste, I added 1/2 tsp
1/2 tsp sugar
Method
Cut the garlic cloves into smaller pieces for ease of grinding. Then put all the ingredients in the blender and using the pulse function, grind this to make a finer consistency. Do not add water and do not make a paste. Open the mixer every few pulses and scrape it down and mix up the chutney. The coconut threads should still show a little and the garlic gets a pasty texture. You can over blend in the mixer, but it will still taste great.
The best texture or consistency is obtained by mixing it using a mortar and pestle, which is how I made it this time. I make it both ways depending on how much time I have.
Store this in an airtight container, in the fridge and it will last you over a month.
Tips
The garlic has a pungent smell, so be careful of how much chilli powder you add. You can always add more and mix it into the chutney after it has been ground. The scraping and mixing of the chutney while in the mixer, will prevent the coconut from getting pasty and releasing oil.
Whenever I eat batata vada with this chutney, it takes me to childhood memories. We used to take trips during summer vacations, and many of those used to be between Pune and Mumbai. We used to take the train and the highlight of the train journey for me was the delicacies we would be able to eat on the way. My parents did not encourage eating street food and used to prefer home made food. Since, this was one of the rare times we got to eat these foods, I used to look forward to it eagerly. The train used to stop at Karjat station for just a few minutes. This was famous for the batata vadas that one could buy at the station and the taste was just amazing. During that brief halt, my dad used to get off the train and buy vada pav, which used to be served with a generous amount of this chutney mixed with bits of the fried vada batter. These few moments filled with excitement and thrill as the train stop was literally just a few minutes and many a times it used to start moving without my dad in sight. Every time my heart would be pounding with worry that he had been left behind. And I still remember the sense of relief when I used to see him walking with the packed of the vadas in his hand. At that age, I didn't like the vada pav combination and used to enjoy the vadas with this chutney.
It has been decades since I made that journey, but that taste lingers on and whenever I make batata vadas, whether there is pav or not, this chutney always accompanies it, helping me rejoice in my nostalgia.
Ingredients
1/4 cup garlic cloves
3/4-1 cup dessicated coconut, shredded/grated
salt to taste
red chilli powder to taste, I added 1/2 tsp
1/2 tsp sugar
Method
Cut the garlic cloves into smaller pieces for ease of grinding. Then put all the ingredients in the blender and using the pulse function, grind this to make a finer consistency. Do not add water and do not make a paste. Open the mixer every few pulses and scrape it down and mix up the chutney. The coconut threads should still show a little and the garlic gets a pasty texture. You can over blend in the mixer, but it will still taste great.
The best texture or consistency is obtained by mixing it using a mortar and pestle, which is how I made it this time. I make it both ways depending on how much time I have.
Store this in an airtight container, in the fridge and it will last you over a month.
Tips
The garlic has a pungent smell, so be careful of how much chilli powder you add. You can always add more and mix it into the chutney after it has been ground. The scraping and mixing of the chutney while in the mixer, will prevent the coconut from getting pasty and releasing oil.
Labels:
batata,
batata vada,
batata wada,
chutney,
coconut,
garlic,
side
Sunday, August 21, 2016
Mixed Vegetable Kurma - Coconut Based Curry
This is a delicious, vegetable rich curry with a coconut base which forms the gravy. I ate this for the first time in a South Indian style restaurant with Uttapam (thick rice pancakes). I absolutely loved it. I then started making it at home whenever I would have grated coconut on hand. I believe this has its origins in Karnataka. It is very different from the mixed vegetable kurma which is found in North Indian style restaurants where the gravy base is onions and tomatoes.
This pairs very well with phulkas, uttapams and is worth being on a feast menu when served with puris. If is also a great gravy accompaniment with simple pulao. I love this preparation and hope you enjoy it too.
Ingredients
This pairs very well with phulkas, uttapams and is worth being on a feast menu when served with puris. If is also a great gravy accompaniment with simple pulao. I love this preparation and hope you enjoy it too.
Ingredients
1 onion, finely chopped
2 carrots, cut into small cubes
15 green beans, finely diced
1 potato, cut into small cubes
¼ cauliflower, cut into small florets
½ cup peas
2 tbsp oil
¼ tsp cumin seeds/jeera
2 bay leaves/tej patta
salt to taste
water to form the gravy
For the gravy masala paste
1/2 onion, chopped
1 cup fresh coconut
4-5 garlic cloves
1 inch ginger
1-2 green chillies (to taste)
¼ cup cilantro/coriander leaves loosely filled (approximately leaves yielding from 10-15 stems)
½ tsp turmeric
½ tsp tamarind paste (soak tamarind in warm water and once it is softened, remove seeds and any fibers and extract the pulp from the tamarind)
1 tsp garam masala (optional)
water to grind the ingredients together to form a thick paste
Method
Blend all the ingredients listed under the fresh coconut
masala paste into a fine thick paste. Cut all the vegetables into approximately
similar sized pieces. To reduce the overall cooking time, you can steam cook
these or cook these in the microwave till partially cooked. Do not overcook
them. It is not necessary to semi-cook the vegetables. It will just take a little longer for the kurma to
cook if raw vegetables are added. If using frozen peas, just thaw them. Do not
cook them with other vegetables as thawed peas cook really quickly.
Heat a pan. Add oil and then cumin seeds and bay leaves.
Once the cumin seeds crackle, add the coconut paste and cook it till the raw
smell of onion and garlic goes away and it starts to brown slightly. Next add
the cut vegetables – the carrots, beans, peas, potato and cauliflower. Stir to
coat these in the coconut masala and let these cook for a few minutes. Then add
about ½-1 cup of water to create a gravy, based on your preference. Add salt to
taste. Let the vegetables boil till completely cooked.
Do not use cold or frozen coconut directly when making the masala paste. Thaw it and warm it a little. If it is very cold, the oil will separate out during the grinding process. Also, use warm water to grind the masala. You can also add 10-12 cashews (not roasted, raw) to the paste to give it a richer taste.
Labels:
beans,
carrot,
cauliflower,
coconut,
gravy,
kurma,
mixed vegetable kurma,
potato,
vegetable
Thursday, August 18, 2016
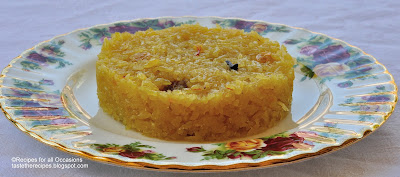
Narali bhaat - Sweet Coconut Rice
This dish is special and close to my heart as it transports me instantly to my childhood. This a sweet delicacy which was made at least once a year in the house on the occasion of Narali Purnima which coincided with Rakshabandhan. On Narali Purnima, coconut based dishes are prepared to celebrate the day. Usually this coincides with the occasion of Rakshabandhan, when sisters tie a decorative thread on their brother’s hand and getting a gift in return. Of course there is a deeper meaning to this tradition but this is a food blog, so lets get back to the rice.
The main reason why this was a rarely prepared dish was because of the effort involved in scraping fresh coconut and that used to be tiring. But now with the availability of frozen packets of fresh coconut, it has become easier to make this once elaborate dish. In fact, if you don’t have access to a frozen packet, on a day when you do have the time and energy, scrape the coconut and freeze it. Use it within the next couple of months.
1 cup rice (basmati preferably)
2 cups water
2 tbsp ghee/clarified butter
4-5 cloves
2 cups grated/scrapped fresh coconut
2 cups sugar
½-3/4 cup water
1 cup milk
1-2 pinch saffron
1/8 tsp green cardamom powder
1-2 tbsp raisins
2 tsp sliced almonds (optional)
1 tbsp cashews (optional)
1 tbsp ghee, after cooking
Wash the rice a couple of times and keep aside. Heat ghee in the vessel/cooker that you cook your regular rice in. Once you can smell the aroma of ghee, add the cloves and let them cook till fragrant. Then add the rice and stir it in the ghee till the grains are coated with ghee. Add water and let the rice cook. Once cooked, spread it out on a plate or tray and let it cool down completely.
Heat a saucepan which is of such size that it will easily accommodate the cooked rice and coconut mixture. To this add the grated coconut and roast it a little. Then add the water and heat till the sugar dissolves completely. Then add the milk and keep stirring and let the mixture thicken. Once it starts to thicken, add the saffron, cardamom powder, raisins and nuts (if using). Let this all cook together. Once the mixture starts to get to a nice thick syrup consistency, add the cooled rice and mix it in to the coconut sugar mixture gently. Continue to cook, till the water evaporated and a sticky rice texture is achieved. Add the ghee to this. Serve hot.
Tips
Tips
The roasting of the coconut a little helps to increase the shelf life of the cooked rice. Always store this in the fridge. Heat the saffron a little in a tsp of water or milk. The golden color of the rice is achieved using the saffron. It will be a deep golden if you use two pinches instead of one. I used two and got a lovely golden color as seen in the pictures.
This helps release the color of the saffron. Always roast the coconut a little if you plan to store it in the fridge or freezer to help increase its shelf life, else the coconut will become rancid in a couple of days.
Labels:
coconut,
coconut rice,
naral,
narali,
narali bhaat,
narali bhat,
rice,
sticky rice
Tuesday, November 10, 2015
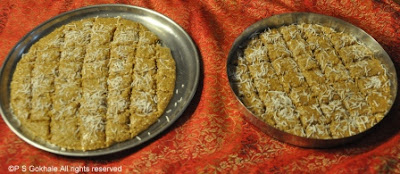
Gulkand Barfi - Rose Fudge
Gulkand are rose petals preserved in sugar. It is made by preserving rose petals with sugar and kept in a glass bottle in the sun till the sugar melts. This preserved mixture is extremely fragrant and delicious and a delicacy. It is meant to give a cooling effect during the summer months.
This sweet recipe came about in an interesting way. My husband had brought Gulkand Barfi from India a few years ago and when we were discussing the menu for Diwali treats this year, he suggested I make it. I had only eaten this sweet that one time. And it had been quite a while since then and I couldn't remember what it was made of. He told me that it definitely had gulkand and coconut and I would need to figure out the rest.
Well, I started off with sugar and coconut and then added the other ingredients based on the description of the sweet. The end result was extremely delicious and finger licking. I just cannot stop eating it.
Ingredients
3 cups shredded fresh coconut
2.5 cups sugar
1/2 cup gulkand
1 can evaporated milk (12 oz can)
1 packet milk powder (90 gm pack)
2 tsp of milk
2-3 drops red/pink food color (optional)
1-2 tsps of ghee to grease the plate
1-2 drops of rose essence
Method
Take a plate or tray in which you will pour out the barfi and set it and grease it well with ghee.
Mix together the sugar and coconut and heat this. Once the sugar has melted, add the evaporated milk and the milk powder and cook this on low heat, stirring often. Keep stirring and cook it down till you can see the base of the pan. Add a couple of teaspoons of warm milk to the gulkand and stir it in. Stir it well so that the gulkand liquefies a little so that it can easily be stirred and incorporated into the mixture that is being cooked.
When the mixture thickens enough that when you stir it, the base of the pan can be easily viewed for a few seconds, then the mixture is ready to be poured into the greased plate. At this point add the gulkand and then increase the heat and stirring continuously again cook it down to the consistency where it is ready to be poured onto a greased plate. Turn off the heat, add the color and essence is using and mix in it thoroughly. Pour the mixture onto the greased plate and using a bowl or measuring cup spread the mixture out into the plate. Make sure to grease the base of the cup with ghee, so that the mixture doesn't stick. Use it to level the mixture and flatten it. Now, let the mixture cool. When it has cooled to a luke warm temperature, it will solidify a little. At this stage, you can cut it into squares.
Tips
If you want to speed up the cooking process, you can increase the heat but be sure to stand at the stove and keep stirring so that it doesn't brown or stick to the pan. An alternate method to check if the mixture is at the right consistency is to take a drop full of the mixture into a plate and as soon as it is cool enough to touch, try to roll it into a ball. If you are able to roll it, then the mixture is ready to be poured. The gulkand is added at the last step and cooked for a minimal time so that is maintains its fragrance. If you take this off the heat a little early and the barfi ends up being soft after cooling completely, you can reheat the mixture. However, you will end up losing the fragrance from the gulkand. So definitely add the essence before you put it into the greased pan. The taste will be the same.
This sweet recipe came about in an interesting way. My husband had brought Gulkand Barfi from India a few years ago and when we were discussing the menu for Diwali treats this year, he suggested I make it. I had only eaten this sweet that one time. And it had been quite a while since then and I couldn't remember what it was made of. He told me that it definitely had gulkand and coconut and I would need to figure out the rest.
Well, I started off with sugar and coconut and then added the other ingredients based on the description of the sweet. The end result was extremely delicious and finger licking. I just cannot stop eating it.
Ingredients
3 cups shredded fresh coconut
2.5 cups sugar
1/2 cup gulkand
1 can evaporated milk (12 oz can)
1 packet milk powder (90 gm pack)
2 tsp of milk
2-3 drops red/pink food color (optional)
1-2 tsps of ghee to grease the plate
1-2 drops of rose essence
Method
Take a plate or tray in which you will pour out the barfi and set it and grease it well with ghee.
Mix together the sugar and coconut and heat this. Once the sugar has melted, add the evaporated milk and the milk powder and cook this on low heat, stirring often. Keep stirring and cook it down till you can see the base of the pan. Add a couple of teaspoons of warm milk to the gulkand and stir it in. Stir it well so that the gulkand liquefies a little so that it can easily be stirred and incorporated into the mixture that is being cooked.
When the mixture thickens enough that when you stir it, the base of the pan can be easily viewed for a few seconds, then the mixture is ready to be poured into the greased plate. At this point add the gulkand and then increase the heat and stirring continuously again cook it down to the consistency where it is ready to be poured onto a greased plate. Turn off the heat, add the color and essence is using and mix in it thoroughly. Pour the mixture onto the greased plate and using a bowl or measuring cup spread the mixture out into the plate. Make sure to grease the base of the cup with ghee, so that the mixture doesn't stick. Use it to level the mixture and flatten it. Now, let the mixture cool. When it has cooled to a luke warm temperature, it will solidify a little. At this stage, you can cut it into squares.
Tips
If you want to speed up the cooking process, you can increase the heat but be sure to stand at the stove and keep stirring so that it doesn't brown or stick to the pan. An alternate method to check if the mixture is at the right consistency is to take a drop full of the mixture into a plate and as soon as it is cool enough to touch, try to roll it into a ball. If you are able to roll it, then the mixture is ready to be poured. The gulkand is added at the last step and cooked for a minimal time so that is maintains its fragrance. If you take this off the heat a little early and the barfi ends up being soft after cooling completely, you can reheat the mixture. However, you will end up losing the fragrance from the gulkand. So definitely add the essence before you put it into the greased pan. The taste will be the same.
Tuesday, September 15, 2015
Coconut Beetroot Barfi (Coconut Beetroot Fudge)
My Mom and I were discussing various recipes that are made during the festive season and one of my favorites is coconut burfi or naral barfi. I told her I was planning to make that sometime soon and she suggested that I try adding some beetroot to make it colorful. I loved the idea and I decided to try it with golden beetroots. The end result was beautiful. The barfi turned out to absolutely golden and it tastes great. And I feel less guilty eating it because I know I am also eating a vegetable. This is a beautiful, delicious and healthier variation to the coconut barfi.
The recipe for the coconut barfi can be found here.
Ingredients
2 cups fresh coconut - grated/scraped (if using frozen, thaw it)
2 cups sugar
1/2 cup whole milk
1 cup beetroot - cooked and grated (see details in method)
1/8 tsp cardamom powder
Method
Cook the beetroot and then grate it. I usually do it in a pressure cooker
Heat the beetroot, coconut and sugar in a pan. Stir it and then add the milk. The sugar will melt and turn into syrup. As the mixture starts to thicken, add the cardamom powder. Stir frequently so that the mixture doesn't burn. Heat this mixture, till it is thick enough, so that when you move a spoon through it, you can see the base of the pan and till the mixture comes together. In the meanwhile, grease a tin or dish with some ghee or butter. Then pour the mixture in a greased pan. Use a spatula to spread this or you can use the base of a small bowl. Grease the base of the bowl with some ghee, so that the coconut mixture doesn't stick to the base. Once it has cooled down a little and is warm to touch, cut it into small squares. Once it has completely cooled down, you can separate the squares. Store it in the fridge.
The recipe for the coconut barfi can be found here.
Ingredients
2 cups fresh coconut - grated/scraped (if using frozen, thaw it)
2 cups sugar
1/2 cup whole milk
1 cup beetroot - cooked and grated (see details in method)
1/8 tsp cardamom powder
Method
Cook the beetroot and then grate it. I usually do it in a pressure cooker
Heat the beetroot, coconut and sugar in a pan. Stir it and then add the milk. The sugar will melt and turn into syrup. As the mixture starts to thicken, add the cardamom powder. Stir frequently so that the mixture doesn't burn. Heat this mixture, till it is thick enough, so that when you move a spoon through it, you can see the base of the pan and till the mixture comes together. In the meanwhile, grease a tin or dish with some ghee or butter. Then pour the mixture in a greased pan. Use a spatula to spread this or you can use the base of a small bowl. Grease the base of the bowl with some ghee, so that the coconut mixture doesn't stick to the base. Once it has cooled down a little and is warm to touch, cut it into small squares. Once it has completely cooled down, you can separate the squares. Store it in the fridge.
Tips
You can scrape/grate a coconut and freeze this in an airtight bag/box for about 6-8 weeks. After you scrape the coconut, heat it for a minute in the microwave or on the stove till you can smell the coconut aroma. Then cool it and freeze it. This helps preserve the coconut for a longer period.
When you cook the beetroot in the pressure cooker, just wash it and place it in the cooker. Remove the top and the root end and peel it after it is cooked.
If you use red beetroot (which I plan to use the next time), you will get a beautiful pink color.
When you cook the beetroot in the pressure cooker, just wash it and place it in the cooker. Remove the top and the root end and peel it after it is cooked.
If you use red beetroot (which I plan to use the next time), you will get a beautiful pink color.
Labels:
beetroot,
coconut,
coconut barfi,
coconut beetroot barfi,
dessert,
diwali,
fudge
Thursday, November 8, 2012
Rava Laddoo/Ladoo - Sweet Semolina Balls
This is another Diwali favorite. This is another sweet snack like the besan laddoo and multrigrain laddoo, which can be made as a snack and stored for a few weeks. It is mainly made using semolina (farina) or rava and fresh grated coconut is also added to it. I have always heard everyone say it is one of the simplest laddoo recipes to make. I, however had made it only once so far. The main reason has been that I just couldn't remember how I had made it the last time (It was a recipe I asked from my Mom, of course). So this week I decided to make it again, much to the delight of my husband. I had asked my friends (some of them make this really well) for their recipe, however finding myself without one, I decided that the best course was to call my Mom and ask her to tell me the recipe again. Finally, I was able to make it. It turned out real great. And it is on the menu this year again for Diwali.
Ingredients
1 cup ghee
4 cups coarse rava/semolina/farina (if you just can't find the coarse one, you can use fine rava)
3 cups sugar
1 - 1.5 cup water
2 cups grated fresh coconute
1/4 tsp cardamom powder
1/4 cup raisins
1/4 cup blanched almond slices
Method
In a pan dry roast the coconut for 2-4 minutes till slightly dry. Keep aside. Heat ghee in a pan to hold the rava and roast the rava till it is lightly browned and fragrant. At the same time, in a pan that will be large enough to hold the rava and coconut, heat the sugar and water mixture to make a syrup. Once the syrup comes to a boil, take a drop on a plate and when it is warm to touch, pick this drop up between your forefinger and thumb and then separate out the finger slightly and see if you can see a strand of syrup between your fingers. If so, then your syrup is ready. This is called single strand/ single thread stage.
Take the syrup off the heat. Once it is slightly cooler (no longer boiling but still warm), add the cardamom, raisins and almonds and stir well. Then add the roasted rava and coconut and mix this mixture well. Let it cool till it is luke warm and can easily be held in your hand. At this temperature, take a fistful of this mixture and compress to make a round ball. Make all the balls and let them cool completely. Store in an airtight container. This will stay fresh without refrigeration for a couple of weeks. However, if you plan to store them for a longer time, put them in the fridge, so that the coconut doesn't become rancid.
Tips
The sugar syrup reaches the single thread/strand stage at approximately 220F/104C temperature. If you have a candy thermometer you can use that. However I find this method a more accurate indicator to check if the syrup is at the right consistency.
Remember to add the garnishes like raisins and cardamom to the syrup before adding the rava or coconut. This will ensure that the garish spread evenly through the mixture.
Now, if you do end up overcooking your syrup, the resultant mixture and laddoo will become very dry. If this happens, sprinkle about 1/4 to half cup milk on the mixture and warm it up and mix well. You can then re-roll it into laddoos.
If your mixture becomes too soft and the laddoos do not retain the round shape, then you can add 1/4 to 1/2 cup icing sugar to the mixture. Mix it thoroughly and then roll the laddoos.
ter you
Ingredients
1 cup ghee
4 cups coarse rava/semolina/farina (if you just can't find the coarse one, you can use fine rava)
3 cups sugar
1 - 1.5 cup water
2 cups grated fresh coconute
1/4 tsp cardamom powder
1/4 cup raisins
1/4 cup blanched almond slices
Method
In a pan dry roast the coconut for 2-4 minutes till slightly dry. Keep aside. Heat ghee in a pan to hold the rava and roast the rava till it is lightly browned and fragrant. At the same time, in a pan that will be large enough to hold the rava and coconut, heat the sugar and water mixture to make a syrup. Once the syrup comes to a boil, take a drop on a plate and when it is warm to touch, pick this drop up between your forefinger and thumb and then separate out the finger slightly and see if you can see a strand of syrup between your fingers. If so, then your syrup is ready. This is called single strand/ single thread stage.
Take the syrup off the heat. Once it is slightly cooler (no longer boiling but still warm), add the cardamom, raisins and almonds and stir well. Then add the roasted rava and coconut and mix this mixture well. Let it cool till it is luke warm and can easily be held in your hand. At this temperature, take a fistful of this mixture and compress to make a round ball. Make all the balls and let them cool completely. Store in an airtight container. This will stay fresh without refrigeration for a couple of weeks. However, if you plan to store them for a longer time, put them in the fridge, so that the coconut doesn't become rancid.
Tips
The sugar syrup reaches the single thread/strand stage at approximately 220F/104C temperature. If you have a candy thermometer you can use that. However I find this method a more accurate indicator to check if the syrup is at the right consistency.
Remember to add the garnishes like raisins and cardamom to the syrup before adding the rava or coconut. This will ensure that the garish spread evenly through the mixture.
Now, if you do end up overcooking your syrup, the resultant mixture and laddoo will become very dry. If this happens, sprinkle about 1/4 to half cup milk on the mixture and warm it up and mix well. You can then re-roll it into laddoos.
If your mixture becomes too soft and the laddoos do not retain the round shape, then you can add 1/4 to 1/2 cup icing sugar to the mixture. Mix it thoroughly and then roll the laddoos.
ter you
Labels:
coconut,
diwali,
farina,
festive season,
laadu,
laddoo,
rava,
rava laadoo,
rava laadu,
rava laddoo,
rava ladoo,
rava ladu,
semolina,
sweet,
sweets
Tuesday, January 10, 2012
Til Gul Wadi/Vadi - Sesame Seed Fudge
The first week of January has passed by and we are inching towards 14th of January, when the first Indian festival of the year will be celebrated. This is "Sankrant" also known as Makar Sankrant in India. It is a festival to celebrate the harvest season. This is one festival which almost always falls on the 14th of January (this year it was on the 15th) and is based on the movement of the Sun rather than the Moon. It is celebrated throughout India and is called by different names in different states. Some names that I am familiar with are Lohari (in Punjab), Uttarayan (in Gujarat), Makar Sankrant (in Maharashtra) and Pongal (in the southern states). In Gujarat, the entire day is spent on the terrace of the houses and in streets flying kites. It is one of the most colorful scenes I have ever seen. In Andhra Pradesh, it is celebrated over a period of three days.
In Maharashtra, it is celebrated by distributing sweets made from sesame seeds and jaggery. These are called "til gul vadi" and the tradition is to say "til gul ghya ani goad goad bola" which translates to "please take this sweet and speak sweetly". There are multiple variations in how this sweet is made, some are really hard in texture, some are brittle and some are soft. Each family has it's own recipe and tradition of making this sweet.
The ones I make have a soft texture and are easy to bite into and extremely simple to prepare. You can roll it into a ball and make a "laddoo" or you can flatten it and cut it into "vadi/barfi" akin fudge pieces. This is my Mom's recipe and my favorite version of this sweet. I hope you will give it a try and enjoy it.
Ingredients
1 cup sesame seeds
1 cup peanuts (shelled and without the peel)
1 cup finely cut jaggery, cup should be packed
1 tbsp ghee/clarified butter
2 tbsp of grated dessicated coconut, for garnish
some ghee to grease the plate in which the sweet will be set.
Method
Take a plate with an edge or a pan with a small edge and grease it with some ghee.
In a dry skillet, on low to medium heat, roast the sesame seeds till you get the aroma of the sesame seed. Keep it aside and let it cool. In the same skillet roast the peanuts following the same method as for the sesame seeds. Be careful not to burn these ingredients. Once these cool down, coarsely grind them separately and then mix the two powders together.
In a pan, add the ghee and jaggery and keep it on a very low flame to cook. The jaggery will start melting. Be sure to keep it on very low heat.. Stir the jaggery so that it doesn't caramelize. Within a couple of minutes, the jaggery will start bubbling and foaming. At this stage, turn off the heat and add the powdered mixture of peanuts and sesame seeds and mix well together. Then pour this mixture (it will be quite thick) into the greased plate. Then using another bowl/measuring cup (grease the bottom), pat the this hot mixture and even it out into the plate. Make sure to level it properly. Then sprinkle the dessicated coconut all over the top and using the cup, pat it into the mixture. All this must be done while the mixture is hot.
Then, after the mixture cools a little, cut it into square pieces of about 1 inch sides. Let the mixture cool completely befor you take the individual pieces out of the plate.
Tips
You can roast the peanuts and the sesame seeds in the microwave. Initially you can do it for 1 minute intervals. Stir it after each minute and then you can reduce that to 30 second intervals. It takes about 2-3 minutes based on the power settings of your microwave. Let them cool completely and then grind.
If jaggery is kept on high heat, it will start caramelizing as soon as it melts, so be careful of the temperature. Also, it is necessary to turn off the heat as soon as the jaggery foams to get the soft consistency, the longer it is cooked, the harder the end product will be. If you feel that the jaggery syrup has become very thick, you can add some more ghee or alternately add a couple of tbsp of milk to the syrup to thin it out (if you add milk, this shortens the shelf life, so be sure to keep it refrigerated and eat it in a couple of days). If after adding the sesame and peanut powder, the mixture becomes very dry and powdery, then sprinkle a teaspoon of warm milk and stir (while the mixture is hot). The mixture will immediately become moist (if it becomes too soft and moist, then re-heat it). Then spoon the mixture into the greased plate.
If you forget to remove the pieces and then it gets difficult to take them out, heat the bottom of your plate or keep it in a warm oven for a couple of minutes and then it will be very easy to get the pieces out.
In Maharashtra, it is celebrated by distributing sweets made from sesame seeds and jaggery. These are called "til gul vadi" and the tradition is to say "til gul ghya ani goad goad bola" which translates to "please take this sweet and speak sweetly". There are multiple variations in how this sweet is made, some are really hard in texture, some are brittle and some are soft. Each family has it's own recipe and tradition of making this sweet.
The ones I make have a soft texture and are easy to bite into and extremely simple to prepare. You can roll it into a ball and make a "laddoo" or you can flatten it and cut it into "vadi/barfi" akin fudge pieces. This is my Mom's recipe and my favorite version of this sweet. I hope you will give it a try and enjoy it.
Ingredients
1 cup sesame seeds
1 cup peanuts (shelled and without the peel)
1 cup finely cut jaggery, cup should be packed
1 tbsp ghee/clarified butter
2 tbsp of grated dessicated coconut, for garnish
some ghee to grease the plate in which the sweet will be set.
Method
Take a plate with an edge or a pan with a small edge and grease it with some ghee.
In a dry skillet, on low to medium heat, roast the sesame seeds till you get the aroma of the sesame seed. Keep it aside and let it cool. In the same skillet roast the peanuts following the same method as for the sesame seeds. Be careful not to burn these ingredients. Once these cool down, coarsely grind them separately and then mix the two powders together.
In a pan, add the ghee and jaggery and keep it on a very low flame to cook. The jaggery will start melting. Be sure to keep it on very low heat.. Stir the jaggery so that it doesn't caramelize. Within a couple of minutes, the jaggery will start bubbling and foaming. At this stage, turn off the heat and add the powdered mixture of peanuts and sesame seeds and mix well together. Then pour this mixture (it will be quite thick) into the greased plate. Then using another bowl/measuring cup (grease the bottom), pat the this hot mixture and even it out into the plate. Make sure to level it properly. Then sprinkle the dessicated coconut all over the top and using the cup, pat it into the mixture. All this must be done while the mixture is hot.
Then, after the mixture cools a little, cut it into square pieces of about 1 inch sides. Let the mixture cool completely befor you take the individual pieces out of the plate.
Tips
You can roast the peanuts and the sesame seeds in the microwave. Initially you can do it for 1 minute intervals. Stir it after each minute and then you can reduce that to 30 second intervals. It takes about 2-3 minutes based on the power settings of your microwave. Let them cool completely and then grind.
If jaggery is kept on high heat, it will start caramelizing as soon as it melts, so be careful of the temperature. Also, it is necessary to turn off the heat as soon as the jaggery foams to get the soft consistency, the longer it is cooked, the harder the end product will be. If you feel that the jaggery syrup has become very thick, you can add some more ghee or alternately add a couple of tbsp of milk to the syrup to thin it out (if you add milk, this shortens the shelf life, so be sure to keep it refrigerated and eat it in a couple of days). If after adding the sesame and peanut powder, the mixture becomes very dry and powdery, then sprinkle a teaspoon of warm milk and stir (while the mixture is hot). The mixture will immediately become moist (if it becomes too soft and moist, then re-heat it). Then spoon the mixture into the greased plate.
If you forget to remove the pieces and then it gets difficult to take them out, heat the bottom of your plate or keep it in a warm oven for a couple of minutes and then it will be very easy to get the pieces out.
Labels:
barfi,
coconut,
festive season,
fudge,
ghee,
groundnut,
how to make til gul wadi,
lohari,
makar sankrant,
peanuts,
pongal,
sankrant,
sankranti,
sesame,
til gul vadi,
til gul wadi,
vadi,
wadi
Saturday, March 19, 2011
Coconut Chutney
Coconut chutney is an absolute must when eating dosa or idli. One can get always get away with dry chutneys called "podis" or even ketchup. But if you want to have an authentic experience, fresh coconut chutney is the only way to go. It is a very easy recipe. The only time consuming portion of the recipe would be processing the coconut. However, I have a couple of short cuts listed in the tips below that will make this task easy and fast.
Ingredients
Half a coconut, fresh, grated or sliced into pieces (you can use frozen, grated coconut as well)
1-2 green chillies
1/4 cup of roasted gram (dall)
salt to taste
water to grind the above ingredients into chutney
1 tbsp oil
1 tsp urad dal
1 green chilli, cut into small pieces
1/8 tsp mustard seeds/rai
3-4 curry leaves
a pinch of asafoetida/hing
Method
Grind together the coconut, green chillies, roasted gram and salt. Add enough water so that the ingredients are easily ground together to form the chutney. It takes about 1/4th cup of water in my blender. In a small pan, heat the oil. Add the mustard seeds. Once they begin to crackle and pop, add the urad dal, curry leaves, asafoetida and chilli. Once the urad dal turns light brown, pour this seasoning over the chutney. Mix well. Serve with dosa and idli.
Tips
I have used frozen, grated coconut to make chutneys before. However I have noted that the frozen coconut tends to spoil very fast if not used in a couple of weeks after buying it. Also, the chutney texture is not very nice. It does not blend well and the oil tends to separate and rise to the surface as the ingredients are ground together. So, these days I make chutney with fresh coconut. Often times, I will buy a couple of coconuts when I have time to process it. I remove the coconut from the shell, and slice it into small pieces. I then heat these pieces in the microwave or on the stove for a minute. Once they cool, I pack these into ziploc bags
and freeze them. This method ensures that the frozen coconut lasts for at least 4-6 weeks in the freezer. Whenever I need to make chutney, I remove these slices and either thaw them before processing or use the "ice crush" setting on my blender to make the chutney. I use the cusinart 600 W blender
, which does a great job of processing the coconut. To thaw the coconut, use the thaw option on your microwave or thaw it for a few hours in the refrigerator.
Half a coconut, fresh, grated or sliced into pieces (you can use frozen, grated coconut as well)
1-2 green chillies
1/4 cup of roasted gram (dall)
salt to taste
water to grind the above ingredients into chutney
1 tbsp oil
1 tsp urad dal
1 green chilli, cut into small pieces
1/8 tsp mustard seeds/rai
3-4 curry leaves
a pinch of asafoetida/hing
Method
Grind together the coconut, green chillies, roasted gram and salt. Add enough water so that the ingredients are easily ground together to form the chutney. It takes about 1/4th cup of water in my blender. In a small pan, heat the oil. Add the mustard seeds. Once they begin to crackle and pop, add the urad dal, curry leaves, asafoetida and chilli. Once the urad dal turns light brown, pour this seasoning over the chutney. Mix well. Serve with dosa and idli.
Tips
I have used frozen, grated coconut to make chutneys before. However I have noted that the frozen coconut tends to spoil very fast if not used in a couple of weeks after buying it. Also, the chutney texture is not very nice. It does not blend well and the oil tends to separate and rise to the surface as the ingredients are ground together. So, these days I make chutney with fresh coconut. Often times, I will buy a couple of coconuts when I have time to process it. I remove the coconut from the shell, and slice it into small pieces. I then heat these pieces in the microwave or on the stove for a minute. Once they cool, I pack these into ziploc bags
Tuesday, March 1, 2011
Black Eyed Beans
Black Eyed beans are no-soak beans. They do not need overnight soaking or very long cooking time. This is a simple recipe and delicious too. It takes about five minutes to put all the ingredients together. If you pressure cook it or use canned beans, the entire recipe takes about 15 minutes including preparation and cooking. It will definitely be a recipe that you will come to rely on. It makes life easier on busy evenings when you are running late. It's faster than ordering a pizza. It taste great with tortilla or with white rice.
Note: If you are using canned beans do not pressure cook, as these are pre-cooked. Also, the net cooking time will be shorter.
Ingredients
1 cup uncooked black eyed beans

or 1 can black eyed beans

(these would be pre-cooked)
1 tbsp oil
1/8 tsp mustard seeds

1/8 tsp cumin/jeera seeds
3 tbsp shredded unsweetened dry coconut

3 cloves of garlic, finely chopped
red chilli powder
to taste
salt to taste
1/2 tsp sugar
2 cups water (use 1 cup water if using canned beans)
Method
Heat the oil. To this add the mustard and cumin seeds. Once they being to crackle, add the garlic, coconut and stir. Add the uncooked black eyed beans (if using the cooked canned beans, drain and rinse them out) and stir. Add chilli powder, salt and sugar. Add the water and cook till the beans are completely cooked. If cooking directly in the pressure cooker, cook it till the the appropriate pressure is reached (that is 2 whistles in my cooker) and then turn off the heat. Once the pressure is released, open the lid and mix well. You can add a little more water and boil it all together, if you want the gravy to be thinner. Serve hot with rice or chapati.
If using the Instant Pot, I use the beans mode and natural pressure release. These are however quick cooking and about 12 minutes in manual mode, high pressure with natural pressure release will also work.
Note: If you cook it in a regular vessel, it will take about 30 mins or more for the beans to cook and become tender.
Tips
This is a recipe which is perfect to cook direcly in the pressure cooker. You can also use canned black eyed peas which are already cooked. If using this, do not cook it in the pressure cooker.
Note: If you are using canned beans do not pressure cook, as these are pre-cooked. Also, the net cooking time will be shorter.
Ingredients
1 cup uncooked black eyed beans
1 tbsp oil
1/8 tsp mustard seeds
1/8 tsp cumin/jeera seeds
3 tbsp shredded unsweetened dry coconut
3 cloves of garlic, finely chopped
red chilli powder
salt to taste
1/2 tsp sugar
2 cups water (use 1 cup water if using canned beans)
Method
Heat the oil. To this add the mustard and cumin seeds. Once they being to crackle, add the garlic, coconut and stir. Add the uncooked black eyed beans (if using the cooked canned beans, drain and rinse them out) and stir. Add chilli powder, salt and sugar. Add the water and cook till the beans are completely cooked. If cooking directly in the pressure cooker, cook it till the the appropriate pressure is reached (that is 2 whistles in my cooker) and then turn off the heat. Once the pressure is released, open the lid and mix well. You can add a little more water and boil it all together, if you want the gravy to be thinner. Serve hot with rice or chapati.
If using the Instant Pot, I use the beans mode and natural pressure release. These are however quick cooking and about 12 minutes in manual mode, high pressure with natural pressure release will also work.
Note: If you cook it in a regular vessel, it will take about 30 mins or more for the beans to cook and become tender.
Tips
This is a recipe which is perfect to cook direcly in the pressure cooker. You can also use canned black eyed peas which are already cooked. If using this, do not cook it in the pressure cooker.
Labels:
beans,
black eyed beans,
chawali,
coconut,
main course,
quick meals,
vegetables
Subscribe to:
Posts (Atom)