

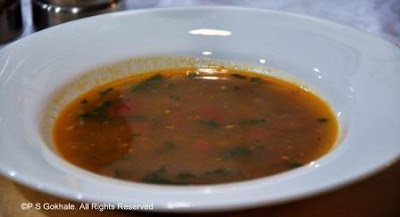
Rasam is an absolutely delicious Indian soup, which is often lentil based. It is a staple in the southern states of India and just like dal preparation, you will find a different recipe in every home. It is one of my favorite foods. It is the perfect appetizer soup to start your dinner with. Generally, it has a consistency similar to clear soups, however I do end up making it thicker, as I enjoy this with a bowl of white rice topped with some ghee. It is often prepared when someone at home is feeling a bit under the weather and is down with a cold or cough. This recipe has a lot of black pepper and garlic and provides a comforting feeling when you sip it. The spiciness helps clear up the sinuses too. I still remember the time when I was really sick and a neighbor had dropped in to say hello. She was back soon with a bowl of piping hot and spicy rasam and it really cheered me up.

Of course, I don't have to be sick to enjoy a bowl. I make this really often. I used to use the ready made spice mix to prepare rasam until a good friend gave me her recipe. Ever since then, I have been making this wonderful recipe. It is really easy and delicious and perfect for this cold weather.

Ingredients
1 tsp jeera/cumin seeds
1/2 - 1 tsp black peppercorns, adjust to taste
2-4 garlic cloves, adjust to taste
2 tsp ghee(clarified butter)/oil
1-2 green/red chillies, to taste
7-8 curry leaves
1/8 tsp mustard seeds
1 pinch hing/asafoetida powder
1 tbsp cooked tur dal (pigeon peas) (optional) - see tips section for cooking instructions
1 tomato, diced
salt to taste
1/2 tsp tamarind paste
2 cups water (500 ml)

Method
Dry roast the cumin seeds and peppercorns, till they are fragrant. Grind these into a coarse powder and then add the garlic pods to it and grind them together to make a paste.
In a deep pot, heat the ghee and add mustard seeds to it. Once they start cracking, add the hing, curry leaves, chillies and paste and roast it till the garlic gets cooked, about a minute. Do not let it brown.
Add the diced tomatoes and cook till softened. Then add the cooked lentil, stir and add the water. Once it starts to boil, add the tamarind paste and salt. Let it boil for a couple of minutes. Garnish with cilantro leaves and serve hot.

Tips
If you want, you can completely skip the lentils and add another tomato instead. You can also make it thicker by adding more cooked lentils. I generally like it thicker like sambar or dal, so that I can eat it with white rice as part of the main course rather than a soup. In that case, I add about 1 cup of lentil instead of 1 tbsp. Also, I increase the amount of the salt, tamarind paste and if I want it spicy, I also add more peppercorns to the paste and increase the number of garlic pods to 4 instead of 2.
You can also add a tsp of ready made rasam masala powder to the rasam after adding the cooked lentils for a slightly different taste. I usually use the MTR brand rasam masala powder that can be found in the Indian grocery store.
To cook the lentils, I use a pressure cooker. I use double the amount of water to cook the lentils. So for example if I have 1 cup of pigeon peas (tur dal), I will use 2 cups of water. Wash the lentils three times. Then, add the water to the lentils. Next I add 1/8th tsp of turmeric and a pinch of asafoetida powder and then pressure cook the lentils till they are completely cooked through and soft. It takes about 3-5 whistles (10-15 mins) based on the type of cooker I use.
Of course, I don't have to be sick to enjoy a bowl. I make this really often. I used to use the ready made spice mix to prepare rasam until a good friend gave me her recipe. Ever since then, I have been making this wonderful recipe. It is really easy and delicious and perfect for this cold weather.
Ingredients
1 tsp jeera/cumin seeds
1/2 - 1 tsp black peppercorns, adjust to taste
2-4 garlic cloves, adjust to taste
2 tsp ghee(clarified butter)/oil
1-2 green/red chillies, to taste
7-8 curry leaves
1/8 tsp mustard seeds
1 pinch hing/asafoetida powder
1 tbsp cooked tur dal (pigeon peas) (optional) - see tips section for cooking instructions
1 tomato, diced
salt to taste
1/2 tsp tamarind paste
2 cups water (500 ml)
Dry roast the cumin seeds and peppercorns, till they are fragrant. Grind these into a coarse powder and then add the garlic pods to it and grind them together to make a paste.
In a deep pot, heat the ghee and add mustard seeds to it. Once they start cracking, add the hing, curry leaves, chillies and paste and roast it till the garlic gets cooked, about a minute. Do not let it brown.
Add the diced tomatoes and cook till softened. Then add the cooked lentil, stir and add the water. Once it starts to boil, add the tamarind paste and salt. Let it boil for a couple of minutes. Garnish with cilantro leaves and serve hot.
Tips
If you want, you can completely skip the lentils and add another tomato instead. You can also make it thicker by adding more cooked lentils. I generally like it thicker like sambar or dal, so that I can eat it with white rice as part of the main course rather than a soup. In that case, I add about 1 cup of lentil instead of 1 tbsp. Also, I increase the amount of the salt, tamarind paste and if I want it spicy, I also add more peppercorns to the paste and increase the number of garlic pods to 4 instead of 2.
You can also add a tsp of ready made rasam masala powder to the rasam after adding the cooked lentils for a slightly different taste. I usually use the MTR brand rasam masala powder that can be found in the Indian grocery store.
To cook the lentils, I use a pressure cooker. I use double the amount of water to cook the lentils. So for example if I have 1 cup of pigeon peas (tur dal), I will use 2 cups of water. Wash the lentils three times. Then, add the water to the lentils. Next I add 1/8th tsp of turmeric and a pinch of asafoetida powder and then pressure cook the lentils till they are completely cooked through and soft. It takes about 3-5 whistles (10-15 mins) based on the type of cooker I use.
 , one of the components, can be easily ground in regular blenders. The other main component is
  . This can be easily found in your local Indian grocery store or


 and freeze them. This method ensures that the frozen coconut lasts for at least 4-6 weeks in the freezer. Whenever I need to make chutney, I remove these slices and either thaw them before processing or use the "ice crush" setting on my blender to make the chutney. I use the
  , which does a great job of processing the coconut. To thaw the coconut, use the thaw option on your microwave or thaw it for a few hours in the refrigerator.


