

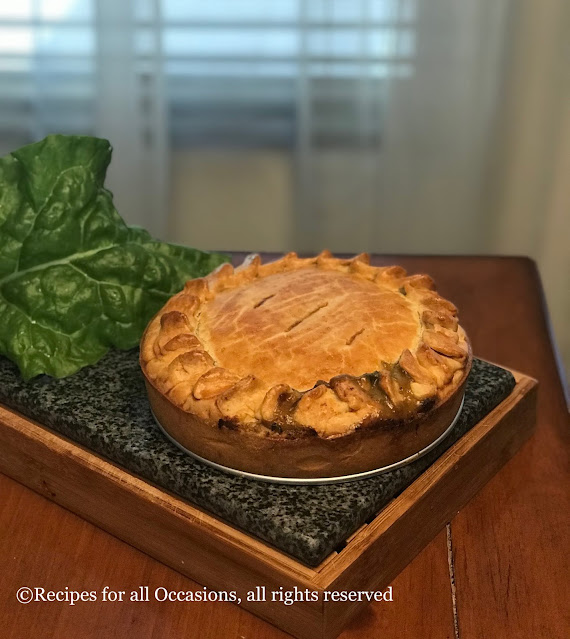
Welcome to our seventh episode of the Culinary Tour of the World. This post takes us to the South American continent and we are making a delicious dish from Argentina. Argentina is known for its meat dishes, however as I started researching the foods, I realized that there were several vegetarian options to choose from too. So, I turned to my garden for inspiration. It was late spring when I made this and we had an abundance of eggplants and chard. So, I decided to focus my search on dishes which could be made with these two vegetables. I came across a simple recipe of grilled eggplant sliced, which were cooked with some salt, oil and cumin. I cooked up a large batch of eggplants in this manner and we ate them as is and it was delicious. I also used them in tacos and also froze a couple of batches. This seemed too simple for the video series though, so I decided to make another dish. I finally decided to make a chard pie called Tarta De Acelga Cremosa. This hearty, delicious pie is filled with a creamy chard filling and boiled eggs. The pie is a complete meal given that it has a hearty crust, eggs and a delicious sauce and green vegetables too! I skipped the boiled eggs and it still made a hearty meal.


Link to the video recipe
Ingredients
For the pastry dough
300 gm all purpose flour
1/2 tsp salt
1/2 cup or 1 stick unsalted butter
1/3 - 2/3 cup water, ice cold
1 egg + 1 tsp of water for the egg wash
For the filling
4 tsp oil
15 chard leaves and stems, diced
1 large onion, diced
4 cloves of garlic, minced
black pepper powder, to taste
1 tsp ground mustard, adjust to taste
1 tbsp cream cheese
1/4 cup mixed soft cheeses (cheddar, monterey jack). I have used Mexican cheese blend
1/4 cup parmesan cheese, grated
pinch of nutmeg powder
salt to taste
15 chard leaves and stems, diced
1 large onion, diced
4 cloves of garlic, minced
black pepper powder, to taste
1 tsp ground mustard, adjust to taste
1 tbsp cream cheese
1/4 cup mixed soft cheeses (cheddar, monterey jack). I have used Mexican cheese blend
1/4 cup parmesan cheese, grated
pinch of nutmeg powder
salt to taste
Method
If you have a food processor, use it to make the dough. Add flour, salt and cold butter pieces to the food processor and pulse till the butter is cut into the flour and it gets a sandlike texture. Then add a little water at a time and pulse till the dough comes together into a soft dough. Do not over mix the dough.
If you don't have a food processor, rub the cold butter into the flour till you get a sand like texture and then add the water to make a soft dough.
Divide the dough into two and then flatten it into discs. Cover with plastic wrap and refrigerate.
Heat oil and add onions and garlic. After you fry them for a few mins and the onion softens, add the chard stems. Saute it for a few mins till the stems start to soften. Then, add a tablespoon of all purpose flour. Mix it in and let it cook for couple of minutes but don't let it brown. Cook the flour and mix it in well, so that when the milk is added, there are minimal lumps. Next, add the milk and stir while you add the milk, making sure there are no lumps. Then add the chard leaves. Now, this is where I was tempted to add more milk to the sauce to increase the quantity of the sauce, because I felt that there was a lot of chard. However, remember that the chard leaves are going to wilt and add moisture to the sauce and they will shrink. So, resist the temptation and let the leaves cook, till they are nicely mixed into the sauce and have been cooked. Now, add the cheeses and stir them in till they melt. Finally, taste this and then add salt, if needed. Chard has a salty flavor profile and the cheeses also have salt, so you want to be careful and add salt only after tasting it. Let the mixture cool completely.
Preheat the oven to 450F or 200 C. Now roll out one disc of dough into a round pastry which is about 1/8th inch in thickness and about 11-12 inches in diameter. Place this into a deep baking tin. If the tin has a removable bottom, it will be easier to remove the pastry, but that is not necessary. Press the pastry to align to the edges of the tin. Then pour the cooled filling into the pastry.
Roll out the second disc of dough in the same manner as the first and then place it on top of the filling. Adjust the dough to cover the filling completed. Press the edges of the bottom and the top dough sheets by pinching them and then crimp it to decorate it. Crimping will also ensure that the pie will not leak due to the pie crust splitting where the two sheets meet. Make a couple of slits in the pie top to allow for the steam to escape.
Then place the baking tin onto a baking sheet and place it in the hot oven on the middle rack. Bake for an hour till the pastry has a golden brown color. Remove the tin and place it on a rack to cool for 10 mins. Remove it from the baking tin if it is easy to remove and let it cool down on the rack. Else you can cool it down completely in the pan and serve it straight from the pan.
Cut into slices and serve.


Tips
Do not make the filling too watery. As I detailed in the method, it is important to not add extra milk than what the recipe calls for. Make sure that the filling is completely cool before filling into the pastry shell. Make sure you cool the pie before cutting otherwise the filling will flow out.


