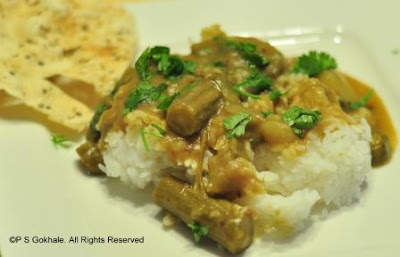
This is the third recipe from the first menu : a rice dish. Rice plays a prominent role in an Indian menu. Just as Naan/Roti or Chapati is necessary in an Indian meal, so is rice. If it is an elaborate rice preparation with lots of spices and vegetables or meat, then it is generally served along with a raita or yogurt. Else, you would serve plain or lightly flavored rice with a dal preparation.
Biryani is a very flavorful recipe that has its origin in the Mughal cuisine. Dum (which means pressure) Biryani traditionally is made by cooking the rice with vegetables or meat in an earthen pot, which is sealed and cooked on hot coals. It is an elaborate recipe and again a popular feature in restaurant menus. When you look at the rice section, you will find many variations listed on a restaurant menu, which are mainly based on the ingredients that are cooked along with rice. Vegetable biryani is my favorite rice dish. I had tried to make this a few years ago, however I found the process very laborious. So, I was reduced to relying on ordering it at restaurants.
A couple of years ago my friend made a delicious vegetable biryani and she swore that it was a very easy method that she used, with lots of shortcuts. And, of course I kept requesting her to make it every chance I got. Then I spoke to another friend about the way she makes her vegetable biryani and she also said that it is a simple recipe and gave me the detailed method of making it. Finally I was convinced and decided to give it a try. So, I married the two recipes, using the short cuts that my first friend suggested and using some of the additional exotic spices and yogurt from the second recipe and the result was absolutely delicious and also very easy to make. With this recipe I am no longer daunted by this exotic rice dish and I can't wait to make it again.

Ingredients
for the garnish
2 large red onion, sliced into thin slices
1/4 cup cashewnuts
1/4 cup mint leaves, chopped
1/2 cup cilantro leaves, chopped
for the marinade
1/2 cauliflower, separate into florets
1-2 carrots, cut into thick slices or diced into thick pieces
1 cup peas
1/2 cup french/green beans cut into 1/2 inch long pieces
1 cup yogurt
1/2 tsp red chilli powder
1 tsp salt
1/8 tsp turmeric powder
2 green chillies
4 garlic cloves
1.5 inch ginger
3 javentri flowers (optional - see tips)
3 tbsp biryani masala
1 lemon, juiced
1/2 cup mint leaves, cut chiffonade style into thin ribbons
1/4 cup cilantro leaves, chopped finely
1/4 cup fried onion
1 tbsp oil
for the rice
2 cups basmati rice
2 bay leaves
2 javentri flowers (optional)
2 inch long cinnamon pieces
2 black cardamoms/badi elaichi
5 cloves
2 cups of vegetable broth (optional. replace with water if not available)
2 cups water
salt to taste

Method
Slice the red onions. Separate the slices out and let it dry for a couple of hours. Then deep fry the onion till golden brown and crisp. Drain on a paper towel and keep aside. Use 1/4 cup of this in the marinade and the rest as garnish. Roast the cashew nuts in a little oil till lightly brown.
Make a fine paste of the green chillies, ginger and garlic.
Take yogurt in a bowl deep enough to hold all the vegetables. Then add in the chilli, ginger and garlic paste, turmeric, chilli powder, salt, lemon juice, biryani masala, mint leaves, cilantro leaves, javentri flowers, crushed fried onion, oil and mix well. Then add the vegetables to this mixture and set this aside for at least an hour up to 8 hours (or overnight).
Wash the rice three times and discard the water. Then add in the 2 cups broth and 2 cups water. If you don't have vegetable broth, add 4 cups of water. Add the bay leaves, javentri flowers, black cardamon, cinnamon, cloves and salt to taste and cook the rice using your preferred method. Be careful to not overcook the rice. In fact you want it a little underdone as it will finish cooking with the vegetables in the oven.

Now, take a deep oven proof glass dish or an oven proof deep pot with an oven safe cover. Next, we need to layer the vegetables and rice alternately and then cook this in the oven. Start off with layering the vegetables at the base of the pan. Then garnish this with a handful of crushed onion, cashews and some mint and cilantro leaves and then spread a layer of rice on top of the vegetables. If it is a large pan, you may end up with just these two layers. If it is a narrower pan, then you may get two vegetables layers alternated with two rice layers. Keep layering till you are done. The base layer should be vegetables and the top layer should be the rice layer. Finally garnish the top with fried onions, cashews, cilantro and mint leaves.
Now, cover the pan completely with aluminium foil. There shouldn't be any vent created in the foil, so double wrap it if needed. If the pan has a lid, then place this oven safe lid on the foil covered pan and cook it in the oven for about an hour at 350F. The vegetables will create steam as they cook in the heat and that will help complete the cooking process for the rice (creating the "dum" effect). Serve hot with raita or yogurt.

Tips
Javentri flowers are difficult to find, even in the Indian stores. I couldn't find them here and when I was visiting San Jose, I chanced upon them at an Indian store there, I bought a large packet. These have a mild nutmeg like smell and their main function is to add a nice fragrance to the rice. However considering there are several other spices that are used, it is not an essential ingredient, so don't let that stop you from making this recipe.
I prefer to cook the rice in a pressure cooker for one whistle and then I take it completely off the heat and let it cool. Sometimes, I just boil it in a saucepan, keeping it partially covered and take it off the heat when it is semi cooked. Initially, I used to use a glass oven safe dish to cook the biryani, however I realized that my cooking pot is also oven safe and have started using that as it is a wider and deeper pot.
You can use frozen vegetables as well instead of using fresh vegetables. Just rinse them in water and then add to the marinade.
If you are using broth, then be careful about adding salt when rice is being cooked. Broths are already salted, even the low sodium ones.
If you can find fried onions and roasted cashews, you can directly use those and skip the step of preparing the garnish.
Biryani is a very flavorful recipe that has its origin in the Mughal cuisine. Dum (which means pressure) Biryani traditionally is made by cooking the rice with vegetables or meat in an earthen pot, which is sealed and cooked on hot coals. It is an elaborate recipe and again a popular feature in restaurant menus. When you look at the rice section, you will find many variations listed on a restaurant menu, which are mainly based on the ingredients that are cooked along with rice. Vegetable biryani is my favorite rice dish. I had tried to make this a few years ago, however I found the process very laborious. So, I was reduced to relying on ordering it at restaurants.
A couple of years ago my friend made a delicious vegetable biryani and she swore that it was a very easy method that she used, with lots of shortcuts. And, of course I kept requesting her to make it every chance I got. Then I spoke to another friend about the way she makes her vegetable biryani and she also said that it is a simple recipe and gave me the detailed method of making it. Finally I was convinced and decided to give it a try. So, I married the two recipes, using the short cuts that my first friend suggested and using some of the additional exotic spices and yogurt from the second recipe and the result was absolutely delicious and also very easy to make. With this recipe I am no longer daunted by this exotic rice dish and I can't wait to make it again.
Ingredients
for the garnish
2 large red onion, sliced into thin slices
1/4 cup cashewnuts
1/4 cup mint leaves, chopped
1/2 cup cilantro leaves, chopped
for the marinade
1/2 cauliflower, separate into florets
1-2 carrots, cut into thick slices or diced into thick pieces
1 cup peas
1/2 cup french/green beans cut into 1/2 inch long pieces
1 cup yogurt
1/2 tsp red chilli powder
1 tsp salt
1/8 tsp turmeric powder
2 green chillies
4 garlic cloves
1.5 inch ginger
3 javentri flowers (optional - see tips)
3 tbsp biryani masala
1 lemon, juiced
1/2 cup mint leaves, cut chiffonade style into thin ribbons
1/4 cup cilantro leaves, chopped finely
1/4 cup fried onion
1 tbsp oil
for the rice
2 cups basmati rice
2 bay leaves
2 javentri flowers (optional)
2 inch long cinnamon pieces
2 black cardamoms/badi elaichi
5 cloves
2 cups of vegetable broth (optional. replace with water if not available)
2 cups water
salt to taste
Method
Slice the red onions. Separate the slices out and let it dry for a couple of hours. Then deep fry the onion till golden brown and crisp. Drain on a paper towel and keep aside. Use 1/4 cup of this in the marinade and the rest as garnish. Roast the cashew nuts in a little oil till lightly brown.
Make a fine paste of the green chillies, ginger and garlic.
Take yogurt in a bowl deep enough to hold all the vegetables. Then add in the chilli, ginger and garlic paste, turmeric, chilli powder, salt, lemon juice, biryani masala, mint leaves, cilantro leaves, javentri flowers, crushed fried onion, oil and mix well. Then add the vegetables to this mixture and set this aside for at least an hour up to 8 hours (or overnight).
Wash the rice three times and discard the water. Then add in the 2 cups broth and 2 cups water. If you don't have vegetable broth, add 4 cups of water. Add the bay leaves, javentri flowers, black cardamon, cinnamon, cloves and salt to taste and cook the rice using your preferred method. Be careful to not overcook the rice. In fact you want it a little underdone as it will finish cooking with the vegetables in the oven.
Now, take a deep oven proof glass dish or an oven proof deep pot with an oven safe cover. Next, we need to layer the vegetables and rice alternately and then cook this in the oven. Start off with layering the vegetables at the base of the pan. Then garnish this with a handful of crushed onion, cashews and some mint and cilantro leaves and then spread a layer of rice on top of the vegetables. If it is a large pan, you may end up with just these two layers. If it is a narrower pan, then you may get two vegetables layers alternated with two rice layers. Keep layering till you are done. The base layer should be vegetables and the top layer should be the rice layer. Finally garnish the top with fried onions, cashews, cilantro and mint leaves.
Now, cover the pan completely with aluminium foil. There shouldn't be any vent created in the foil, so double wrap it if needed. If the pan has a lid, then place this oven safe lid on the foil covered pan and cook it in the oven for about an hour at 350F. The vegetables will create steam as they cook in the heat and that will help complete the cooking process for the rice (creating the "dum" effect). Serve hot with raita or yogurt.
Tips
Javentri flowers are difficult to find, even in the Indian stores. I couldn't find them here and when I was visiting San Jose, I chanced upon them at an Indian store there, I bought a large packet. These have a mild nutmeg like smell and their main function is to add a nice fragrance to the rice. However considering there are several other spices that are used, it is not an essential ingredient, so don't let that stop you from making this recipe.
I prefer to cook the rice in a pressure cooker for one whistle and then I take it completely off the heat and let it cool. Sometimes, I just boil it in a saucepan, keeping it partially covered and take it off the heat when it is semi cooked. Initially, I used to use a glass oven safe dish to cook the biryani, however I realized that my cooking pot is also oven safe and have started using that as it is a wider and deeper pot.
You can use frozen vegetables as well instead of using fresh vegetables. Just rinse them in water and then add to the marinade.
If you are using broth, then be careful about adding salt when rice is being cooked. Broths are already salted, even the low sodium ones.
If you can find fried onions and roasted cashews, you can directly use those and skip the step of preparing the garnish.