The latest 5 recipes are displayed on the main page. For more recipes, you can browse the archive, click on the labels in the index to the left or use the Custom search below to look for a specific recipe.
Let me start by saying that this is an amazing recipe. It is one of the tastiest Mexican foods that I have eaten in recent memory. It is spicy and has a burst of flavors and everyone in the family absolutely loved it. I am so glad to have found this recipe because it is perfect to use all the roselle hibiscus petals after making tea. And now I have a way to use the large harvest we have had this year. It does not matter if you are using fresh roselle sepals or dried ones in this recipe. The ones in the original recipe were dry whereas I used the fresh ones that I harvested today. The recipe was originally shared by a friend, Ayshica, in a wonderful gardening group called "Gardening in the Desert". She shared this recipe from a YouTube channel called "Views on the road" and highly recommended it. Ayshica is a great cook herself and I trust her food recommendations, so I thought that I had to give this recipe a try.
Now, this recipe requires certain Mexican chillies - Guajillo and Pasilla chillies. After making and eating the tacos I am of the firm belief, that these chillies are a key flavor ingredient for the birria tacos. These chillies lend an earthy taste which reminds me of the mole sauce. Also, when I searched for what birria was and other recipes for birria, I realized that the original version is meat based. The birria is a stew made with the meat and these chillies. However, this version is completely vegetarian and if you use non-dairy cheese, will be a 100% vegan. I did not use any broth or bouillon powder/cubes either and the result was still lip smacking delicious. The roselle sepals add a slight tart flavor. These also make the taco filling and provide that meatiness to the taco, that 3-4 tacos per person was a pretty good serving size for most of the family members. I think any vegetable that retains its texture after being boiled can be a used, like jackfruit or mushrooms.
The way I understand it, birria is a stew and then the meaty portion of the stew is used to fill the taco and then the taco is then grilled/cooked and eaten by dipping it into the consomme or liquid part of the stew. The stew that I made with the roselle sepals was quite soup like. Then I used the roselle sepals and carrots which were cooked in the sauce as the taco filling. And then we dipped the tacos in the soup and also drank sipped it along with the tacos. I also made the chilli oil which was mentioned in the original recipe and modified it based on what I had on hand. The combination of flavors was perfect for a cold weeknights dinner. And so so delicious!!
The highlight of the recipe was that I was able to use a lot of our homegrown produce. Roselle hibuscus was the star of the recipe, but it was great to be able to use homegrown carrots and cilantro as well. If you would like to know more details on growing, harvesting and preserving Roselle Hibiscus, do check out our videos on our YouTube channel, "Gardening and Cooking Made Easy".
How to grow Roselle Hibiscus
How to harvest and store Roselle Hibiscus
Ingredients
For the chilli oil
1/2 cup oil
3 guajillo chillies
2 spicy chillies, dry (I used Indian dry chillies)
1 bay leaf or 1 tsp broken bay leaf pieces
1/2 tsp black pepper
1/4 tsp clove powder
salt to taste
1/4 tsp sugar
For the birria
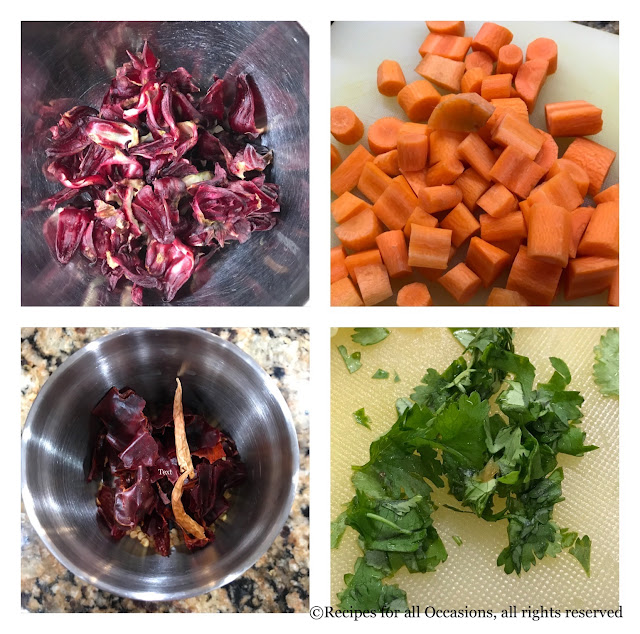
1.5 cups fresh roselle petals. If using dried ones, I would recommend using 1 cup
6-7 carrots, cut into small bite sized pieces, appropriate for filling in the taco
2 tbsp apple cider vinegar
1 medium red onion, cut into half
3 garlic pods, whole
1 pasilla chilli
4 guajillo chillies
10 cups of water
1 bayleaf
salt to taste
1/4 tsp sugar
For the tacos
corn tortillas
cooked roselle sepals and carrots from the birria/stew
finely cut cabbage
finely cut white or yellow onion
cilantro
chilli oil
shredded/grated cheese
Method
To make the chilli oil
Remove the stem of the chillies. In a coffee grinder or blender in which you can grind spice to a fine powder, grind the chillies and the bay leaf into a fine powder. If you want, you can also remove the seeds, however I did not as I wanted the oil to have the heat and spice from the chillies. Heat 1/2 cup of oil (I used olive oil) and once it is warm (do not heat to very high temperature to avoid spices burning), add the chilli and bay leaf powder. Stir, and then add the garlic powder, clove powder, black pepper powder, sugar and salt. Cook all the spices for a couple of mins, making sure to not overheat the oil. Turn off the heat and set aside.
To make the birria/stew
Boil 4 cups of water and pour over the roselle sepals (dried or fresh). Set aside for 15 mins. Strain and use the water to make tea or lemonade. Add 2 tbsp of apple cider vinegar to the sepals, toss them in it and set aside.
In a pressure cooker, Instant Pot or a regular deep sauce pan, addd the remaining 6 cups of water. Then to it add the onion, cut into two halves. Then remove the stem of the chillies and add those to the water along with the garlic cloves. If you don't like too much spice remove most of the seeds of the chillies. Add 1/4 cup of carrots. Then cook this mixture. If you are cooking it in the pressure cooker, cook for 1 whistle. In the instant pot, cook for 5 mins. Naturally release the pressure. If you are cooking it in the saucepan, cover and cook for 10-15 mins once it starts boiling, till the chillies are softened. Now, using a skimmer spoon, fish out the chillies, garlic and onion. Let them cool down a little and blend in the blender to a fine paste. This is your salsa or sauce that flavors the stew.
Add the paste back to the water. Then, add the rest of the carrots, the roselle sepals along with the vinegar and 1 bay leaf and cook for another 10 mins till the roselle and carrots are softened. If using a pressure cooker, cook till it reaches pressure and turn off heat. Instant Pot timing will be 2 mins. Let pressure cookers naturally release pressure.
Taste, add the salt and sugar and stir well. Then fish out the carrot pieces and roselle sepals and place into a bowl. Heat the liquid and boil it for a few mins.
To assemble the taco
Use a brush or spoon and smear the corn tortilla on both sides with the chilli oil. Then filling a tbsp of the roselle, carrot filling, cabbage, onions, cilantro and shredded cheese. On a hot pan, cook the taco on both sides till the cheese melts.
Serve with the consomme/soup part of the stew. Dip the tacos in the soup and eat.
Tips
The chillies are dry, so it is easy to just split the chillies into two and shake them to remove the seeds. Or remove the stem and shake the seeds out. I made corn tortillas with masa harina flour and the taste was amazing using fresh tortillas. If possible, I recommend it. If the taco is opening up (I do tend to overfill it), place a spoon on top of the taco as it cooks on one side. Then as you flip it over and cook on the other side, it should retain its folded taco shape (see photo above). If you are using other vegetables, then I recommend adding tomatoes along with the onions and garlic and puree those as well. Else, add lemon juice to the stew at the end of the cooking, before serving.
Welcome to our third episode of the Culinary Tour of the World. This time we are headed to Algeria. Algeria is in Northern Africa. As I started researching Algerian food, I read that the cuisine is influenced by all the exchanges with different cultures and people over centuries. There is a heavy French influence (it was a French colony) and a common breakfast I observed was croissant and coffee. I saw a lot of delicious recipes including pastries. I have noted down quite a few recipes I would eventually like to try out. As I started reading more about the food and googling the traditional names, I came across several blogs and video which were mostly in French and some in what I think was Arabic. It was difficult to choose a recipe because there were so many choices!
Couscous and a stew would have been perfect but I thought I could make that any day and wanted to choose something new which I had not heard of. I almost chose a pizza recipe which is said to be over a 100 years old. I finally decided to go with a street food called Mhadjeb (singluar) or Mahdjouba (plural). In my experience, street food is usually something everyone enjoys and is very special to a place, so I thought it would be a good choice.
Mhadjeb can be best described as a flavorful savory pastry of layered semolina dough, with each layer as thin as a phyllo sheet, which is filled with a sweet and tart filling of caramelized onions and tomatoes. The recipe made me curious. I wondered how a simple filling of just onions and tomatoes would taste. Based on the description of the pastry cover, I deduced that it would be crispy and the covering would be delicious for sure.
I had some challenges with this recipe, as the recipes I found which seemed authentic were in French and Arabic. I was able to finally leverage the French I had studied in high school and with the help of google translate make enough sense of the recipes. The final result was delicious! I read that if this pastry is made without filling it is called Msemmen and is a delicious accompaniment with tea or coffee. So, one recipe with two uses. I am definitely going to make it again.
Our next country will be Andorra. This has been a particularly difficult one to find vegetarian recipes for, so if you have suggestions, please add that in the comments below.
You can find the link to all our previous episodes here and the Culinary Tour playlist will take you to all the videos.
Here is the video link to the Mhadjeb/Mahdjoba recipe.
Ingredients
For the cover
1.5 cups fine semolina or semolina flour
1/2 cup all purpose flour
1 tsp salt
1/2- 3/4 cup water (enough to knead a very soft dough)
oil
For the filling
2.5 tbsp oil
2 large or 1/2 kilo onions, finely sliced
2 large or 1/2 kilo tomatoes, pulp (see method)
1 tsp of garlic, finely minced
salt to taste
pepper to taste
Method
For the cover
Mix together the semolina, all purpose flour and salt and then add the water to make a soft dough. This dough needs to be kneaded really well. So if you have a stand mixer or food processor, knead it in the machine for about 15 mins. Else, if kneading by hand, after mixing it set it aside to autolyse for 15-20 mins and then knead by hand for 15 mins like you will knead bread. The resultant dough will be soft and sticky. Spread a little oil in a plate to coat the surface. Then divide the dough into 6-7 pieces and then roll each one into a smooth ball of dough. Place this on the oiled surface. Cover the plate with plastic wrap and let the dough rest for a minimum of 30 mins to about a couple of hours. The dough (and gluten) should be really relaxed to be able to pat the dough out into a very thin sheet.
For the filling
Grate the tomatoes to separate the pulp from the peel. Discard the tomato peel. If you wish you can deseed the tomatoes before grating. In a big pan, add the oil and the onions and garlic and cook this on medium heat till the onions are caramelized. They will start turning brown. At this stage, add the tomatoes. Then cook the mixture till it has reduced and is dry enough to form the filling. Add the salt and pepper. You can also add 1 tbsp of tomato paste along with the tomatoes. Let this cool down.
Putting it together
Apply oil over the surface which you will use to flatten out the dough. I prefer to use a baking sheet/pan so that I don't get my countertop oily. Then place a piece of dough on the center and using the palm, flatten the dough. Use your palms and finger tips to stretch the dough. Then stretch each end of the dough to cover more of the pan. Do this till the entire pan is covered. One ball of dough (of 7) can be stretched thin enough to fill a 12 X 18 inches pan. Then place a ladle full of filling in the center and spread it into a rectangle. Fold the pastry around this filling. Place the bottom third of the dough over the center to cover the filling. Then overlap it with the top third. Then fold the right and left dough flaps over the center to create a rectangular pastry packet. (See the video for a visual demonstration).
Heat a pan or griddle till it is hot and then turn the heat to a low-medium setting. Since there are several layers, we need all of them to be cooked. So cook it on both sides on a low-medium heat till both sides are well browned.
Serve is hot with a side of harissa sauce or ketchup. For the harissa sauce, I blended one roasted, peeled red bell pepper, with store bought harissa spice mix and a some oil.
Tips
Apply oil to your palms and fingertips while handling the dough, so it does not stick to your fingers. To remove the tomato peel easily, you can also submerge the tomatoes in boiling water for a minute, till the peel starts to separate. Then take it out into a bowl of ice cold water. Then you can easily peel the tomatoes and puree the pulp.
It has been a long while since I last updated my blog. Well, as they say life happens and I have barely been able to come up for a breather, least of all update my blog for a while. So, I must say that this is possibly my return to blogging post. With the advent of the new year, it feels that I must get back to things that I have fun doing.
As you may have noticed, as soon as January starts, there are advertisements for gym memberships and almost every magazine that I have glanced at has had something related to healthy eating. Getting into the same spirit, I thought it best to start off with a very simple but delicious salad recipe.
This has to be one of the easiest salads that you can make. It is a combination of vegetables, leafy vegetables and fruits. Because of the flavor combinations of these components, you don't need additional dressings for the salad. You can always dress it with balsamic vinaigrette, or sesame ginger dressing or even a creamy dressing, but it will taste great with just salt and paper too. It is a great summer recipe, since a plethora of vegetables and fruits are available in this season. You can modify the recipe based on what fruits and vegetables you find as well. It is a perfect light meal or snack.
Ingredients
1 cup grapes, sliced in halves
1 cup raspberries
3 cups organic mixed greens, chopped
1/2 cup of mixed sweet bell peppers (yellow, red or orange), sliced
1 orange, sliced and diced into bite sized pieces
1/4 cabbage, sliced
salt to taste
pepper to taste
readymade salad dressing (Optional)
Method
Toss the veggies together along with the cut grapes and orange pieces. Sprinkle salt and pepper and mix well. Add the raspberries, the last after the heavy all the ingredients are tossed well and then gently mix them into the salad.
Serve cold.
Tips
Raspberries are fragile, so it is best to keep them last and adding them just before you intend to serve the salad. If you use a dressing (I would recommend a light dressing like ginger sesame or balsamic vinaigrette or italian dressing), then too toss the raspberries gently with a little dressing, just by themselves and add them to the salad.
This is a recipe made using fresh green peas. I remember the good old days, when I used to spend, what seemed like hours, shelling peas with my mom. When the peas were tender and sweet, most of them used to end up going into my mouth rather than the bowl. And it always seemed unfair that the heap of shells used to be much larger than the small mound of peas in the bowl. Ah the good old days. I haven't done this for several years now because all I can find in the way of fresh peas in the local grocery stores in the US are snap peas or snow peas. These are so tender, that the peas are barely formed and they are meant to be eaten, shell and all. The frozen peas, which I use instead, are a great convenience and make it much easier to make any dish with peas. However, these are generally sweet and not best suited for spicy curry preparations. But one must make do with what one can find and try to make the best of it.
I am always on the look out for fresh peas, shelled or un-shelled and am hopefully that I will run across this sometime soon.
This is my Mom's recipe and a fantastic one. It needs time and preparation before you can start the cooking process, and the cooking process is lengthy as well, but the end result is finger licking delicious. If made with fresh peas and fresh coconut, a lot of manual labor is involved, in terms of shelling peas and grating the coconut. That was probably the reason that my Mom made it as a treat and it has been my most favorite peas preparation to date. It tastes amazing with puris or hot chapatis and I too save it for celebratory occasions when I have time to make it right. The last time I made it was a few months ago when I had invited my friends over for lunch and it was a great hit. I hope you make it and it becomes one of your favorites too.
Ingredients
1.5 tbsp oil
1 large or 2 medium red onions, diced finely
1 cup fresh coconut, grated
1 tbsp ginger garlic paste
1-2 green chillies to taste
1/8 tsp jeera/cumin seeds
2 tsp garam masala
1 tsp dhania jeera/ corriander cumin powder
1/8 tsp turmeric
2 cups frozen peas, washed
salt to taste
2 tbsp to 1/4 cup water to grind ingredients
1- 2 cups water for the gravy
Method
Grind together the coconut, green chilli, cumin seeds and some salt. Add water to the mixture depending on your blender. Add as little as possible to get a smooth paste.
In a pan, heat oil and add the onion to it. Fry the onion till well cooked. Then add the coconut paste as well as ginger and garlic. Fry this mixture, stirring the ingredients often so they don't burn, till it is well browned. The ingredients need to be so well cooked and fried, that you can see the oil start to separate out. Do this on low heat. If this is done on high heat, the ingredients at the base of the pan will start to burn while the ones at the top will remain under cooked. Then, add the turmeric powder, garam masala and dhania jeera powder and fry this for a couple of minutes. Finally, add the peas and stir to cover them well with the spices. Frozen peas don't need a lot of time to cook through. Finally, add enough water to form a semi thick gravy. Add salt to taste and let the gravy boil for a few minutes. Serve hot with puris or chapati.
Tips
Since you cook the recipe on low heat, it takes about 20-30 minutes for the ingredients to brown. Avoid the temptation of turning up the heat. Cook it on a day when you have the luxury to spend a lot of time to prepare this dish.
You can also use fresh peas instead of frozen peas. If you use fresh peas directly, then it will take longer for the peas to get cooked through as they boil. To speed you the process, you can also boil the peas in a separate pot while your onion mixture gets cooked. Add a tsp of salt to the water. Use enough water to cover the peas. Cook till soft. Then, put them in a bowl of cold water to stop the cooking process. Drain and keep aside. You can use these instead of the frozen peas.
This is the third recipe from the first menu : a rice dish. Rice plays a prominent role in an Indian menu. Just as Naan/Roti or Chapati is necessary in an Indian meal, so is rice. If it is an elaborate rice preparation with lots of spices and vegetables or meat, then it is generally served along with a raita or yogurt. Else, you would serve plain or lightly flavored rice with a dal preparation.
Biryani is a very flavorful recipe that has its origin in the Mughal cuisine. Dum (which means pressure) Biryani traditionally is made by cooking the rice with vegetables or meat in an earthen pot, which is sealed and cooked on hot coals. It is an elaborate recipe and again a popular feature in restaurant menus. When you look at the rice section, you will find many variations listed on a restaurant menu, which are mainly based on the ingredients that are cooked along with rice. Vegetable biryani is my favorite rice dish. I had tried to make this a few years ago, however I found the process very laborious. So, I was reduced to relying on ordering it at restaurants.
A couple of years ago my friend made a delicious vegetable biryani and she swore that it was a very easy method that she used, with lots of shortcuts. And, of course I kept requesting her to make it every chance I got. Then I spoke to another friend about the way she makes her vegetable biryani and she also said that it is a simple recipe and gave me the detailed method of making it. Finally I was convinced and decided to give it a try. So, I married the two recipes, using the short cuts that my first friend suggested and using some of the additional exotic spices and yogurt from the second recipe and the result was absolutely delicious and also very easy to make. With this recipe I am no longer daunted by this exotic rice dish and I can't wait to make it again.
Ingredients for the garnish
2 large red onion, sliced into thin slices
1/4 cup cashewnuts
1/4 cup mint leaves, chopped
1/2 cup cilantro leaves, chopped
for the marinade
1/2 cauliflower, separate into florets
1-2 carrots, cut into thick slices or diced into thick pieces
1 cup peas
1/2 cup french/green beans cut into 1/2 inch long pieces
1 cup yogurt
1/2 tsp red chilli powder
1 tsp salt
1/8 tsp turmeric powder
2 green chillies
4 garlic cloves
1.5 inch ginger
3 javentri flowers (optional - see tips)
3 tbsp biryani masala
1 lemon, juiced
1/2 cup mint leaves, cut chiffonade style into thin ribbons
1/4 cup cilantro leaves, chopped finely
1/4 cup fried onion
1 tbsp oil
for the rice
2 cups basmati rice
2 bay leaves
2 javentri flowers (optional)
2 inch long cinnamon pieces
2 black cardamoms/badi elaichi
5 cloves
2 cups of vegetable broth (optional. replace with water if not available)
2 cups water
salt to taste
Method
Slice the red onions. Separate the slices out and let it dry for a couple of hours. Then deep fry the onion till golden brown and crisp. Drain on a paper towel and keep aside. Use 1/4 cup of this in the marinade and the rest as garnish. Roast the cashew nuts in a little oil till lightly brown.
Make a fine paste of the green chillies, ginger and garlic.
Take yogurt in a bowl deep enough to hold all the vegetables. Then add in the chilli, ginger and garlic paste, turmeric, chilli powder, salt, lemon juice, biryani masala, mint leaves, cilantro leaves, javentri flowers, crushed fried onion, oil and mix well. Then add the vegetables to this mixture and set this aside for at least an hour up to 8 hours (or overnight).
Wash the rice three times and discard the water. Then add in the 2 cups broth and 2 cups water. If you don't have vegetable broth, add 4 cups of water. Add the bay leaves, javentri flowers, black cardamon, cinnamon, cloves and salt to taste and cook the rice using your preferred method. Be careful to not overcook the rice. In fact you want it a little underdone as it will finish cooking with the vegetables in the oven.
Now, take a deep oven proof glass dish or an oven proof deep pot with an oven safe cover. Next, we need to layer the vegetables and rice alternately and then cook this in the oven. Start off with layering the vegetables at the base of the pan. Then garnish this with a handful of crushed onion, cashews and some mint and cilantro leaves and then spread a layer of rice on top of the vegetables. If it is a large pan, you may end up with just these two layers. If it is a narrower pan, then you may get two vegetables layers alternated with two rice layers. Keep layering till you are done. The base layer should be vegetables and the top layer should be the rice layer. Finally garnish the top with fried onions, cashews, cilantro and mint leaves.
Now, cover the pan completely with aluminium foil. There shouldn't be any vent created in the foil, so double wrap it if needed. If the pan has a lid, then place this oven safe lid on the foil covered pan and cook it in the oven for about an hour at 350F. The vegetables will create steam as they cook in the heat and that will help complete the cooking process for the rice (creating the "dum" effect). Serve hot with raita or yogurt.
Tips
Javentri flowers are difficult to find, even in the Indian stores. I couldn't find them here and when I was visiting San Jose, I chanced upon them at an Indian store there, I bought a large packet. These have a mild nutmeg like smell and their main function is to add a nice fragrance to the rice. However considering there are several other spices that are used, it is not an essential ingredient, so don't let that stop you from making this recipe.
I prefer to cook the rice in a pressure cooker for one whistle and then I take it completely off the heat and let it cool. Sometimes, I just boil it in a saucepan, keeping it partially covered and take it off the heat when it is semi cooked. Initially, I used to use a glass oven safe dish to cook the biryani, however I realized that my cooking pot is also oven safe and have started using that as it is a wider and deeper pot.
You can use frozen vegetables as well instead of using fresh vegetables. Just rinse them in water and then add to the marinade.
If you are using broth, then be careful about adding salt when rice is being cooked. Broths are already salted, even the low sodium ones.
If you can find fried onions and roasted cashews, you can directly use those and skip the step of preparing the garnish.