Rava cake (semolina cake) is one of my most frequently baked cakes at home. It tastes absolutely decadent. This cake is so delicious that it does not need any icing on it. So it is always eaten plain or infused with other flavors. Given how delicious it is, I feel any frosting or icing would detract from its tastiness. In fact every time I have suggested that I try icing the cake, I have heard loud protests of how the icing would make it less tasty.
However, visually this ends up being a plain bake and the recipe gets relegated to being a cake for a regular bake and not for a special occasion. When the family requests that it be baked for special celebrations like birthdays and anniversaries, I have struggled with glamorizing this cake. How do I take a regular cake which can even be eaten at breakfast into a fancy bake for this great occasion.
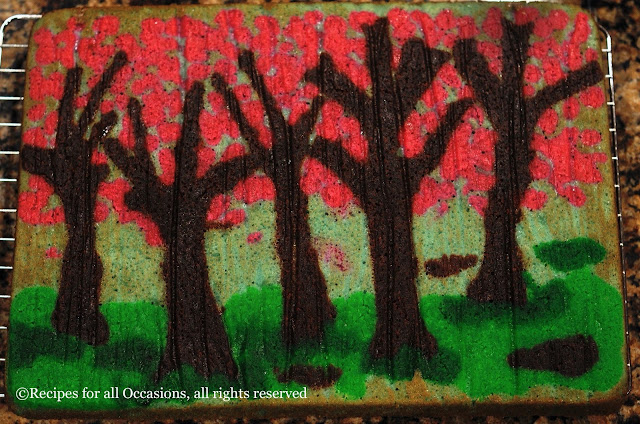
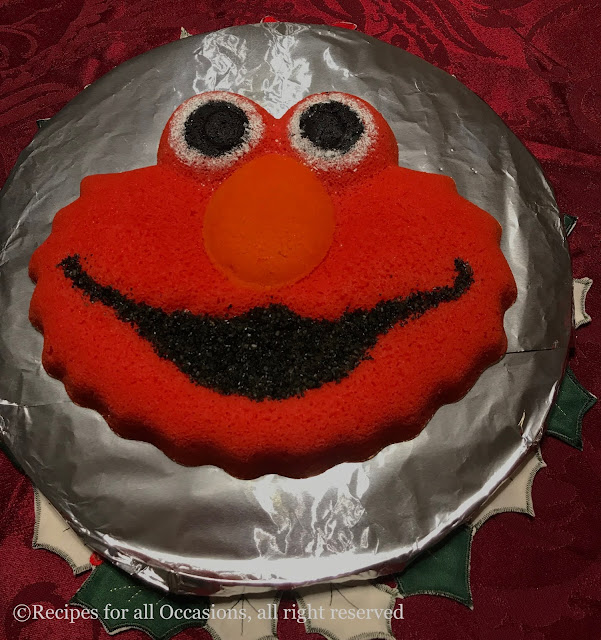
This cake tastes so good by itself, that in this case an icing would actually reduce the enjoyment of eating the cake. So that was not an option. So I tried adding fondant flowers and decorations to up the glamor, but I wasn't satisfied. Then, I decided to experiment with baking a decoration right into the cake itself.
So, I took the same basic recipe shared many years ago on my blog (see original recipe) and added steps to glamorize the cake. See the method which details the steps on how to embed the design into the cake. You can use the same method described below with other cakes too, which are made with all purpose flour too.
This is an easy method that turns a simple cake into one with a tremendous wow factor!
Ingredients
1.5 cups fine rava/semolina
1 cup milk
1 cup sugar
1 cup yogurt
1/2 cup clarified butter/ghee
1/8 tsp cardamom powder
1/2 tsp baking soda
few strands of saffron (optional - don’t use if embedding a design)
a pinch of salt
ghee for greasing the baking tin
1.5 cups fine rava/semolina
1 cup milk
1 cup sugar
1 cup yogurt
1/2 cup clarified butter/ghee
1/8 tsp cardamom powder
1/2 tsp baking soda
few strands of saffron (optional - don’t use if embedding a design)
a pinch of salt
ghee for greasing the baking tin
Method
Cut a parchment paper the same size a the bottom of your baking tin. Draw the design you wish to embed into the cake onto a parchment paper. Then grease the baking tin and place the parchment paper onto the base, such that the pencil/pen mark will be stuck to the greased side and the traced outline can be seen from the top view.
Note: the design will get reversed once the parchment paper is flipped into the tin base. When the final cake is taken out, the design will be the same as Keep that in mind when creating an asymmetric pattern. When the cake is flipped out of the
Beat the yogurt and sugar together till the sugar is dissolved. To this add the milk, salt, ghee, rava and mix this together. Keep this mixture aside overnight or at least for 5-6 hours. It tastes better when the yogurt which gets set during the hours turns a little sour.
Preheat the oven to 350F. Grease a baking tin with ghee. Add the baking soda just before you bake. Mix the baking soda well into the batter. Then take about 1/2 to 1 cup of batter in another bowl.
Depending on the design you plan to make, divide it further and using food coloring, color the batter. Then using piping bags, pipe the desired pattern onto the traced design on the parchment base, and fill it in. Then put the tin in the freezer for 15 mins so that the batter sets.
Then remove the pan from the freezer, check that the batter has set and will not flow easily. Then pour the rest of the batter into the tin covering the piped pattern evenly.
Then bake this for 20-30 mins at 350F. Use a knife or skewer and pierce the center of the cake with it. If it comes out clean then the cake is ready.
I have also piped out lettering and baked it on a separate baking sheet to decorate cakes.
Tips
If you are adding colors to the batter, use gel based colors if available as they are stronger and will color the batter with less amount of added coloring. Keep in mind that a design can get reversed when baking, so be careful when embedding lettering.


No comments:
Post a Comment